
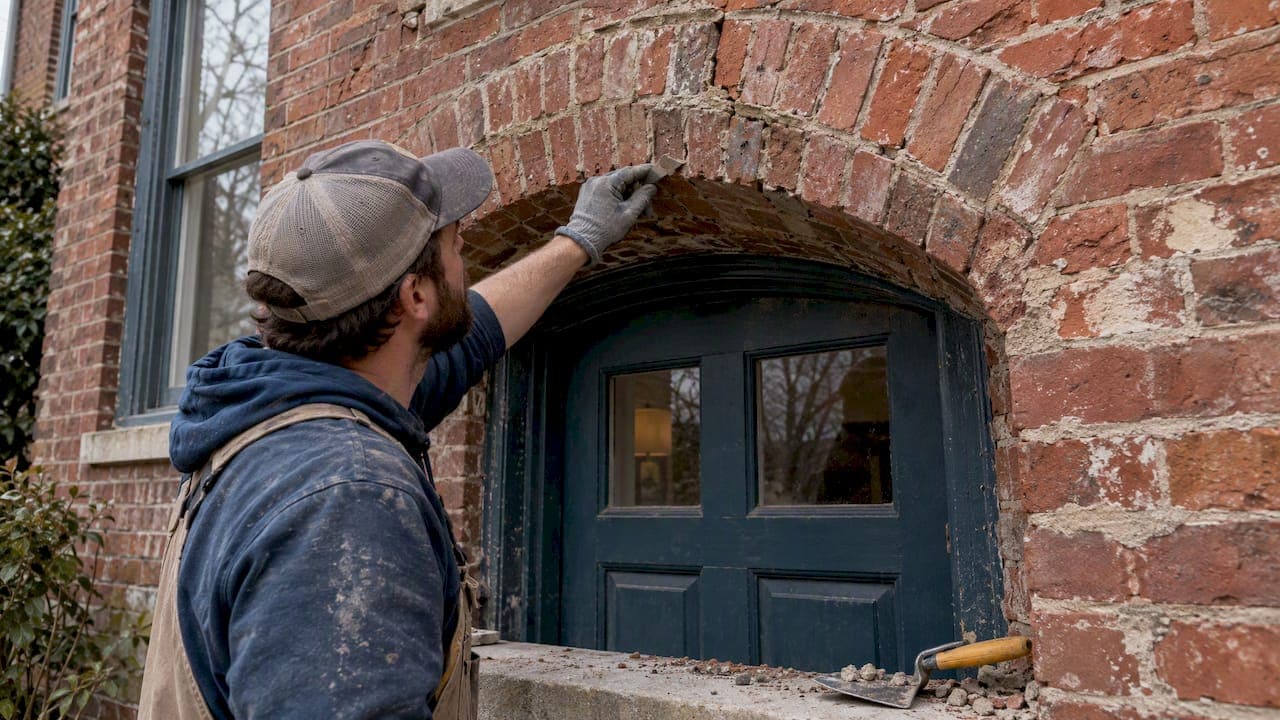
Most damaged brick arches can be repaired when the underlying cause is identified and addressed. If you notice significant sagging, a keystone that has slipped more than half an inch, or cracks extending into the surrounding wall, stop and call a structural engineer right away. Otherwise, your first steps are simple: photograph the damage, keep people away from the area, and schedule a professional inspection.
TL;DR:
- Shallow segmented and soldier-course arches tend to show structural problems earlier than deeper semicircular arches.
- Displaced keystones exceeding half an inch or visible arch ring sag are clear signs of imminent failure requiring immediate professional assessment.
- Proper repair focuses on diagnosing root causes first, matching original materials second, and reinforcing only when the arch has genuinely lost load capacity.
- Costs vary widely, with simple repointing being quick and inexpensive, while reinforcement or rebuilding can take weeks and require engineering oversight.
- DIY repairs are safe for superficial cleaning and minor cracks but require professional help for any structural issues or when installing reinforcement systems.
Table of Contents
- Types of Brick Arches and Why Design Matters
- Cosmetic Cracks vs. Structural Failure: What to Look For
- Repair Methods: From Repointing to Structural Reinforcement
- Choosing Mortar and Materials That Protect Old Brick
- What Brick Arch Repairs Typically Cost and How Long They Take
- Which Brick Arch Repairs Are Safe for a Homeowner to Attempt
- Heritage Masonry & Brick: A Preservation-First Approach to Arch Repair
- Preventing Future Arch Damage With Expansion Joints
- A Step-by-Step DIY Repair Process for Minor Arch Issues
- Safety Precautions to Take Before and During Arch Repair
- Tools and Materials You Need for Brick Arch Repair
- How to Assess an Arch's Structural Stability Before Repairing It
- Long-Term Maintenance Tips for Brick Arches
- Why Patchwork Thinking Fails Brick Arches
- Get a Free Estimate for Your Brick Arch Repair
- FAQ
- Sources
Types of Brick Arches and Why Design Matters
Not every brick arch carries weight the same way, so knowing what you have is the first step toward understanding what might be wrong with it. The three types homeowners encounter most often are the semicircular arch, the segmented (or "eyebrow") arch, and the flat soldier-course or rowlock arch.
Semicircular arches form a true half-circle and distribute weight efficiently around the curve, which makes them relatively stable over time. Segmented arches, by contrast, use a shallower curve. They look elegant above windows and doors, but that flatter profile means less of the load gets redirected sideways into the supporting walls, which puts more strain on the mortar joints and the masonry units at the base. Flat soldier-course arches, built from bricks set on end in a straight line, rely almost entirely on a hidden steel lintel for support. When that lintel rusts or fails, the brick above has no real structural backup.
Before you diagnose anything, it helps to know the parts you are looking at:
- Keystone: the central brick or stone at the top of the arch, locking the other pieces in place.
- Voussoirs: the wedge-shaped bricks radiating out from the keystone that form the curve.
- Imposts: the points where the arch meets the vertical wall and transfers its load downward.
- Arch ring: the full curved band of brick that makes up the arch itself.
Shallow segmented arches and soldier-course arches tend to show problems earlier than deep semicircular ones, simply because they have less built-in geometry working in their favor.
Cosmetic Cracks vs. Structural Failure: What to Look For
Hairline cracks that follow mortar joints and stay the same width year after year are usually just settlement, not an emergency. Diagonal cracks that cut through the brick itself and travel into the wall beside the arch are a different story entirely, and they tend to mean the arch is losing its ability to hold compression.
A few patterns are worth learning to recognize:
- Step cracks that zigzag along mortar joints usually point to minor settlement and are often cosmetic.
- Cracks that run straight through brick units, rather than following joints, often signal real structural movement.
- A visibly sagging arch ring, where the curve looks flattened or distorted compared to its original shape, means the arch may no longer be self-supporting.
- A displaced keystone, especially one that has shifted more than half an inch out of position, is one of the clearest signs of imminent failure.
If you see any of the signs in items three or four, restrict access to the area immediately and call a structural engineer or a licensed mason before doing anything else, including cleaning or probing the damage yourself.
Pro Tip: Take a photo next to a tape measure or coin for scale every few months. Comparing images over time is the easiest way to tell a stable hairline crack from one that is actively widening.
Repair Methods: From Repointing to Structural Reinforcement
The right repair depends entirely on what is actually failing, the mortar, the brick, or the structure behind it. Mixing these up is how homeowners end up paying twice for the same arch.
Repointing addresses failed or eroded mortar joints without touching the brick itself. According to preservation guidance from the National Park Service, proper repointing removes old mortar to a depth of several times the joint width, then fills the joint in layers and tools it to match the historic profile. Skipping that depth, or using the wrong mortar, is one of the most common mistakes in older masonry repair.
Brick replacement and spall repair handle individual damaged units. The contractor cuts out the cracked or spalled brick, beds a matching replacement, and ideally sources salvaged brick to keep color and porosity consistent with the surrounding wall.
Lintel repair and concealed reinforcement come into play when a hidden steel lintel has failed or when an arch needs load-bearing help without rebuilding the visible face. Stainless steel helical bars, bonded in place with polymer-modified grout, can form what is effectively a reinforced brick beam inside the existing arch, restoring load capacity without demolishing the front of the structure.
Stitching and pinning use smaller reinforcing bars across cracks to tie masonry back together, and they work well for isolated cracking. Repeated patching of the same spot without addressing the cause, though, is a sign the arch likely needs a different approach entirely.
- Shoring and centering, temporary supports placed under the arch, are necessary any time structural work begins, because an arch that has already lost compression can fail suddenly once load-bearing elements are disturbed.
- Root-cause repairs (fixing a settling foundation or corroded lintel) tend to outlast cosmetic patching by years.
A stainless steel helical bar system bonded with polymer-modified grout can restore an arch's load-bearing capacity without removing the visible brick face, according to technical guidance on repairing brick arch lintels, making it one of the less invasive options available for structural reinforcement.
Choosing Mortar and Materials That Protect Old Brick
Mortar that is too hard for the brick around it is one of the most common and most expensive mistakes in masonry repair. Older brick is typically softer and more porous than modern units, and it needs mortar that can flex and wear slightly over time rather than forcing stress into the brick itself. Preservation guidance from the National Park Service specifically warns against high-Portland cement mixes on historic masonry, favoring lime-based or other compatible, softer formulations instead.
Reputable contractors match mortar through a deliberate process:
- Pull a small sample of existing mortar for color, texture, and pigment comparison.
- Test porosity and compressive strength so the new mix performs similarly to the old.
- Build a sample panel on an inconspicuous section of wall and let it cure before approving full-scale work.
For cracks rather than full repointing, GSA technical procedures for patching brick masonry recommend grouting hairline cracks using a color-matched cementitious grout compatible in texture and porosity with the surrounding brick. Epoxy grouts are rigid and can trap moisture inside older, more porous brick, so cementitious patching is generally the safer default unless an engineer specifies otherwise.
Pro Tip: Always ask for a cured sample panel before full repointing begins. Mortar color changes noticeably as it dries, and a panel is the only reliable way to confirm the match in daylight.
For homeowners who want a deeper look at preservation-friendly repair practices, our masonry advice resources cover mortar matching in more detail.
What Brick Arch Repairs Typically Cost and How Long They Take
Costs vary widely depending on what is actually wrong and how accessible the arch is, but a few general patterns hold true across most jobs. Simple repointing of a small arch section costs far less than any job requiring reinforcement or rebuilding, since repointing involves no structural work and minimal material cost beyond mortar and labor. Limited brick replacement costs more once custom color matching or salvaged brick sourcing enters the picture. Lintel repair or helical bar reinforcement adds the cost of cutting channels, installing bars, and curing grout, and a full arch reconstruction is the most expensive option because it typically requires shoring, engineering oversight, and complete rebuilding.
Several factors reliably push estimates higher:
- Scaffolding or lift rental for second-story or hard-to-reach arches.
- Custom brick matching when standard stock does not fit the existing wall.
- A required structural engineer's report before work can begin.
- Permit fees, which vary by jurisdiction and project scope.
A typical structural repair sequence runs through four stages: inspection and engineer evaluation, temporary shoring, the structural work itself, and finally finish work and curing time for new mortar. Simple repointing jobs can wrap up in a day or two, while jobs involving reinforcement or rebuilding often take a week or more once shoring and curing time are factored in.
When comparing quotes, ask every contractor for the same three things: a cured sample panel, a written mortar specification, and a workmanship guarantee. Quotes that skip any of these are harder to evaluate fairly against each other.
Which Brick Arch Repairs Are Safe for a Homeowner to Attempt
Some brick arch maintenance is genuinely low-risk, and some of it is not a do-it-yourself job under any circumstances.
- Cleaning the arch face with a soft brush and mild detergent is safe and helps you spot new cracking early.
- Minor repointing on clearly non-structural, decorative sections can be a reasonable DIY project if the mortar loss is cosmetic and shallow.
- Sealing superficial hairline cracks with an appropriate crack grout is generally low risk, provided the crack is not widening.
- Any arch showing sagging, a displaced keystone, or cracks into the adjacent wall needs a licensed mason or structural engineer, full stop, because misjudging a structural repair can lead to collapse.
- Any job requiring shoring or temporary support should always go to a professional, since removing load-bearing elements without proper bracing is genuinely dangerous.
Before hiring anyone for structural work, ask for an engineer's report where applicable, a cured sample panel, a written mortar specification, and a workmanship guarantee in writing. A contractor who hesitates to provide any of these is worth reconsidering. For a closer look at testing urgency yourself before calling someone in, our guide to repointing timing and contractor questions walks through the basics.
Heritage Masonry & Brick: A Preservation-First Approach to Arch Repair
We built our brick repair practice around one principle: match the original material before reaching for anything structural. We specialize in mortar matching, careful repointing, and structural repairs that protect the character of the original brickwork rather than papering over it.
In practice, that means we build sample panels before committing to full repointing, test mortar for color and porosity against the existing wall, and bring in reinforcement methods like helical bars only when the arch genuinely needs load-bearing support, not as a default. Every estimate we provide is free, and every completed job carries a workmanship guarantee.
Good arch repair preserves what's original and reinforces only what's failing, never the reverse.
For arches showing real structural signs, we recommend an independent engineer's evaluation alongside our own site assessment, so the repair plan rests on an accurate diagnosis rather than guesswork about what is actually wrong.
Preventing Future Arch Damage With Expansion Joints
Most arch problems that show up years after a repair trace back to one thing: the structure was never given room to move. Brick, mortar, and the materials around an arch all expand and contract with temperature and moisture, and if nothing absorbs that movement, it concentrates stress at the weakest point, usually a mortar joint or the arch ring itself.
Expansion joints, thin gaps filled with a flexible sealant rather than rigid mortar, are placed at regular intervals in long masonry runs specifically to absorb that movement. An arch without a properly placed expansion joint nearby can crack repeatedly in the same spot no matter how many times it gets patched, because the real problem is that the wall has nowhere else to flex.
Beyond expansion joints, a few habits go a long way toward preventing new damage:
- Keep gutters and downspouts clear so water is not pooling against the arch or the wall above it.
- Regrade soil or adjust drainage if water is pooling near the foundation below the arch.
- Check that nearby window or door replacements have not removed a lintel the arch was quietly relying on.
If a recent window replacement is part of your arch's history, it is worth asking the installer whether the original lintel stayed in place. Builders like Gepetto Millworks, who specialize in arched window work, can speak to how that interaction plays out during a window swap.
A Step-by-Step DIY Repair Process for Minor Arch Issues
For genuinely minor, cosmetic damage, here is the general sequence a careful homeowner can follow safely.

Start by cleaning the area with a stiff nylon brush and a mild masonry detergent, never a wire brush, which can scratch softer historic brick. Let it dry completely before inspecting the crack or joint again in good light.
Next, remove any loose or crumbling mortar from the joint using a small chisel and hammer, working carefully to avoid chipping the brick edges. Clear out debris with a brush or low-pressure air, then dampen the joint slightly so the new mortar bonds properly instead of drying out too fast.
Mix a small batch of mortar matched as closely as possible to the existing color and texture, and apply it in thin layers rather than one thick pass, letting each layer firm up before adding the next. Tool the joint to match the surrounding profile once it reaches thumbprint hardness.
Finally, cover the fresh mortar and keep it slightly damp for several days as it cures, since mortar that dries too quickly loses strength. If at any point you find the crack extends into the brick itself rather than just the joint, stop and treat it as a job for a professional instead.
Safety Precautions to Take Before and During Arch Repair
Brick arch repair involves more risk than most homeowners expect, partly because the danger is not always obvious until something moves. Never remove mortar or brick from an arch that shows any sign of sagging or keystone displacement without temporary shoring in place first, since an arch under stress can shift suddenly once a load-bearing piece is disturbed.
Wear safety glasses and a dust mask any time you are chiseling or grinding mortar, since old mortar dust can contain silica and, in some older homes, lead from previous paint layers. Gloves protect against the sharp edges of broken brick and mortar debris.
If your work requires a ladder or scaffolding to reach the arch, make sure it is rated for the task and set on stable, level ground, and never lean a ladder directly against loose or cracked brick. Keep children and pets away from the work area entirely, and rope off the space below any arch you suspect may be structurally compromised, since falling debris is a real risk even from a relatively small section of brick.
If you ever feel uncertain about whether a crack is cosmetic or structural, treat it as structural until a professional tells you otherwise. That caution costs you nothing; misjudging a failing arch can cost considerably more.
Tools and Materials You Need for Brick Arch Repair
For minor, cosmetic repairs, the tool list is short: a stiff nylon brush, mild masonry detergent, a small cold chisel and hammer, a pointing trowel, a mortar mixing tub, and a jointing tool to match the existing profile. You will also want a spray bottle for dampening joints before and after mortar application, plus burlap or plastic sheeting to keep new mortar curing slowly.
Material needs depend heavily on the job. Repointing calls for mortar mixed to match the original in color and hardness, something a contractor typically tests through a sample panel rather than guessing from a bag label. Crack repairs on sound brick may call for a color-matched cementitious grout rather than mortar, per GSA patching guidance, since grout is formulated differently for narrow crack filling than mortar is for joint work.
Structural repairs require tools and materials outside typical homeowner reach: shoring posts or adjustable jacks, helical bar systems and the specialized grout that bonds them, masonry saws for cutting channels, and often a masonry drill for anchor points. These are jobs where the material itself, not just the labor, is specialized enough that sourcing it correctly matters as much as installing it correctly.
How to Assess an Arch's Structural Stability Before Repairing It
Before any repair begins, take a step back and look at the arch as a whole system rather than focusing only on the visible crack or damaged brick. Stand at a distance and sight along the curve of the arch ring: a smooth, even curve suggests the geometry is still intact, while a flattened or distorted section suggests the arch may already be losing its ability to carry load.
Check the imposts, the points where the arch meets the supporting wall, for cracking or crumbling, since a failing impost can undermine an otherwise sound arch. Look at the wall sections directly above and beside the arch for diagonal cracking that lines up with the arch's edges, which often indicates the load path has shifted.
Press gently on any loose or spalled brick near the arch's base to gauge how much material has actually lost integrity, and note whether cracks are dry and stable or show signs of recent movement, like fresh debris or lighter-colored mortar exposed at the crack edges. A structural engineer's evaluation is the most reliable way to confirm what your visual inspection suggests, particularly for any arch showing sagging, keystone displacement, or cracking that extends beyond the arch itself. That report identifies the actual failure mechanism, which prevents a repair that treats the symptom while leaving the real cause untouched.
Long-Term Maintenance Tips for Brick Arches
An arch that gets regular attention rarely needs dramatic intervention. Walk around and inspect any brick arch on your property at least once or twice a year, ideally after winter freeze-thaw cycles and after heavy storm seasons, since both tend to reveal new cracking or mortar loss.
Keep water away from the arch wherever possible. Clear gutters, properly graded soil, and functioning downspouts do more to protect an arch over a decade than almost any single repair, since water intrusion is behind a large share of the mortar failure and brick spalling homeowners eventually deal with.
Address small mortar loss promptly rather than waiting for it to spread, since a joint that has failed in one section puts more stress on the joints around it. Avoid painting or sealing brick arches with non-breathable coatings, which can trap moisture inside the brick and accelerate spalling from the inside out.
Finally, keep a simple record, photos and dates, of any cracks or repairs you have made. That record is genuinely useful if you ever need to show a contractor or engineer how a crack has or has not changed over time, and it often shortens the diagnostic process considerably.
Why Patchwork Thinking Fails Brick Arches
The biggest mistake in brick arch repair is not using the wrong mortar or skipping an engineer. It is treating every crack as an isolated event instead of a symptom. Conventional advice tends to focus heavily on the visible fix, repoint this joint, replace that brick, without asking what caused the movement in the first place. That approach produces homeowners who repair the same section three times in five years and never understand why.
What the evidence here actually supports is a sequencing discipline: diagnose root cause first, match materials second, and reinforce structurally only when the arch has demonstrably lost load-bearing capacity, not preemptively. Preservation-minded repair is not about being precious with old brick for its own sake. It is about recognizing that softer, compatible mortar and conservative intervention genuinely outperform aggressive rebuilding in most cases, because the arch was engineered to work with materials of a certain hardness and flexibility, not against them.
If you take one thing from this guide, let it be patience in diagnosis. The repair itself is usually the easy part.
— Thomas
Get a Free Estimate for Your Brick Arch Repair
If your arch shows mortar loss, cracking, or signs of structural movement, we offer free estimates on brick repair across the work covered in this guide, from simple repointing to structural reinforcement.

At your first visit, expect a full inspection of the arch and surrounding wall, a cured sample panel for any repointing work, and an honest assessment of whether mortar matching alone will solve the problem or whether structural reinforcement is warranted. Every written quote includes our mortar specification and our 5-year workmanship guarantee, so you know exactly what you're paying for before work begins. Reach out through our brick repair page to schedule an inspection.
FAQ
Can damaged bricks be repaired?
Yes, individual damaged or spalled bricks can typically be cut out and replaced with matching units rather than requiring a full rebuild. A mason will select replacement brick that matches the color and porosity of the surrounding wall, often using salvaged brick for the closest match.
What are brick arches called?
Brick arches are generally categorized by shape: semicircular arches form a true half-circle, segmented (or eyebrow) arches use a shallower curve, and flat soldier-course or rowlock arches rely on bricks set on end over a hidden lintel. Each type carries load differently, which affects how it fails and how it gets repaired.
How can I repair cracked mortar around bricks?
Minor cracked or crumbling mortar is repaired by removing the old mortar to a proper depth, about two to two and a half times the joint width according to National Park Service preservation guidance, then refilling in layers and tooling it to match the original joint. Narrower hairline cracks on sound brick may instead call for a color-matched cementitious grout rather than full repointing.
How much does it cost to repair brickwork?
Brickwork repair costs vary significantly based on the scope: simple repointing costs less than brick replacement, which in turn costs less than structural reinforcement or full reconstruction. Factors like scaffolding access, custom brick matching, and required engineer reports all push estimates higher, so a written quote with a sample panel and mortar specification is the most reliable way to compare contractors.
Do I need a structural engineer for arch repair?
You need a structural engineer whenever an arch shows significant sagging, a keystone displaced more than half an inch, or cracking that extends into the surrounding wall. An engineer's report identifies the actual failure mechanism, which prevents a repair plan built on guesswork.
Sources
- Preservation Brief 2: Repointing Mortar Joints in Historic Masonry Buildings
- Repairing brick arch lintels — Thor Helical