
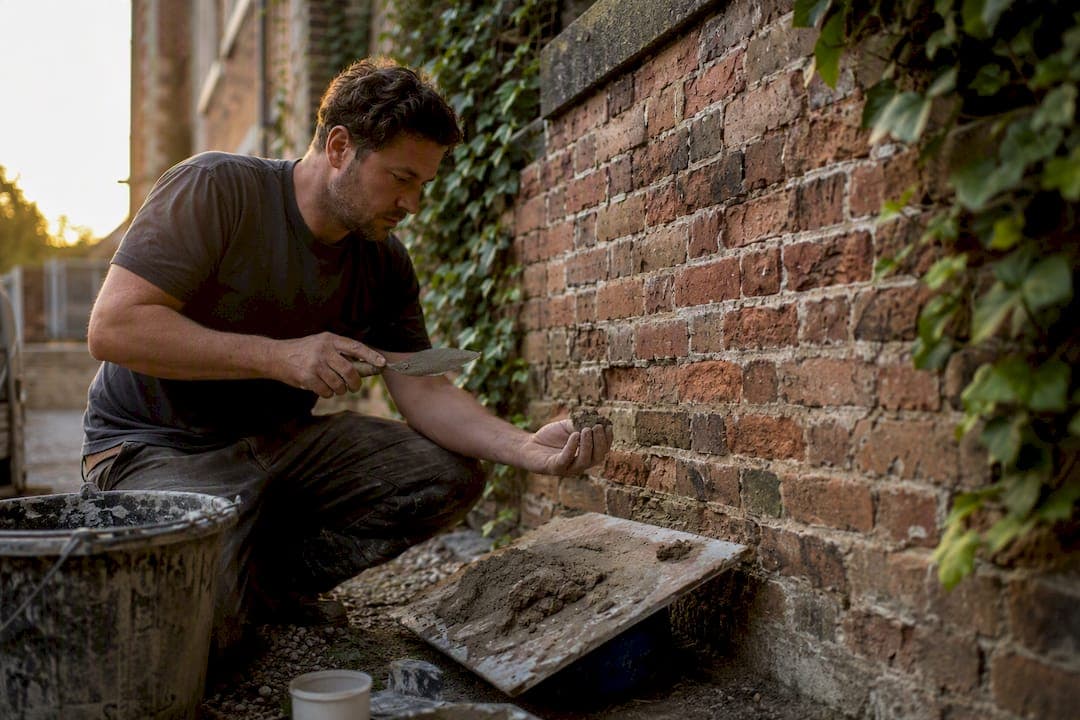
The fastest path to a mortar match that actually holds up: pull a sample from inside an existing joint (never the weathered face), match the sand's color and grain size first, then measure your binder and pigments by weight, and mix three to five test batches before you commit. Compare cured patches in indirect natural light, not full sun or shade. Sand drives most of the visible color, so getting that piece right does more work than any pigment adjustment ever will.
This sequence works because mortar color comes from a handful of variables, and skipping the order makes every later step harder. Sand sets the base tone and texture. The binder (gray or white Portland cement, plus lime) sets the overall value. Pigments only fine-tune what's already there. Mortar joints make up roughly 15 to 20 percent of a wall's visible surface area, so getting this wrong is not a small cosmetic miss. It's the difference between a repair nobody notices and one every passerby clocks from the sidewalk.
- Sample from inside the joint, not the surface
- Match sand color and grain size before anything else
- Weigh pigments; don't eyeball them
- Mix 3 to 5 test batches and label each one
- Cure and judge color only in natural, indirect light
Pro Tip: Never chase a perfect color match by using a harder, less permeable mortar than what's original to the wall. A close color on a mortar that's too strong will crack your brick within a few winters. Compatibility always outranks a perfect shade.
Key Takeaways
A close, lasting mortar match depends on sampling from inside the joint, matching sand before pigment, and choosing a mix softer than the brick itself.
| Point | Details |
|---|---|
| Sample the right spot | Take mortar samples from inside the joint, never the weathered surface, to see the true original color. |
| Sand comes first | Match sand color and grain size before adjusting pigment; sand drives most of the visible result. |
| Test in batches | Mix 3 to 5 labeled test batches, weighing pigment precisely, since shifts under 2% show up visibly. |
| Wait before judging | Check color at 72 hours, but wait 3 to 4 weeks for full stabilization before finalizing a match. |
| Compatibility over color | Mortar must stay softer and more vapor-permeable than the brick, per National Park Service guidance. |
| Call a pro for high-stakes repairs | Heritage Masonry & Brick offers free estimates and a 5-year workmanship guarantee on repointing and matching work in Richmond. |
Table of Contents
- What Controls Mortar Color and Texture
- The Step-by-Step Mortar Matching Process
- Finding the Right Sand and Texture Match
- Testing, Curing, and Judging the Color Honestly
- Where to Source Materials for a Precise Match
- Compatibility Warnings Before You Mix
- When a Mortar Match Calls for a Professional
- Free Estimates for Mortar Matching in Richmond
- Frequently Asked Questions
- Sources
What Controls Mortar Color and Texture
Four things determine what a cured mortar joint looks like: sand, cement type, lime content, and pigment. Sand is the biggest lever. It typically makes up most of the mix by volume, and its natural color, from tan to gray to reddish, shows through more than people expect. Cement type matters too: standard gray Portland pulls everything toward a cooler, darker tone, while white Portland opens up room for lighter, warmer matches on cream or buff-colored historic mortars.
Texture is a separate problem from color, and it's just as visible. Grain size and gradation (the mix of coarse and fine particles in the sand) change how light scatters off the surface, which changes how "bright" or "dull" a joint reads at a glance. The tooling profile, whether a joint is struck, raked, concave, or flush, adds shadow lines that shift perceived color further still. A perfectly color-matched mortar tooled the wrong way can still look off.
There's a structural rule underneath all of this that matters more than any color chip: replacement mortar needs to be softer and more vapor-permeable than the brick it's repairing, so it can act as a sacrificial layer.
New mortar should match historic mortar in color, texture, and tooling, and it should be softer and more vapor-permeable than the masonry units it repairs, according to the National Park Service's preservation guidance.
- Sand: dominant color source, 60 to 75% of mix volume
- Cement: gray Portland darkens, white Portland lightens
- Lime: softens strength and improves permeability
- Pigment: fine-tunes tone, doesn't fix a wrong sand choice
- Tooling: struck, raked, or concave profiles change perceived shade
The Step-by-Step Mortar Matching Process
Getting a close match is a testing exercise, not a guessing game. Here's the sequence experienced masons and serious DIYers both follow, adapted from field methods used in restoration work.
- Take the sample correctly. Chisel out a piece from deep inside an intact joint, away from any weathered or discolored surface. The interior of the joint hasn't been bleached by decades of sun and rain, so it shows the mortar's true original color.
- Reverse-engineer the mix. Crush the sample, then soak or wash it to separate sand from the binder paste. This tells you roughly what sand color and grain size you're chasing, and whether the original used gray cement, white cement, or a lime-heavy mix. This is the same approach This Old House recommends for tackling a mismatched repair.
- Choose your ingredient path. Decide between a premixed bag product, a custom blend of Portland, lime, and sand, or a brickyard/lab match if the color is unusual or the repair is highly visible.
- Mix 3 to 5 test batches. Weigh every ingredient, especially pigment, on a small kitchen or postal scale. Professional matches often require multiple attempts because pigment shifts under 2% by weight can create a visible color difference once cured.
- Apply test patches. Put a small amount of each batch on a scrap board and, if possible, in an inconspicuous spot on the actual wall. Label each patch with its batch number and exact recipe.
- Cure and evaluate. Check color at 72 hours for an initial read, but don't make a final call yet. Full color stabilization can take 3 to 4 weeks, and mortar looks noticeably darker and more saturated while wet.
Wear gloves and eye protection when handling powdered pigments and cement. Both are fine, alkaline dust that irritates skin and lungs with repeated exposure.
Field-tested workflow: extract a sample from inside the joint, reverse-engineer the sand and binder ratio, mix small test batches with varied lime-to-Portland proportions, and compare thin, fast-drying patches side by side against the original.
Pro Tip: Write down every recipe as you go, down to the gram. If Batch 3 turns out to be the winner three weeks from now, you'll want to be able to mix that exact recipe again for the rest of the wall.
Finding the Right Sand and Texture Match
Sand is where most DIY matches succeed or fail, and it's also the most solvable problem if you're patient about it. Start by washing a piece of your original mortar sample clean of cement paste, then let it dry completely. What's left is the raw sand, and its true color and grain mix become obvious once the gray cement film is gone.
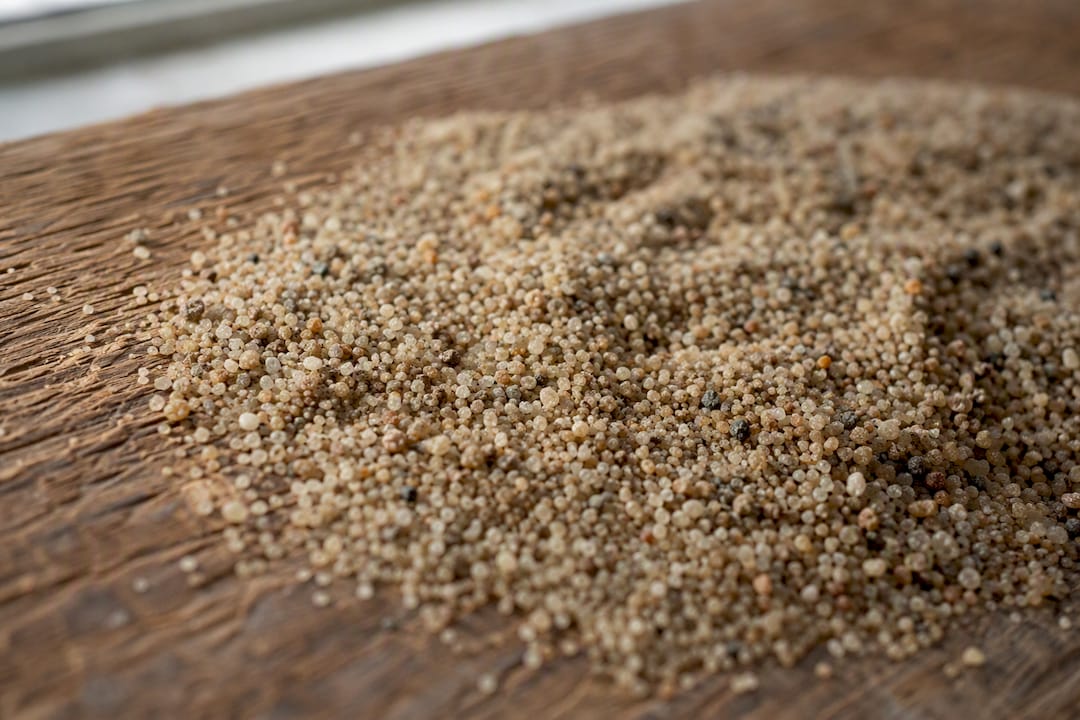
From there, run a rough sieve test. You don't need lab equipment. Pass the dried sand through a kitchen strainer or a few mesh sizes if you have them, and note whether the original mix leans coarse, fine, or a blend of both. Look for anything unusual too, shell fragments, dark mineral flecks, or rounded river-rock grains all show up in older mortars and are easy to miss if you're only looking at overall color.
For sourcing, most homeowners find what they need through a combination of options:
- Local sand and gravel pits, which often carry regional sand in several natural colors
- Brickyards and masonry suppliers, who may stock or special-order matching aggregate
- General-purpose sand blended with a coarser product like Quikrete Tubesand to build back a specific grain profile
- Wash and dry your sample before judging sand color
- Sieve or hand-sort to identify grain size distribution
- Blend two sand types if no single source matches exactly
- Match the joint's tooling style at this stage, not after
Pro Tip: If your original mortar has a visibly coarse, pebbly texture, blend a portion of Tubesand into your finer all-purpose sand rather than searching endlessly for one perfect bag. Two sands blended usually beats one sand that's close but not quite right.
Testing, Curing, and Judging the Color Honestly
Wet mortar lies to you. It looks darker, richer, and more saturated than it will once it dries, which is exactly why so many DIY repairs end up too light or too gray once they've fully cured. Judge your test patches only after they've had real time to dry out.
The timeline matters more than most guides admit. You'll see an initial color at 72 hours, but full stabilization, the point where the mortar has reached its long-term color, can take 3 to 4 weeks depending on humidity and temperature. Some masons speed up the read on a cured test patch with a light acid wash, which strips the thin cement film off the surface and reveals the sand color underneath, similar to how decades of weathering would expose it naturally. Use this only on disposable test patches, never on the actual repair, since acid washing carries its own risks to brick and mortar if handled carelessly.
- Compare patches outdoors, in indirect daylight, never under artificial light
- View from normal walking distance, not six inches away
- Check the patch against brick that's dry, not rain-darkened
- Reassess at both 72 hours and again after 3 to 4 weeks
Where to Source Materials for a Precise Match
A basic supply list covers most repairs: gray and white Portland cement, hydrated lime, a scale for weighing pigment, mixing buckets, and a selection of sand in different colors and grain sizes. Mineral iron-oxide pigments are the standard choice because they're stable and won't fade under UV exposure the way some dyes will.
For anything visually critical, historic facades, prominent street-facing walls, unusual sand colors, a brickyard or restoration lab can run an aggregate analysis and supply a matched blend. Bring your sample and your notes when you visit a supplier; asking to see aggregate options side by side saves multiple return trips.
Sand selection and grain gradation are usually the dominant factor in mortar color, and labs equipped for restoration-grade matching can reproduce a blend using mineral pigments when a close DIY match isn't achievable.
- Premixed bags: fast and cheap, but limited to a few stock colors
- Custom sand and pigment blends: more accurate, more testing required
- Brickyard or lab match: best precision, added cost and lead time
Compatibility Warnings Before You Mix
A close color match on the wrong mix can do real damage. Brick, especially anything built before the 1920s, is often soft and porous, and pairing it with a modern, high-Portland mortar traps moisture behind a joint that's now harder than the brick itself. That moisture eventually spalls the brick face from the inside out.
New mortar needs to be softer and more vapor-permeable than the masonry it repairs, per National Park Service preservation guidance, so the mortar wears out first instead of the brick.
Watch for these mistakes: using a high-strength, all-Portland mix on soft historic brick; skipping sand gradation entirely and judging by color alone; committing to one test batch instead of running several; and finalizing your choice while the mortar is still wet. If a repair does go wrong, the fix is unfortunately not a repaint. It usually means cutting the bad mortar back out and repointing it correctly.
When a Mortar Match Calls for a Professional
DIY testing works well for small, low-visibility repairs on standard-run brick. Bring in a professional when you're dealing with a large facade, a historic property, an unusual or faded brick color, or any repair where a wrong call risks real structural or preservation consequences.
Contractors approach the problem with more precision than a homeowner's kitchen-table setup: lab aggregate analysis, access to a wider range of sand sources and pigment stock, pigments weighed to a fraction of a gram, and several cured test patches evaluated side by side before a final mix is chosen.
Before hiring anyone, ask these questions:
- Have you matched brick similar to mine before, and can I see photos?
- What's your test-batch and sample-extraction process?
- Can I see a cured test patch before you repoint the whole wall?
A close color match on a repair that fails structurally within a few years isn't a match at all. It's a delayed problem.
Heritage Masonry & Brick brings 25-plus years of hands-on matching experience to jobs across Richmond, backed by a 5-year workmanship guarantee on completed work.
Balancing Aesthetics and Longevity
The instinct on any visible repair is to chase an exact color match, and I understand why. But the mortar's job is to protect the brick, not win a close-up inspection. A joint that reads correctly from the sidewalk, blending in at normal viewing distance, has done its job even if it's not a molecular match under a magnifying glass. What actually matters is whether that mortar is soft enough and permeable enough to let the wall breathe for the next 50 years. If you'd rather not run the testing yourself, Heritage Masonry & Brick's repair work comes with a 5-year workmanship guarantee, which covers you if the match or the repair itself doesn't hold up.
Free Estimates for Mortar Matching in Richmond
Testing three to five batches, weighing pigments to the gram, and waiting three weeks to judge color takes patience most homeowners don't have time for, especially on a large facade or a chimney where a bad match is visible from the street. Heritage Masonry & Brick has built that testing discipline into everyday jobs across Richmond for over 25 years, which means the trial-and-error happens on our end, not yours.

Repointing and tuckpointing are where mortar matching matters most, since a single mismatched joint can stand out across an entire wall. Heritage Masonry & Brick's repointing and tuckpointing service covers exactly this kind of work, along with structural brick repair and chimney repointing, where soft, permeable mortar is critical to prevent freeze-thaw damage. Every completed project carries a 5-year workmanship guarantee.
If you're staring at a mismatched patch job or planning a larger repointing project, request a free estimate and have a mason look at the brick in person before you commit to a DIY test batch.
Frequently Asked Questions
How do I match mortar color to existing brick? Pull a sample from inside an existing joint, identify the sand's color and grain size, then mix several test batches with weighed pigment and compare cured patches in natural light before committing to a full repair.
Why does my new mortar look different once it dries? Wet mortar reads darker and more saturated than cured mortar. Wait at least 72 hours for an initial check and 3 to 4 weeks for the color to fully stabilize before judging a match.
Can I use a premixed mortar bag for a color match? Premixed bags cover a narrow range of colors, usually gray, buff, and white, so they work for standard modern brick but rarely match older or custom-colored brick precisely.
Is a perfect color match more important than mortar strength? No. Mortar needs to stay softer and more vapor-permeable than the brick it repairs. A hard, high-Portland mix that happens to match in color can trap moisture and damage the brick over time.
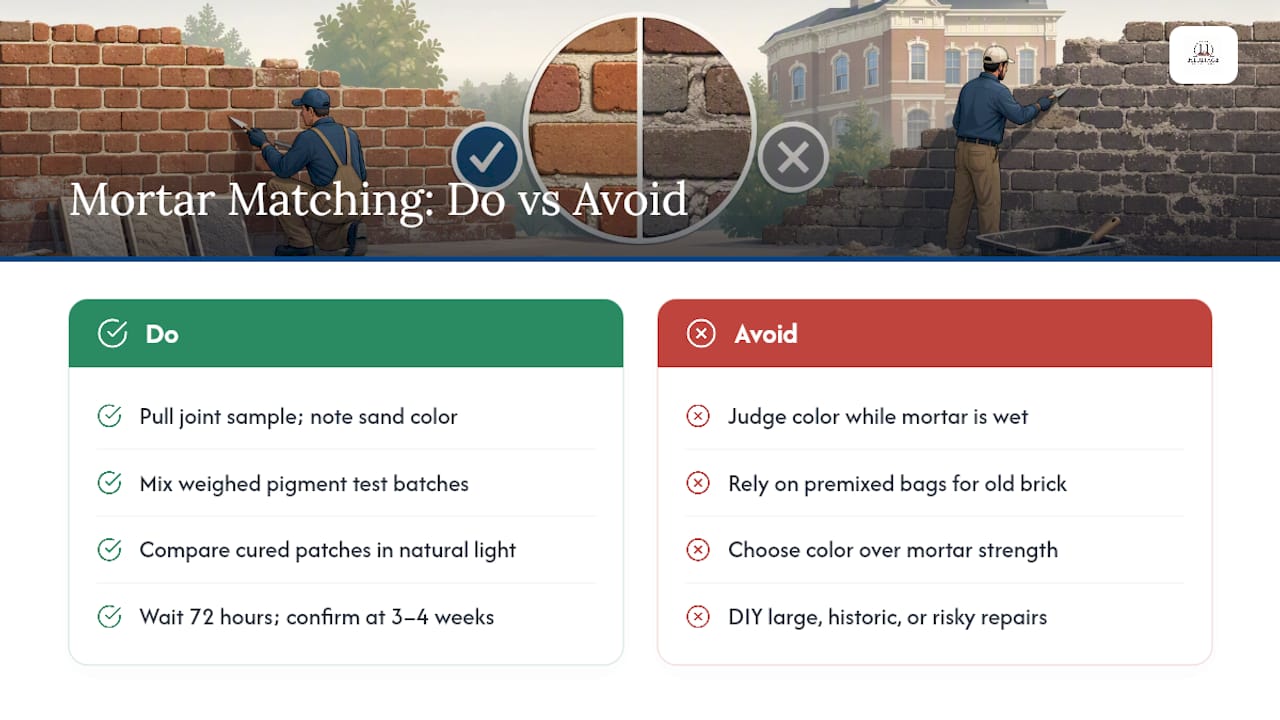
When should I hire a professional instead of DIY testing? Bring in a professional for large facades, historic brick, unusual colors, or any repair where a failed match risks real structural damage. Heritage Masonry & Brick offers free estimates for exactly these situations.
Sources
- How to match mortar color
- How to Match Mortar - This Old House
- Sharing the mysteries of mortar
- Restoration & contractor mortar matching (HFS Materials)