
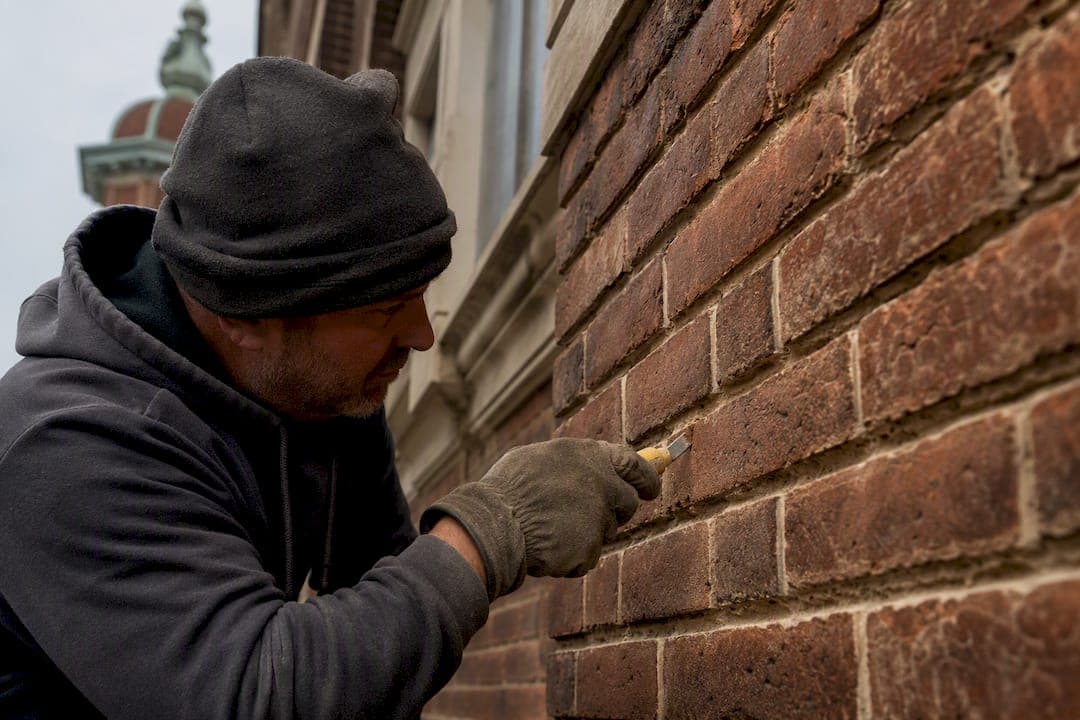
Most historic brick can be saved. Repair almost always beats replacement, and the right first move is a professional condition assessment paired with a moisture and root-cause investigation, following guidance from the National Park Service and the International Masonry Institute. Hold off on cement patches, sandblasting, or pressure washing until you know what's actually compatible with your walls.
TL;DR:
- Proper assessment of historic brick involves detailed visual inspection, safety stabilization, and targeted testing to identify moisture issues, mortar composition, and structural integrity.
- Repointing should prioritize hand cleaning of mortar joints and matching original profiles and materials, avoiding cement patches and incompatible repair methods that accelerate decay.
- Using breathable, lime-based mortar that is softer and more vapor-permeable than the brick is crucial to prevent trapping moisture and causing spalling or deterioration.
- Water sources such as gutters, flashing, and grading must be fixed before any masonry repair to avoid repeated damage and wasted effort.
- Hiring experienced professionals for structural stabilization techniques like pinning, crack stitching, and proper mortar matching ensures long-lasting restoration, supported by thorough assessment and verification steps.
Table of Contents
- What Does a Historic Brick Condition Assessment Involve?
- How Do You Restore Historic Brick the Right Way?
- Why Mortar Compatibility Determines Whether Your Repair Lasts
- Stop the Water Before You Touch the Brick
- How Do You Match Bricks for a Historic Restoration?
- Should You Hire a Professional for Brick Restoration?
- Heritage Masonry & Brick's Approach to Restoration Work
- Techniques for Stabilizing Deteriorated Brick
- Structural Considerations During Restoration
- Maintenance Tips That Extend Restored Brickwork's Lifespan
- What Preservation Contractors Get Right That Homeowners Often Miss
- Ready to Get Your Historic Brick Assessed?
- Where to Learn More
- Sources
- FAQ
What Does a Historic Brick Condition Assessment Involve?
A proper assessment starts with the eyes and ends with a lab report, if the walls need one. A trained mason walks the facade documenting every visible symptom: mortar loss, spalling brick faces, efflorescence (that white salty bloom), stair-step cracks, bulging sections, and any units that have worked loose from the wall plane.
Safety comes first. Loose or spalled units hanging above a sidewalk, entry door, or fire escape get flagged and stabilized before anything else happens, regardless of how minor the rest of the wall looks.
From there, the assessment can escalate into testing, depending on what the visual survey turns up:
- Water penetration testing to see how fast and how deep moisture moves through the wall assembly.
- Rebound hammer testing to estimate the relative hardness and soundness of individual brick units.
- Infrared thermography to spot trapped moisture and insulation gaps invisible to the naked eye.
- Flatjack testing to measure in situ compressive stress on load-bearing masonry, used mainly on structurally questionable walls.
- Lab mortar analysis to identify the original binder ratio, sand type, and any salt contamination driving deterioration.
The International Masonry Institute recommends this combination of field and laboratory testing specifically because guessing at mortar composition is how most historic buildings end up with incompatible repairs. Assessment findings then get sorted into a repair scope: what needs attention this quarter, what can wait a season, and what's cosmetic enough to defer to routine maintenance.
How Do You Restore Historic Brick the Right Way?
Restoration work on historic masonry follows a hierarchy: repoint before you patch, patch before you replace, and never clean with anything that can't be undone.
Repointing is usually the highest-leverage repair on an old building, and it's also the one most often done wrong. The NPS repointing brief calls for hand raking failed mortar out to a depth of at least 15 millimeters (roughly 5/8 inch) or until sound mortar is reached, never cutting into the brick edges with a grinder. The new joint has to match the original in width, profile, and tooling style; a flush joint from 1890 shouldn't come back as a modern concave "V." Mix design matters just as much as technique, which the next section covers in detail.
Replacement only makes sense when a brick has lost so much face that it can no longer shed water or bear load, when spalling has eaten past the fireskin into the soft core, or when a unit has cracked clean through. Our guide on diagnosing spalling brick walks through exactly where that line sits.
Where a wall needs cosmetic patching rather than full unit replacement, the patch material has to breathe like the surrounding brick. Cement-based stucco patches trap moisture behind a hard shell and change how the whole wall assembly manages vapor, which speeds up decay everywhere around the patch.
Cleaning deserves its own set of rules:
- Test any cleaning method on a small, inconspicuous section first and wait several days to judge the result.
- Favor low-pressure water rinses and mild, pH-balanced cleaners for general grime.
- Never sandblast or wheel-blast historic brick. It strips the fired fireskin that gives the brick its water resistance, according to NPS restoration guidance.
- Skip high-pressure washing. It drives water deep into joints and can dislodge already-weak mortar.
- Avoid acidic washes on most historic brick; they react unpredictably with certain clay bodies and can cause staining that never comes out.
Our own preservation-first cleaning method starts every job with that same test-patch step before touching the full elevation.
Pro Tip: Photograph every test patch with a ruler or coin in frame for scale, and log the date and product used. Six months later, when you're deciding whether the mockup held up through a freeze-thaw cycle, that record is worth more than memory.
Why Mortar Compatibility Determines Whether Your Repair Lasts
Historic mortar is supposed to lose the fight, not win it. The working principle in masonry conservation is that mortar should always be softer and more vapor-permeable than the brick around it, so that moisture escapes through the joints rather than through the face of the brick itself.
Traditional mixes relied on lime and sand, producing a mortar with modest compressive strength and high breathability. Modern Portland cement mixes are dramatically harder and far less permeable. Set a hard cement joint next to a soft antique brick, and the mortar traps water inside the brick instead of releasing it. The brick face spalls off first because it becomes the weakest, most sacrificial part of the assembly instead of the mortar.
Getting this right starts with lab testing, not guesswork:
- Commission a mortar analysis to identify the historic binder-to-sand ratio and sand gradation.
- Match compressive strength to a target below that of the surrounding brick, never above it.
- Color-match the new mix using the same sand source or a close substitute, tested in a sample joint before full production.
- Control placement temperature and curing time; lime mortars cure slower than cement and need protection from rapid drying or frost.
Our mortar matching guide walks owners through requesting this analysis from a lab and translating the report into a buildable spec.
Getting the ratio wrong is the single most common cause of preventable brick failure on historic buildings, more so than weather, age, or even neglect. A mortar joint is meant to be the part of the wall you replace every few generations. The brick is not.
Stop the Water Before You Touch the Brick
No repointing job survives a leaking roof or a clogged gutter. Fixing masonry before fixing water sources just means redoing the masonry in a few years.
Walk the building looking for these culprits, in this order:
- Gutters and downspouts — undersized capacity, loose brackets, or downspouts dumping water directly against the foundation.
- Flashing at sills, heads, and roof-to-wall transitions — cracked, rusted, or missing flashing lets water behind the brick veneer.
- Site grading — soil or pavement sloped toward the building instead of away from it.
Once you find the source, the sequence matters: stop the leak, give the wall assembly real time to dry out, then schedule the masonry repair. A masonry wall that's still damp from a roof leak won't bond properly with new mortar, and coatings marketed as waterproofing sealants often make this worse by trapping moisture that can no longer escape, according to NPS restoration guidance. Temporary tarping or diverter flashing can protect a wall in the short term, but plan for several weeks of drying time after a permanent fix before mortar work begins.
How Do You Match Bricks for a Historic Restoration?
Finding a brick that matches a 100-year-old unit rarely means walking into a supply store. Salvage yards specializing in reclaimed brick are usually the first stop, since they carry units that have already weathered to a similar patina. When salvage doesn't turn up a close enough match, specialized manufacturers can custom-fire small batches to replicate historic dimensions, color, and texture.
A real match goes beyond color. It has to line up on:
- Dimensional tolerance (historic brick sizes vary more than modern standardized units).
- Color and surface fireskin texture under natural light, not showroom lighting.
- Porosity and water absorption rate, so the new brick doesn't behave differently in freeze-thaw cycles.
- Approximate compressive strength, so the new unit doesn't outperform (or underperform) its neighbors.
Always build a physical mockup panel and let it weather for a few weeks before committing to a full order; our brick matching playbook covers how to stage that test. When no supplier gets close enough, limited staining on new units can bridge a visible color gap, though it's a compromise, not a fix. Partners specializing in salvage sourcing for historic renovation can also help track down reclaimed stock regionally. Expect custom firing to cost more and take longer, sometimes several months, while reclaimed brick is faster but limited by whatever a yard happens to have on hand.
Should You Hire a Professional for Brick Restoration?
Light surface cleaning and touch-up mortar dabbing on a low garden wall are reasonable DIY tasks for a careful homeowner. Everything past that, repointing, mortar matching, unit replacement, chimney work, or anything touching structural masonry, belongs with a trained contractor.
When comparing bids, ask for:
- Photos of past restoration projects on buildings of similar age and material.
- A commitment to mortar analysis rather than an off-the-shelf mix.
- A willingness to run a paid test patch or mockup before full-scale work.
- Proof of insurance, applicable permits, and named references you can actually call.
- Written warranty terms and a realistic project timeline.
Walk away from any bidder who proposes sandblasting, pressure washing, or a cement-only mortar mix without discussing your building's specific material. Those are the fastest ways to turn a repairable wall into a replacement project.
Pro Tip: Before signing a full contract, ask each bidder to price a small, fixed-fee mockup panel separately. Comparing actual workmanship on your own wall beats comparing portfolio photos every time.
Heritage Masonry & Brick's Approach to Restoration Work
Heritage Masonry & Brick has extensive experience repointing, structurally repairing, and matching historic materials on residential and commercial buildings throughout the Richmond area. That work follows a consistent sequence: assessment first, then lab or mockup verification, then targeted repairs, then a maintenance plan the owner can actually follow.
In the field, that means protecting landscaping and adjacent surfaces before repointing starts, staging visible mockups so owners approve the match before full production, and standing behind finished work with a written warranty. Details on that process are outlined on the firm's masonry advice page.
Techniques for Stabilizing Deteriorated Brick
Not every damaged brick needs to come out of the wall. Consolidation treatments and structural stabilization can extend the service life of units that are weakened but still sound enough to carry load.
Consolidants are specialized liquid treatments applied to friable, crumbling brick faces to bind loose particles back together, typically silane or siloxane-based formulas chosen for their vapor permeability. They're a targeted tool for units that are structurally deteriorated at the surface but not through the full thickness, and they should only go on after testing confirms the brick's absorption characteristics; the wrong consolidant can seal a face that needs to breathe.
Pinning and grouting address deeper problems. Where a wall has developed internal voids or where a wythe of brick has separated from its backup masonry, injectable lime-based grouts can fill those voids without introducing a hard, incompatible material. Stainless steel pins or helical ties anchor loose sections back to sound masonry behind them, a common fix for bulging walls that haven't yet failed structurally.
Crack stitching uses thin reinforcing bars set into mortar joints across a crack to redistribute stress and prevent further movement, often paired with monitoring gauges to confirm the crack has actually stopped growing before finish repairs go in.
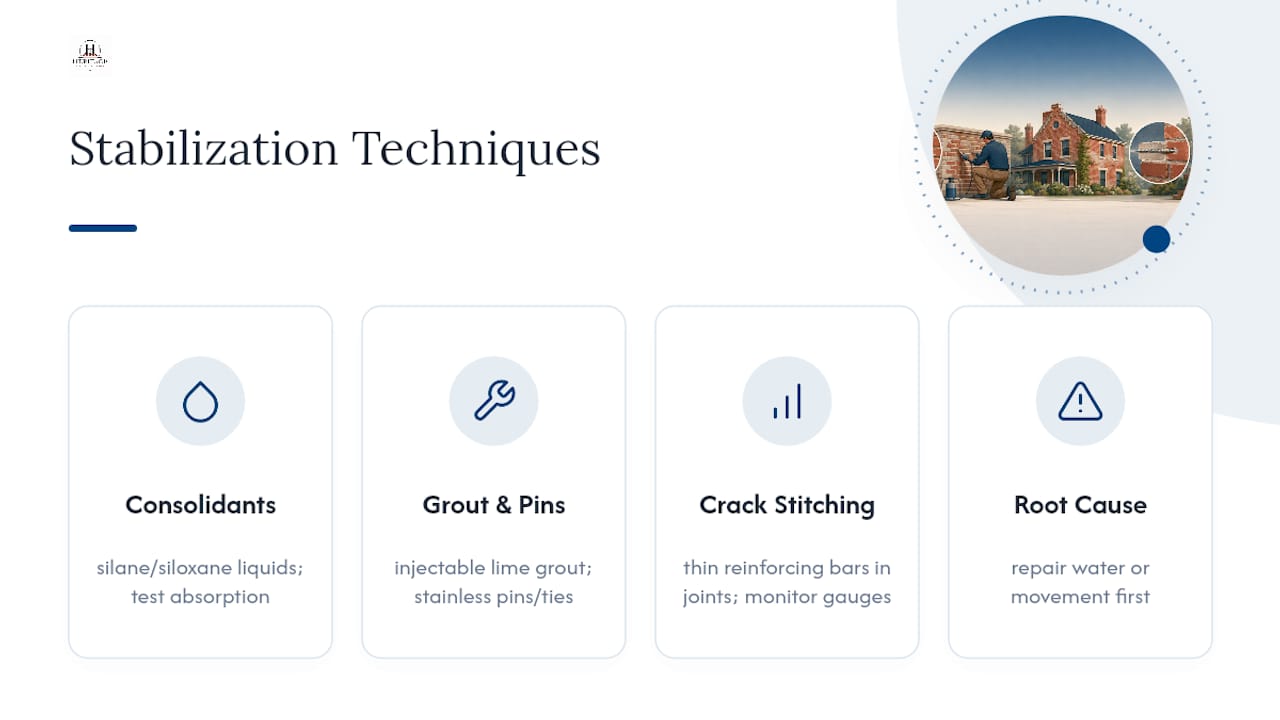
None of these techniques substitute for fixing the water or structural movement that caused the deterioration in the first place. They buy time and preserve original material, but only after the root cause is under control.
Structural Considerations During Restoration
Brick walls on older buildings are frequently load-bearing, not decorative veneer, which changes the stakes of any repair. Removing too many units at once, cutting a new opening, or raking out mortar across a large area without shoring can destabilize a wall that's been holding weight for a century.
Before any large-scale repointing or unit replacement, a contractor should evaluate whether the wall needs temporary shoring, especially over openings like windows and doors where brick arches or lintels carry concentrated load. Work sequencing matters too: repairs typically proceed in small sections, allowing each area to cure and regain strength before adjacent sections are opened up.
Bulging or leaning walls need a structural engineer's evaluation before cosmetic repair begins, not after. A wall that looks like a repointing candidate on the surface can be masking a foundation settlement issue or a failed structural tie that no amount of new mortar will solve. Flatjack testing, mentioned earlier as part of a condition assessment, exists specifically to catch this distinction between cosmetic and structural problems before a crew starts removing material.
Permits and local building code review typically apply to any structural masonry work, and many historic districts require a review process through a State Historic Preservation Office before exterior changes proceed. Skipping that step can mean redoing approved work later at real added cost.
Maintenance Tips That Extend Restored Brickwork's Lifespan
Restoration work protects a building for decades, but only with routine upkeep behind it. Walk the exterior twice a year, ideally spring and fall, checking gutters for debris buildup, flashing for gaps, and mortar joints for any new hairline cracking.
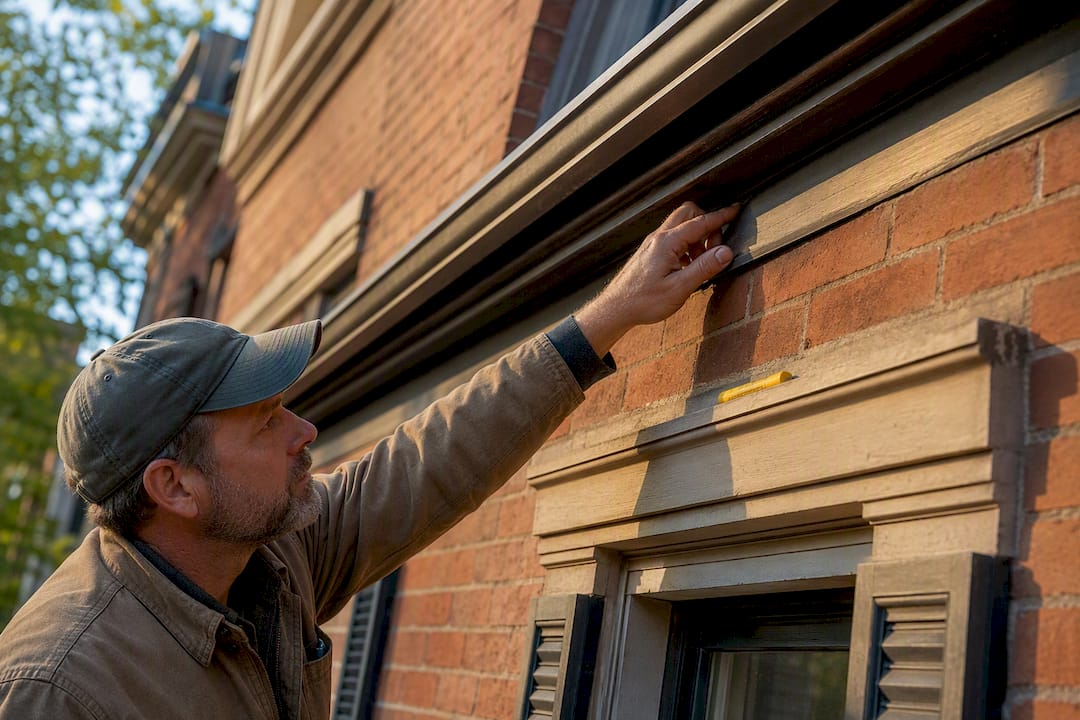
Keep vegetation and irrigation heads away from brick foundations; sprinkler spray hitting a wall daily reintroduces exactly the moisture problem the restoration just solved. Repaint or reseal any painted trim promptly once it starts peeling, since bare wood siding shedding water onto brick below causes slow, hard-to-notice staining and saturation.
Address new mortar cracking or spot spalling the season it appears rather than waiting for it to spread; a small repointing touch-up costs far less than a full wall section years later. Keep a simple log of repair dates, mortar mix used, and any test patch results, so future work (yours or a future owner's) starts from documented history instead of guesswork.
What Preservation Contractors Get Right That Homeowners Often Miss
The biggest gap in most homeowner research on this topic isn't a lack of information. It's the instinct to treat brick restoration like a cosmetic project when it's really a building physics problem. Owners search for how to clean brick or match brick color, when the actual failure driving most historic masonry problems is a water source nobody's traced yet.
Conventional advice tends to lead with cleaning products and mortar colors because those are the visible, satisfying parts of the job. The NPS guidance, and honestly most contractors who've spent real time on old buildings, would tell you the order matters more than any product choice: find the water, stop the water, let the wall dry, then repair the mortar. Skip that sequence and you're repainting a room with a hole in the roof.
If there's one thing this research supports over and over, it's that the mortar should always be the part of the wall you're willing to sacrifice. Every hard cement patch job that "solved" a problem for a homeowner five years ago is usually the reason a contractor is standing in front of a spalled brick face today. The fix isn't more durable materials. It's materials that are durable in the right places and intentionally weaker in others.
Prioritize the assessment and the water investigation before you price out mortar colors or brick suppliers. Everything downstream depends on getting that sequence right first.
— Thomas
Ready to Get Your Historic Brick Assessed?
A local masonry contractor offers repair-first restoration services including repointing, structural brick repair, chimney work, and material matching, with extensive field experience and a workmanship guarantee on completed work.

Every project starts with a free estimate and, where the wall calls for it, a mortar analysis to confirm exactly what mix belongs in your joints before a single stone gets touched. If you've noticed spalling brick, crumbling joints, or water stains on an older facade, the next step is straightforward. Schedule an assessment through the Repointing and Tuckpointing page and get a written scope before any work begins.
Where to Learn More
For technical standards and deeper study, consult the NPS treatment standards for rehabilitation, the International Masonry Institute's brick restoration resources, and the NPS restoration guide for historic masonry buildings. For project-specific approvals, contact your State Historic Preservation Office directly.
Sources
FAQ
Can old brick be restored?
Most historic brick can be restored rather than replaced, provided the underlying moisture problem is fixed first and repairs use compatible, breathable mortar instead of hard cement mixes.
How much does it cost to refinish brick?
Costs vary widely based on wall size, mortar condition, and whether custom brick matching is needed; the contractor provides free, project-specific estimates after an on-site assessment.
How can I restore an old brick wall?
Start with a condition assessment and moisture investigation, fix any active water sources, then repoint with lime-based mortar matched to the original mix rather than patching with cement.
How much does it cost to renovate a historic building?
Historic building renovation costs depend heavily on the scope of masonry, structural, and code-compliance work required, which is why a documented condition assessment should come before any budget estimate.