
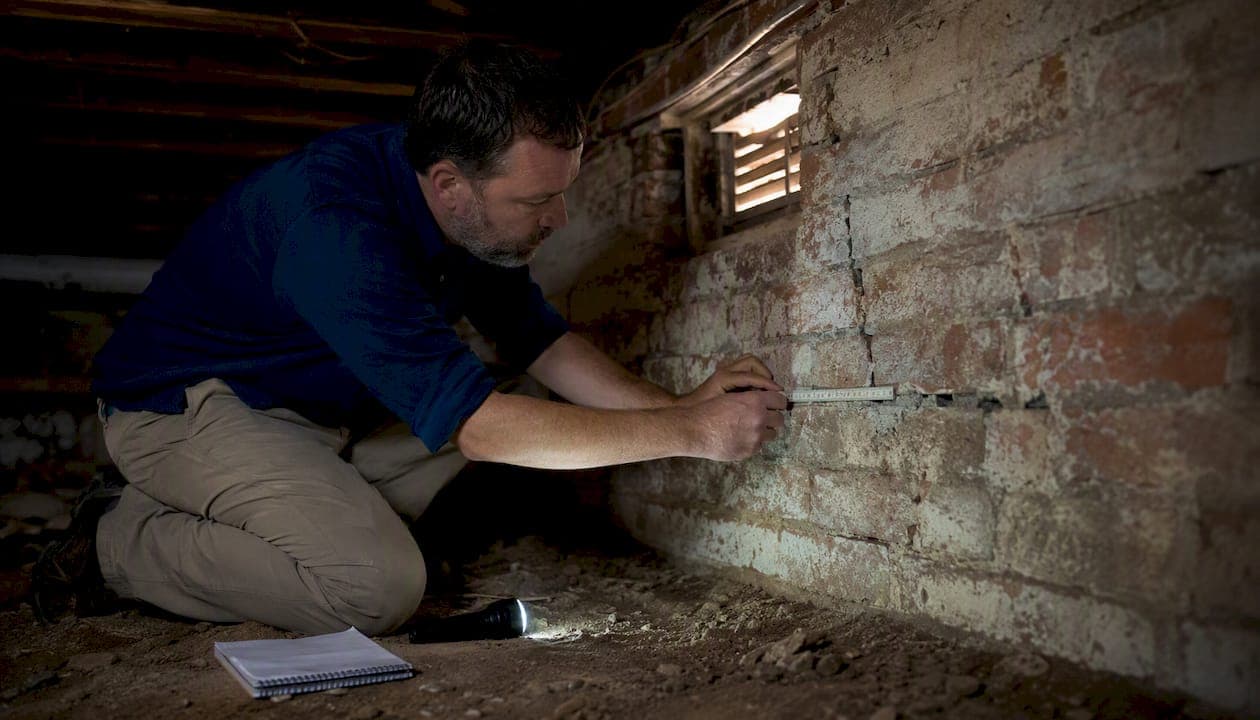
Most brick foundations can be repaired. The right fix depends on what's failing: mortar erosion calls for repointing or tuckpointing, non-structural hairline cracks respond to crack sealing, and through-cracks, bowing, or active settlement require structural reinforcement or underpinning. Before you call anyone, photograph the damage from multiple angles. Capture three specific shots: any stair-step cracks running diagonally through mortar joints, any visible bowing or bulging along the wall face, and close-ups of mortar joints where the material has receded more than 1/4 inch. If you see bowing or a wall that leans visibly inward, stop and call a structural engineer before doing anything else. For mortar loss or isolated surface cracks, a qualified masonry contractor is the right first call.
The industry standard for mortar selection below grade is ASTM C270, which specifies compressive strength benchmarks for Type S and other mortar types. Heritage Masonry & Brick references this standard on every foundation repair job, alongside BIA Technical Note 46, which addresses historic masonry compatibility.
- Mortar failure or receded joints: Repointing or tuckpointing
- Non-structural hairline cracks: Crack sealing or surface parging
- Through-cracks, bowing, or settlement: Structural reinforcement, wall anchors, or underpinning/piers
- Persistent interior moisture: Masonry-first approach (close entry paths before installing interior drainage)
Table of Contents
- Do you have a true brick foundation or just a brick veneer?
- What are the most common brick foundation problems?
- Which repair method matches your foundation problem?
- How much does brick foundation repair cost?
- When should you DIY, and when do you call a professional?
- How do you prevent brick foundation problems from coming back?
- How Heritagemasonryandbrick approaches brick foundation repair
- Key Takeaways
- What experienced masons actually look for first
- Heritagemasonryandbrick serves Richmond homeowners with expert masonry repairs
- Useful sources and further reading
Do you have a true brick foundation or just a brick veneer?
This question changes everything about your repair path. A true load-bearing brick foundation carries the structural weight of the house. A brick veneer is a single-wythe decorative layer attached to a concrete block or poured concrete core behind it. Repairing a veneer is largely cosmetic work. Repairing a load-bearing foundation involves structural and drainage solutions that go much deeper.
Post-1950 construction commonly uses a non-structural brick veneer over block or poured concrete cores, so the build era of your home is your first clue. If your house was built before 1950, a true brick foundation is far more likely.
How to check from inside the basement
Go to the basement or crawl space and look at the wall from the interior. A true brick foundation will show continuous brick courses running below the sill plate with no concrete block or poured concrete visible behind them. The wall will be thick, typically 8–12 inches, and the mortar bonding will run through multiple courses. If you see concrete block or poured concrete with a thin layer of brick on the exterior face only, that's veneer.
Two quick diagnostic tests help confirm what you're looking at:
- Tap test: Knock on the wall with your knuckle. A solid thud suggests full-depth masonry. A hollow sound points to a thin veneer over a different backing material.
- Mortar recession check: Use a small screwdriver or your fingernail to probe the mortar joints. Recession deeper than 1/4 inch is a repair indicator regardless of foundation type, but the repair method differs.
- Moisture probe: A basic pin-type moisture meter (such as a General Tools MMD4E) pressed against the mortar joint will show whether moisture is actively wicking through.
Pro Tip: When in doubt, document with photos that include a tape measure for scale, then get an in-person assessment from a masonry specialist familiar with historic mortar compatibility. Guessing the foundation type and applying the wrong repair wastes money and can cause additional damage.
| Feature | True Brick Foundation | Brick Veneer |
|---|---|---|
| Wall thickness | 8–12 inches or more | 4 inches (one wythe) |
| Build era | Typically pre-1950 | Common post-1950 |
| Interior appearance | Continuous brick below sill plate | Concrete block or poured concrete visible |
| Tap test result | Solid thud | Hollow sound |
| Repair priority | Structural and drainage | Cosmetic and weatherproofing |
What are the most common brick foundation problems?
Older brick foundations fail in predictable ways. Knowing what each symptom looks like, and how urgent it is, helps you decide whether to pick up the phone today or schedule a seasonal inspection.
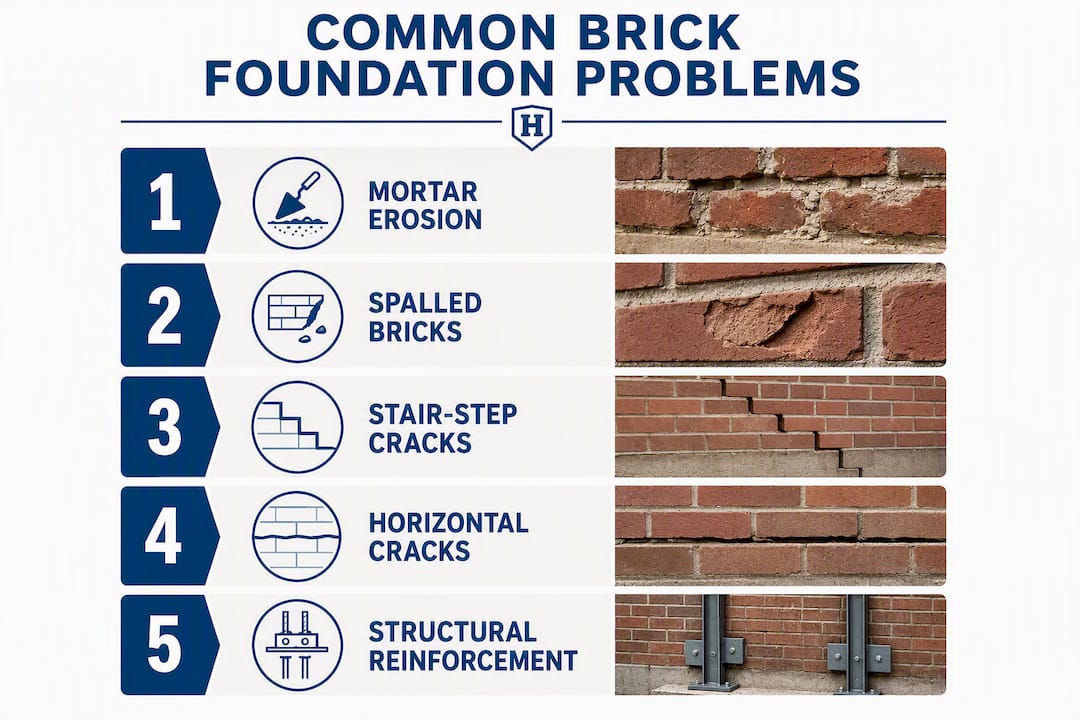
Mortar erosion (receded joints): The most common problem in pre-1950 foundations. Joints that have receded more than 1/4 inch allow water to penetrate directly into the wall. Urgency: routine to prompt, depending on depth and extent.
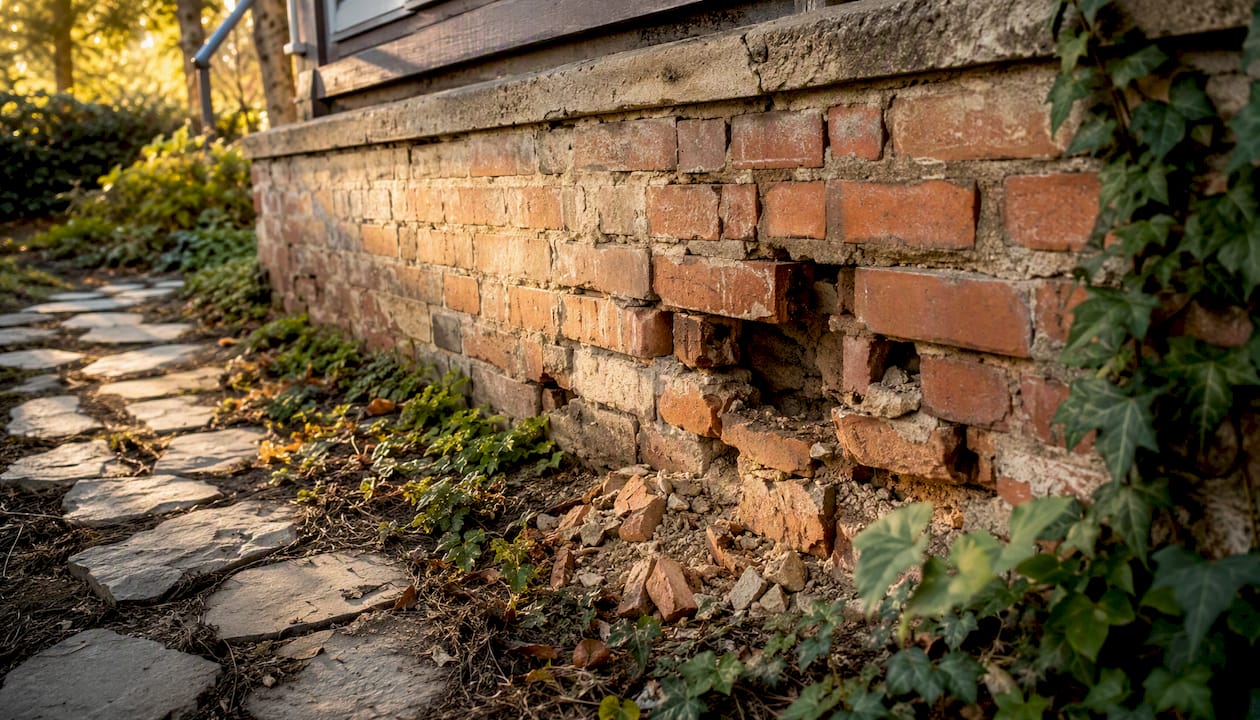
Spalled or soft bricks: Bricks that flake, crumble at the surface, or feel soft when pressed are losing structural integrity. This is called spalling, and it's often caused by freeze-thaw cycling when moisture has entered the brick face. Tap a suspect brick with a metal rod. A dull thud instead of a clear ring suggests the brick is compromised.
Stair-step cracks: Diagonal cracks that follow mortar joints in a stair-step pattern typically signal differential settlement, where one section of the foundation is sinking faster than another. Urgency: prompt. Mark the crack endpoints with a pencil and date them. If the crack grows over 2–4 weeks, that's active movement.
Horizontal cracks and bowing: Horizontal cracks running across multiple courses, especially mid-wall, often indicate hydrostatic pressure pushing the wall inward. A wall that bows more than 1 inch out of plumb is a structural emergency. Urgency: immediate. Call a structural engineer, not a general contractor.
Bulging or leaning walls: Any visible lean or bulge visible to the naked eye warrants an immediate professional assessment. Do not attempt shoring or demolition on a leaning wall without professional guidance.
Persistent interior moisture: Water stains, efflorescence (white mineral deposits), or active seepage after rain are signs that water is entering through the masonry. Many of these cases are misdiagnosed as waterproofing failures when the real cause is eroded mortar joints or failed parging.
Urgency at a glance: Bowing, active collapse risk, and large horizontal cracks require immediate professional attention. Stair-step cracks, visible settlement, and ongoing water entry need prompt professional evaluation. Isolated mortar loss and small hairline cracks can be scheduled for routine repair.
Which repair method matches your foundation problem?
Each symptom maps to a specific repair family. Using the wrong method, such as applying interior waterproofing before closing exterior entry paths, is one of the most common and costly mistakes homeowners make.
Repointing and tuckpointing
Repointing removes deteriorated mortar to a consistent depth recommended by best practice and replaces it with fresh mortar. Removing to that depth creates a mechanical key that bonds the new mortar firmly; shallow surface-only repairs fail during freeze-thaw cycles.
Mortar selection is critical for historic brick. Using a mortar that is harder than the original brick causes the brick face to crack and spall rather than the mortar joint, which is the sacrificial element by design. Below-grade work typically calls for Type S mortar per ASTM C270. For historic brick repairs, a softer, lime-based mix is often the right choice to protect the brick itself.
Pro Tip: Wet the raked-out joint before applying new mortar. For joints deeper than 3/4 inch, apply mortar in two passes, letting the first pass reach a thumbprint-firm set before adding the second layer. This prevents shrinkage cracking.
Crack injection
Epoxy injection works for stabilized structural cracks where no further movement is expected. It bonds the crack faces and restores tensile strength. Polyurethane foam injection is better for active cracks or wet cracks because it expands to fill irregular voids and tolerates moisture. Neither method addresses the underlying cause. If the crack is moving, injection alone is a temporary measure.
Partial brick replacement
When individual bricks are spalled beyond surface repair, they need to be removed and replaced. The challenge in older homes is matching the brick's color, texture, size, and absorption rate. Historic bricks were often hand-made and vary considerably from modern production units. A mason experienced with historic brickwork will source salvaged or custom-blended units to match.
Structural reinforcement
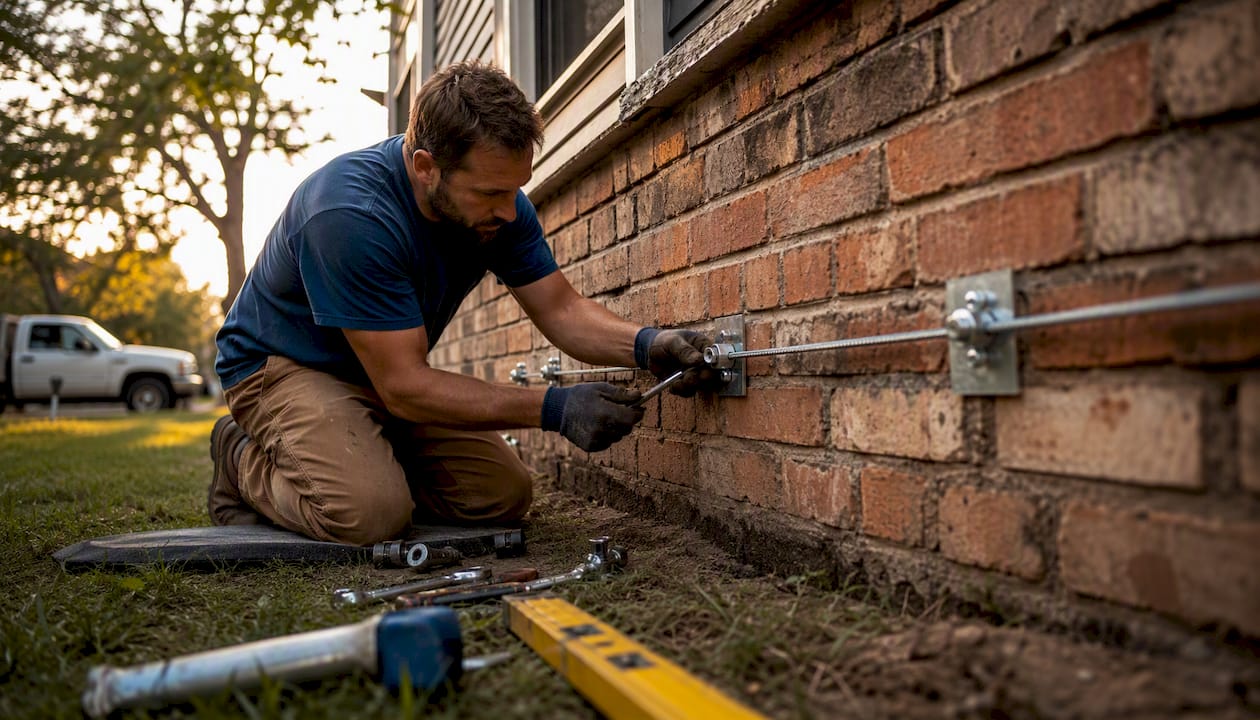
Bowing walls that haven't yet reached the point of requiring full rebuild can often be stabilized with wall anchors (plate-and-rod systems that anchor into the soil), carbon fiber straps bonded to the wall face, or steel I-beam bracing. These methods stop further movement but don't reverse existing displacement. They're most effective when installed before bowing exceeds 2 inches.
Underpinning and piers
When stair-step cracks or differential settlement indicate the footing itself is failing, underpinning transfers the load to stable soil or bedrock below. Helical piers, steel push piers, bell-bottom piers, and mass concrete underpinning are the common options. Helical piers are screwed into the soil and work well in varied soil conditions. Steel push piers are hydraulically driven to refusal and can sometimes lift settled sections back toward original elevation. The right choice depends on soil conditions, load, and access.
| Repair Method | Best For | Durability | Invasiveness | Cost Direction |
|---|---|---|---|---|
| Repointing/tuckpointing | Mortar erosion, water entry | years with proper mortar | Low | $ |
| Crack injection | Stabilized or active cracks | Variable (cause-dependent) | Very low | $ |
| Partial brick replacement | Spalled or failed individual bricks | Long-term if matched correctly | Moderate | $$ |
| Wall anchors/carbon fiber | Bowing walls, inward movement | Long-term if installed early | Moderate | $$ |
| Underpinning/piers | Settlement, footing failure | Permanent (load transfer) | High | $$$ |
Water is the root cause in many brick foundation failures. Fix the wall's entry paths through repointing and parging before installing any interior drainage system. Interior drainage manages water that's already inside the wall. Closing the entry path stops it from getting in.
How much does brick foundation repair cost?
Cost varies widely based on the scope of damage, access conditions, soil type, and whether historic material matching is required. Here are realistic ranges to anchor your expectations.
Repointing: Foundation-specific tuckpointing runs roughly $8–$25 per linear foot, with the higher end reflecting below-grade access, required scaffolding, and stronger mortar specifications. A full-wall repointing project on a typical older home basement can run several thousand dollars depending on perimeter and condition.
Crack injection: Per-injection or per-linear-foot pricing varies by material (epoxy vs. polyurethane) and crack length. Expect this to be a smaller line item than repointing unless the crack network is extensive.
Partial brick replacement: Priced by the number of bricks and the difficulty of matching historic units. Custom or salvaged brick sourcing adds to the cost.
Structural reinforcement (wall anchors, carbon fiber): Mid-range investment, typically covering materials, installation, and any required soil anchoring. Multi-wall projects scale accordingly.
Underpinning and piers: The largest-ticket repair category. Costs are highly site-specific because they depend on soil conditions, pier depth, number of piers, and whether excavation or permits are required. National cost guides that aggregate foundation repair data identify soil conditions and degree of excavation as the two biggest cost drivers.
What drives your final number: The extent of the damaged area, access difficulty (interior vs. exterior excavation), historic material matching requirements, soil conditions, and whether an engineer's report is required. Two bids that look similar on price can differ enormously in scope. Always compare what diagnostic steps are included, what mortar specification is proposed, and whether a workmanship warranty is offered.
Typical timelines: Spot repointing takes 1–3 days. Full-wall repointing on a standard basement runs 3–7 days. Crack injection is often completed in a single day. Partial rebuilds take 1–2 weeks or more depending on scope. Underpinning and pier installation spans multiple days to several weeks, factoring in cure time and permit requirements.
When should you DIY, and when do you call a professional?
Some repairs are within reach of a careful homeowner. Others are not, and attempting them without professional help can make the problem worse or create a safety hazard.
DIY-appropriate tasks:
- Isolated, shallow mortar touch-ups where joints are receded less than 1/4 inch and the area is small (a few square feet)
- Replacing one or two bricks if you can source a matching unit and are comfortable with basic masonry technique
- Extending downspouts away from the foundation and regrading topsoil to slope away from the house
When to hire a masonry contractor:
- Extensive repointing covering more than a few square feet
- Parging replacement or new parging application
- Partial brick rebuilds requiring historic material matching
- Any repair where access requires scaffolding or excavation
When to call a structural engineer first:
- Visible bowing or leaning in any wall
- Large horizontal cracks spanning multiple courses
- Cracks that are actively growing (confirmed by pencil marks over 2–4 weeks)
- Suspected footing failure or significant differential settlement
- Any situation where you're unsure whether the structure is safe to enter
Bowing walls and large horizontal cracks are structural emergencies. These signs often indicate hydrostatic pressure or structural instability that a masonry contractor alone cannot resolve. A licensed structural engineer should assess the wall before any repair work begins.
Questions to ask any contractor or engineer:
- Are you licensed and insured in Virginia?
- Do you have references specifically for historic brick foundation work?
- What mortar specification will you use, and does it reference ASTM C270?
- What is your workmanship warranty, and is it in writing?
- Will you provide a written estimate with scope, materials, and cleanup included?
- If structural concerns exist, will you recommend or coordinate an engineer's report?
Red flags: No written estimate, vague mortar specifications, pressure to sign immediately, no references for historic work, or a contractor who dismisses the need for an engineer when bowing or active movement is present.
How do you prevent brick foundation problems from coming back?
Masonry repair without drainage correction is a temporary fix. Long-term stability requires correcting drainage after masonry repair to reduce hydrostatic pressure on the wall. Repointing a foundation while leaving gutters that dump water at the base of the wall will produce the same problem within a few years.
Drainage controls to address first:
- Clean gutters twice a year and confirm downspouts discharge at least 6 feet from the foundation
- Extend downspouts with splash blocks or underground extensions if needed
- Regrade soil to slope away from the house, targeting a minimum 6-inch drop over the first 10 feet where site conditions allow
Exterior measures: Replace failed parging sections promptly. Parging is the thin mortar coat applied to the exterior face of a foundation wall, and when it cracks or separates, it becomes a direct water entry point. Where chronic water accumulation is a problem, a French drain along the perimeter can relieve hydrostatic pressure before it reaches the wall.
Avoid impermeable landscaping materials (solid concrete patios, dense mulch beds) placed directly against the foundation. These trap water against the wall rather than directing it away.
Seasonal inspection routine: Walk the perimeter in spring and fall. Look for mortar joints that have receded, localized spalling, and any new cracking. Check that downspouts are clear and discharging properly. Photograph any changes and compare year-over-year. A small mortar repair caught early costs a fraction of what full-wall repointing or structural work costs later.
Schedule masonry repairs in dry seasons, late spring through early fall, when temperatures stay consistently above 40°F. Mortar cures through a chemical process that requires adequate temperature and low humidity. Cold or wet conditions slow curing and can cause new mortar to fail before it bonds properly.
Pro Tip: Keep a simple photo log of your foundation, dated and labeled by wall section. When you call a contractor for an estimate, those photos let them assess change over time and give you a more accurate scope and price.
How Heritagemasonryandbrick approaches brick foundation repair
Heritagemasonryandbrick begins every project with a free on-site assessment. That visit includes photographic documentation of all visible damage, a moisture check at suspect joints, and a review of the mortar condition across the full foundation perimeter. When structural signs are present, such as bowing, active cracking, or suspected footing movement, the team refers the homeowner to a structural engineer before any masonry work begins.
The repair sequence follows a masonry-first approach: close water entry paths through repointing or parging repair before addressing interior moisture. Mortar matching is done carefully, with test patches applied and reviewed against the existing wall before full-scale work proceeds. For historic brick, softer lime-based mixes are selected to protect the original brick face, consistent with ASTM C270 guidance for mortar compatibility.
Every repair completed by Heritagemasonryandbrick carries a 5-year workmanship guarantee. With over 25 years of experience in Richmond, VA, the team has worked on foundations ranging from Federal-era rowhouses to mid-century residential properties, matching materials and techniques to what the original construction requires.
Key Takeaways
Brick foundation repair works best when the right method is matched to the specific problem, starting with mortar and drainage before moving to structural solutions.
| Point | Details |
|---|---|
| Confirm foundation type first | True load-bearing brick foundations need structural repairs; brick veneer repairs are mainly cosmetic. |
| Match repair to symptom | Mortar loss needs repointing; bowing or settlement needs structural reinforcement or underpinning. |
| Water entry paths come first | Repoint and reparge before installing interior drainage to stop moisture at its source. |
| Know when to call an engineer | Bowing, horizontal cracks, or active movement require a structural engineer before any repair work starts. |
| Heritagemasonryandbrick | Offers free estimates, historic material matching, and a 5-year workmanship guarantee in Richmond, VA. |
What experienced masons actually look for first
The most common mistake homeowners make isn't ignoring a crack. It's spending money in the wrong order. Interior waterproofing systems get installed while the mortar joints are still open, the water keeps coming in, and the homeowner wonders why the expensive fix didn't work. The answer is almost always that the entry path was never closed.
When a seasoned mason walks a basement, the first thing they check isn't the interior wall surface. It's the mortar joints at and below grade on the exterior, the condition of the parging, and where the downspouts are discharging. A foundation that looks like a waterproofing problem from the inside is usually a masonry problem from the outside.
Consider a straightforward scenario that plays out regularly in older Richmond neighborhoods: a homeowner notices water staining on the interior basement wall after every heavy rain. An interior drainage contractor quotes a sump system. A masonry contractor instead finds mortar joints receded more than 1/4 inch along the entire north wall, directly below a downspout that terminates 18 inches from the foundation. Repointing those joints and extending the downspout stops the water entirely, at a fraction of the cost of an interior system.
Document before you repair. A photo taken before work begins is the only way to confirm, after the fact, that the repair held. That record also helps any future contractor understand the history of the wall.
Heritagemasonryandbrick serves Richmond homeowners with expert masonry repairs
For Richmond homeowners dealing with brick foundation issues, Heritagemasonryandbrick offers the kind of hands-on expertise that older homes actually require: careful mortar matching, historically compatible materials, and a repair sequence that addresses root causes rather than symptoms. The difference between a repair that lasts 25 years and one that fails in three usually comes down to mortar specification and whether the water entry path was closed first.

Services include repointing and tuckpointing, brick replacement with historic material matching, parging repair, structural masonry restoration, and coordination with structural engineers when underpinning or pier work is needed. The team serves residential and commercial properties throughout Richmond, VA, and provides free on-site estimates with a written scope.
Every project is backed by a 5-year workmanship guarantee. To request your free estimate, visit the brick repair services page and include a few photos of the damage, your address, and a brief description of what you're seeing. The team will follow up to schedule an on-site visit.
Useful sources and further reading
Homeowners who want to go deeper on any of the topics covered here will find these references useful.
- How to Repoint a Brick Foundation — This Old House: Step-by-step repointing technique including joint depth, mortar application in passes, and curing guidance. Practical for homeowners evaluating DIY scope.
- How Do You Repair a Brick Foundation? — Acculevel — Useful overview of the veneer vs. true brick foundation distinction and how it changes repair options.
- Brick Repairs — Heritagemasonryandbrick: Service page covering repointing, brick replacement, and historic material matching for Richmond-area homeowners.
- Repointing and Tuckpointing — Heritagemasonryandbrick: Detailed description of the repointing process, mortar matching standards, and workmanship guarantee terms.