
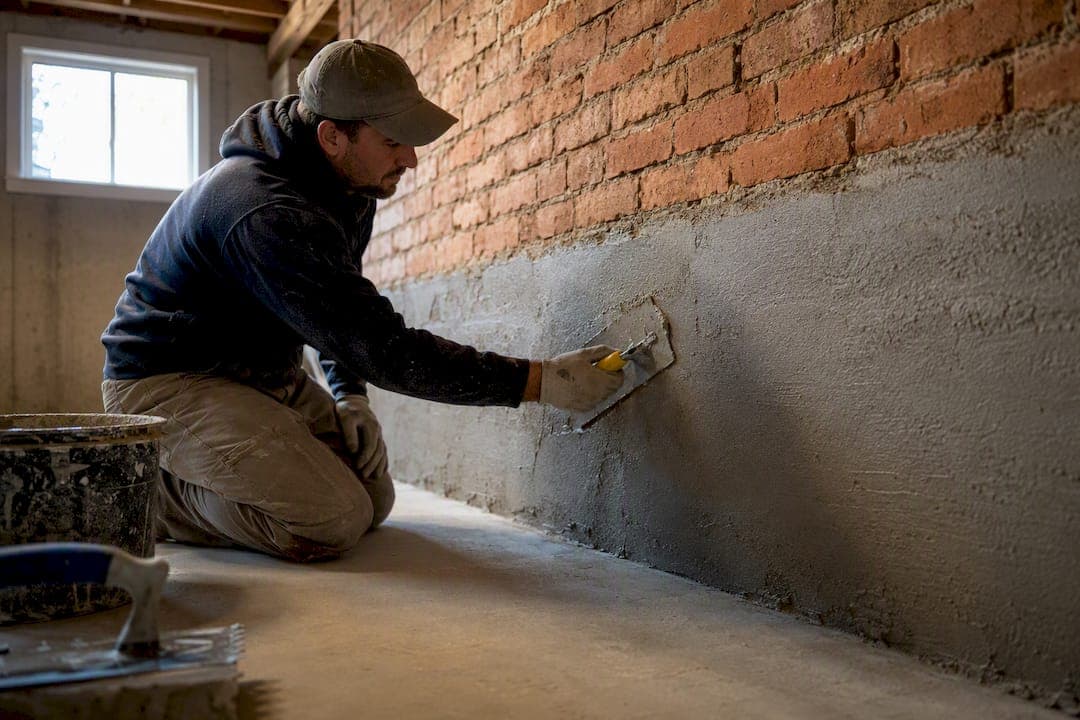
Parging is a thin mortar coat applied over brick, block, or stone to smooth the surface, cover minor damage, and protect exposed masonry from weather. It works well for cosmetic repair and surface protection above and at grade. It does not stop water from pushing through a foundation wall under hydrostatic pressure, so treat it as prep and cosmetic work, never as a waterproofing fix on its own.
TL;DR:
- Proper surface preparation, including removing loose material and dampening the wall, is crucial to prevent failure and ensure the longevity of the parge coat.
- The recommended mortar type depends on the underlying masonry, with Type N for brick and Type S for concrete block or below-grade work; historic masonry should use lime mortar to avoid accelerated decay.
- Parging is suitable for cosmetic repairs on sound surfaces but cannot address active water seepage or structural issues, requiring professional assessment for such problems.
- Most parging failures stem from inadequate prep work, such as skipping dampening or using overly rigid mortar mixes, rather than the mortar itself.
- For large, cracked, or structurally compromised walls, hiring a masonry contractor is essential to ensure proper repair and avoid repeated failure.
Table of Contents
- What Is Parging on a Brick Foundation?
- When Does Parging a Foundation Make Sense?
- What Mortar Mix Should You Use for Parging?
- How Do You Prep and Apply a Parge Coat?
- Why Does Parging Crack, Peel, or Fail?
- When Should You Hire a Masonry Contractor for Parging?
- What Homeowners Get Wrong About Parging
- Get a Foundation Assessed Before You Parge It
- Sources
- FAQ
What Is Parging on a Brick Foundation?
Parging is a cementitious or mortar coat, usually a moderate thickness sufficient to create a smooth, protective surface, troweled over exposed masonry to even out the surface and shield it from moisture and freeze-thaw cycling. Homeowners most often see it on the visible strip of foundation between the ground and the siding, on chimneys, and as a patch layer over damaged or spalled brick.
It gets confused with two other things constantly. Stucco is a multi-coat cladding system, typically applied in three passes over a lath or mesh base, built to be the finished exterior wall surface itself. Parging is a single, thinner coat meant for masonry that is already structurally sound. And waterproofing is a barrier system, a membrane or coating engineered to block water intrusion. Parging smooths and protects exposed masonry and creates a sound surface for waterproofing, but it is not the barrier itself.
Where parging fits and where it doesn't:
- Appropriate: a rough, flaking, or pitted foundation strip that's visible above grade
- Appropriate: a chimney with weathered mortar joints and surface erosion
- Appropriate: patching brick with minor surface loss but sound structure underneath
- Inappropriate: a basement wall with active water seepage that needs a drainage or membrane fix
- Inappropriate: a wall with structural cracking that signals settlement or movement
When Does Parging a Foundation Make Sense?
Look for flaking mortar, chalky white efflorescence deposits, or a rough, pitted block face. Those are the classic signs that a foundation section needs resurfacing rather than structural repair. If the brick or block underneath is intact and the damage is cosmetic or surface-level, parging is one of the more cost-effective ways to protect it and clean up the look of the house.
What parging actually delivers:
- A smoother, more finished appearance on visible foundation, especially at the front of a house
- A protective layer against surface weathering and minor moisture exposure
- A prep surface for a waterproof coating, when that's the end goal
- Lower material cost than a full stucco system, since it's typically one coat instead of three
Parging won't hold back groundwater under pressure, and it won't fix a wall that's actively leaking. A properly applied parge coat on a stable wall commonly lasts several years to over a decade before it needs touch-up or replacement, largely depending on climate exposure and how well the prep work was done. Skipping steps up front is the fastest way to shorten that lifespan, which is exactly why the mix and the application sequence matter more than most homeowners expect.
What Mortar Mix Should You Use for Parging?
Mix selection is where a lot of parging jobs go wrong before the first trowel stroke. The right mortar depends on what you're covering and how much flexibility that material needs.
Brick foundations: Use a Type N mortar. Fine Homebuilding's mix guidance recommends the softer Type N for brick because brick expands and contracts more than concrete block, and a softer mortar moves with it instead of cracking against it.
Concrete block or below-grade work: Use Type S mortar. It's stronger and more rigid, which suits block foundations and areas exposed to more consistent moisture, but that same rigidity is a liability on old, soft brick.
Historic masonry (roughly pre-1930): Skip Portland cement mixes entirely. Hydraulic lime mortar, often labeled NHL, breathes with old, softer brick and stone instead of trapping moisture behind a hard shell. Using a modern hard cement mix on this kind of masonry is one of the more common ways well-meaning homeowners accelerate the exact decay they were trying to stop.
Beyond the base mortar type, a few additions matter:
- Bonding additive: A liquid concrete bonding agent mixed into the mortar improves adhesion to existing masonry, especially on smooth or previously painted surfaces.
- Fiber reinforcement: Chopped fiber additives reduce shrinkage cracking as the parge coat cures.
- Pre-mixed parging compounds: Bagged products save time on small jobs and take the guesswork out of proportions, though they cost more per square foot than mixing from scratch.
Pro Tip: Mix only as much mortar as you can apply within a workable time frame to maintain consistency. Mortar that starts to stiffen in the bucket loses workability fast, and reworking it with extra water weakens the final bond.
Wear gloves and eye protection when mixing. Cement dust and wet mortar are both caustic enough to burn skin on contact, and that's a detail a lot of DIY guides skip entirely.
How Do You Prep and Apply a Parge Coat?
Skipping prep is the single biggest reason parging fails, and it's worth slowing down here even if the temptation is to just start troweling.
- Inspect first. Walk the foundation and flag any structural cracks, bulging, or signs of active water intrusion. Those issues need repointing or structural repair before any cosmetic coat goes on, not after.
- Fix drainage problems. If grading, downspouts, or a failing drain system are pushing water against the wall, resolve that first. A drainage failure will undermine even a perfectly applied parge coat.
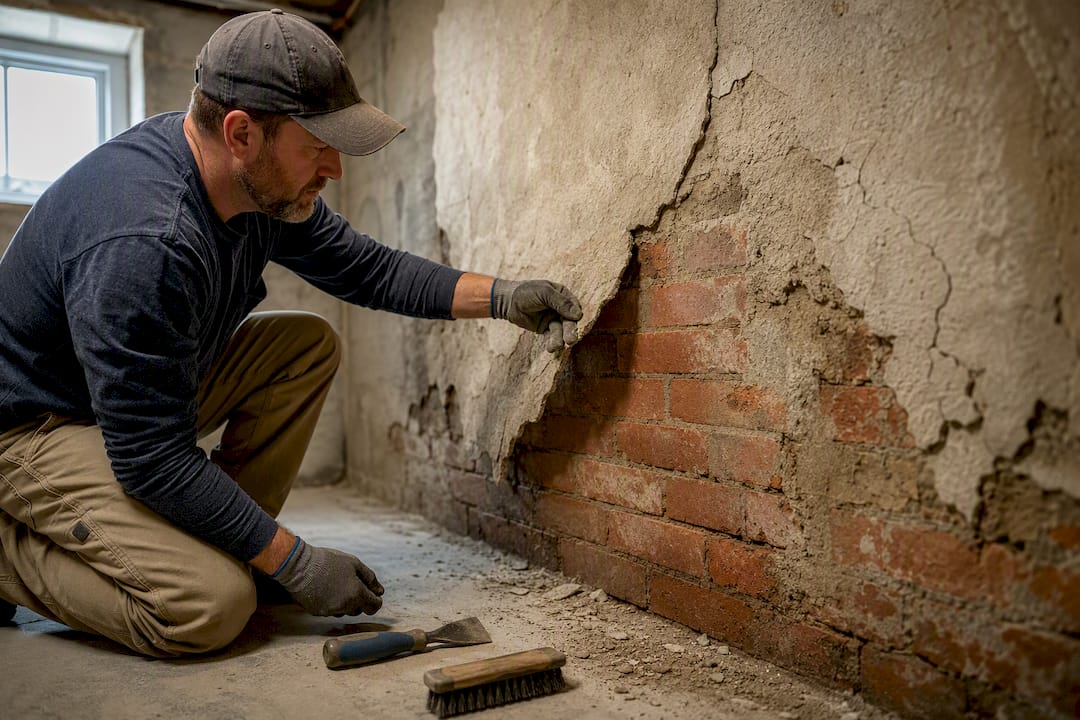
- Strip loose material. Remove every bit of old, failing parging with a chisel or wire brush. Anything left in place becomes a weak point the new coat will fail against.
- Clean the surface. Brush off dust, dirt, and efflorescence, and rinse the wall.
- Dampen the wall. A dry masonry surface pulls moisture out of fresh mortar too fast, causing weak, chalky bonds. Wet the wall until it's uniformly damp but not streaming.
- Apply a slurry coat. A slurry coat acts like a primer that fills the pores with porous brick or block, dramatically improving how well the parge coat grips.
- Apply the scratch coat. Trowel on a base layer roughly 3/8 inch thick, then score it horizontally with a scratching tool while it's still soft. That scratched texture gives the finish coat something to bite into.
- Let it set, then apply the finish coat. Depending on the substrate, bring the total thickness to somewhere between 3/8 inch and a full inch. Trowel smooth, or texture it to match the surrounding wall if that's the look you're after.
- Cure it slowly. Mist the surface periodically and keep it shaded from direct sun for several days to prevent shrinkage cracking, especially in hot, dry weather.
Pro Tip: Never parge in freezing temperatures or in direct afternoon sun. Frost stops the cure cold, and fast drying from heat causes the same shrinkage cracking that slow, damp curing is designed to prevent.
If the damaged area covers more than a small, isolated section, or if you're working around active cracking, uneven settling, or a wall that needs waterproofing as part of a bigger plan, that's the point where a DIY weekend project turns into a job for a licensed masonry contractor.
Why Does Parging Crack, Peel, or Fail?
Four failure patterns show up again and again on parged foundations, and nearly all of them trace back to the same root cause.
- Delamination: the parge coat separates from the wall in sheets, almost always from skipping the dampening step or the slurry coat.
- Edge erosion at the soil line: the bottom edge of the parging crumbles first because it takes the most direct, sustained moisture exposure.
- Cracking from movement: hairline or spreading cracks that follow a mortar mix too rigid for the masonry underneath, especially Type S mortar used on flexible old brick.
- Efflorescence: white, chalky mineral deposits that signal moisture is migrating through the wall and evaporating at the surface.
Poor prep is the common thread behind most of these failures, whether that means old parging left in place, a wall that wasn't damp enough before application, or a hard modern mix used on soft, historic brick.
The decision between patching and full removal comes down to scale. An isolated chip or small crack is a patch job. But once roughly a third or more of a coat is failing, cut your losses and strip the whole section rather than chasing patches that will keep failing at the edges. For upkeep, inspect parged surfaces yearly, and if you're painting over parging, stick to breathable masonry paint. A non-breathable sealer traps moisture behind the coat and shortens its life fast.
When Should You Hire a Masonry Contractor for Parging?
Bring in a professional when you see structural cracking, extensive delamination across large sections, or when the job is part of a larger waterproofing plan that depends on flawless prep. DIY parging works fine for small, visible foundation strips, but scale, structural risk, or waterproofing stakes change the math fast.
When you're vetting a contractor, ask these questions directly:
- What's your experience with masonry similar to mine, brick versus block versus historic stone?
- How do you choose the mortar mix, and why that mix for my wall?
- What prep steps are included before the parge coat goes on?
- How long is your workmanship warranty?
Watch for red flags too. Be wary of anyone who promises that parging alone will waterproof a basement, who won't remove old, loose material before applying new mortar, or who can't produce references or a written warranty. A solid quote should spell out prep work, materials, coat thickness, and warranty terms in writing, not just a price.
What Homeowners Get Wrong About Parging
The failures I see most often on parging jobs have almost nothing to do with the mortar mix and almost everything to do with what happened, or didn't happen, before the trowel ever touched the wall. Skipped prep is the pattern behind nearly every callback.
Before you hire anyone or pick up a trowel yourself, run through three things: confirm there's no structural movement hiding behind the cosmetic damage, make sure the old material actually gets removed instead of coated over, and ask how the mix was chosen for your specific masonry. Some masonry contractors back their work with a workmanship guarantee and offer free estimates, because getting the prep right the first time is always cheaper than fixing a failed coat twice.
— Thomas
Get a Foundation Assessed Before You Parge It
A rough foundation strip, flaking mortar, or old parging that's peeling away all point to the same next step: an honest look at what's underneath before anyone applies a new coat. Heritage Masonry & Brick handles that assessment directly, matching mortar type to your masonry, whether that's Type N for brick, Type S for block, or lime for a historic wall, instead of applying a one-size mix and hoping it holds.

If loose mortar joints are part of the problem, that's a job for repointing and tuckpointing before any parge coat goes on. If the damage runs deeper than the surface, structural repairs come first. For everything in between, from patching brick to a full foundation resurfacing, brick repair covers the work, backed by a free estimate and a 5-year workmanship guarantee. Request that estimate before the next freeze-thaw cycle does more damage to an already weak section.
Sources
For more on mix ratios, curing practice, and diagnosing failures, see the Fine Homebuilding parging mix guide and Brick Aid Masonry's breakdown of why parging cracks. Always check local building codes before starting exterior masonry work.
- Make Your Own Parging Mix - Fine Homebuilding
- Foundation Parging: What It Is + 5 Smart Steps - BasementMoistureLab
- What Is Parging? Why It Cracks and How to Fix It - Brick Aid Masonry
FAQ
Can I Parge My Foundation Myself?
Yes, for small, visible sections of foundation where the masonry underneath is structurally sound. DIY parging is common for cosmetic touch-ups, but larger areas, structural cracking, or waterproofing-related work call for a professional.
How Much Does It Cost to Parge a Foundation Wall?
Parging costs less per square foot than stucco, since it's typically a single coat rather than a multi-layer system. Exact pricing depends on wall condition, square footage, and mix type, so Heritage Masonry & Brick provides a free estimate rather than a flat rate.
What Are Common Parging Problems?
The most frequent issues are delamination, cracking, edge erosion near the soil line, and efflorescence. Nearly all of these trace back to poor surface prep, including skipped dampening, old material left in place, or a mortar mix too rigid for the masonry underneath.
Can I Parge Over Existing Parging?
Only if the existing coat is fully sound and well bonded, which is rare once cracking or flaking has started. In most cases, strip the old parging completely and start with a clean, dampened surface and a slurry coat rather than layering new mortar over a failing base.