
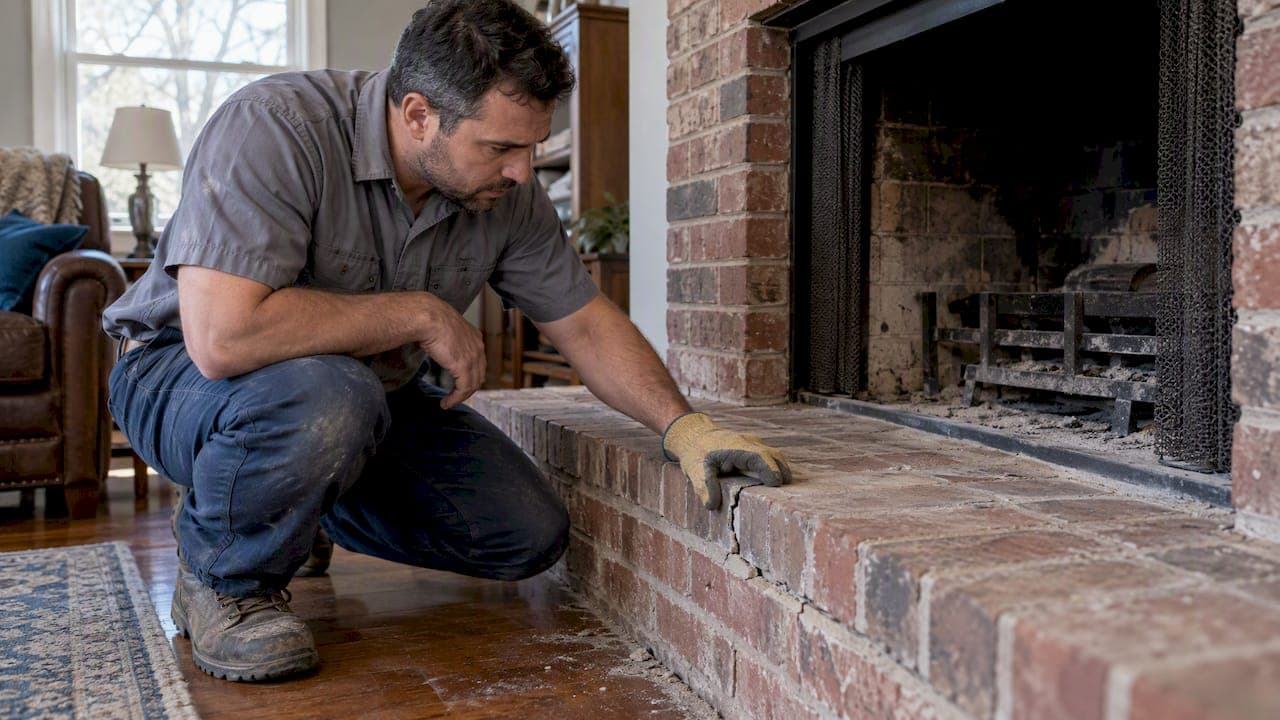
Most hearth damage, including small chips, hairline surface cracks, and a loose tile, is repairable without special training. The exception is structural damage: separation at the hearth-to-firebox joint, deep cracks that run full depth, or a sinking section. If you see those signs, stop using the fireplace, photograph the damage, and schedule an inspection before attempting any repair.
TL;DR:
- Measure the hearth extension against opening size: openings under six square feet need 16 inches in front and 8 inches on each side; larger openings need 20 and 12 inches.
- For cosmetic repairs, keep the fireplace cold, use fireplace rated patching compounds or thin set, and wait for the labeled cure time before lighting a fire.
- If the hearth separates from the firebox, cracks through its full depth, or sinks, stop using the fireplace and arrange a Level 1 inspection.
- Small patches take the same day to 48 hours, tile replacement takes 2 to 4 days, and full rebuilds can take several days to a week.
Table of Contents
- How to inspect your hearth and what each sign means
- Safe DIY repairs for chips, hairline cracks, and loose tile
- Resurfacing or replacing a hearth: the full step-by-step
- When inspection levels matter: NFPA and CSIA red flags
- What hearth repair costs and how long it takes
- Heat-rated mortars, grout, and the tools you'll need
- How a specialist approaches hearth repair
- A practical note on recurring damage
- Get a free hearth repair estimate from Heritage Masonry & Brick
- FAQ
- Sources
How to inspect your hearth and what each sign means
A careful visual check tells you almost everything you need to know before you pick up a tool. Walk around the hearth with a flashlight and look closely at the joint where the hearth meets the firebox, since that seam takes the most thermal stress over time.
Watch for these signs during your inspection:
- Cracked or missing firebrick inside the firebox opening.
- Loose or crumbling mortar between bricks or tiles.
- A visible gap or separation where the hearth meets the firebox.
- A hearth section that has tilted, sunk, or shifted from level.
- Smoke staining above the fireplace opening, which can point to draft or flue problems.
Separation at that hearth-to-firebox joint is worth treating seriously. Industry guidance on fireplace inspections notes that this kind of gap can expose combustible framing behind the masonry, which turns a cosmetic issue into a fire hazard. While you inspect, also check damper movement and measure your hearth extension against your fireplace opening. CSIA and NFPA inspection guidance specifies that a fireplace opening under six square feet needs a hearth extension of 16 inches in front and 8 inches on each side, while openings of six square feet or larger need 20 inches in front and 12 inches on each side. Photograph everything you find before you touch anything.
Safe DIY repairs for chips, hairline cracks, and loose tile
Small, cosmetic damage is the right scope for a homeowner repair. That means surface chips, hairline cracks that don't go through the full thickness of the hearth, and a single tile that has come loose but is otherwise intact.
- Clean the damaged area with a stiff brush and shop vacuum to remove ash, dust, and loose debris.
- Apply a heat-resistant patching compound or refractory epoxy into chips and hairline cracks, following the product's working time.
- For a loose tile, remove it fully, scrape off old adhesive, and reset it with heat-rated thin-set mortar and matching grout.
- Let the repair cure for the full time listed on the product label before lighting a fire.
Keep the fireplace cold throughout the job, wear gloves and eye protection, and work with good ventilation since mortar dust and epoxy fumes irritate your lungs and eyes. Photograph your progress at each step, both for your own record and in case you ever need it for an insurance claim.
Pro Tip: Buy a small extra tube of your patching compound. Hairline cracks have a way of reappearing near the original repair, and matching color and texture later gets harder once the first batch is used up.
Resurfacing or replacing a hearth: the full step-by-step
A damaged hearthstone that goes beyond chips and hairline cracks, think a cracked slab, missing sections, or a visibly uneven surface, usually calls for resurfacing or full replacement rather than a patch. This is a bigger job, but an experienced DIYer can often handle it with the right prep.
Start with preparation and protection:
- Lay down drop cloths to protect flooring and the mantel from dust and mortar splatter.
- Remove the damaged hearthstone or tile with a masonry chisel and grout saw, working in sections rather than trying to pry up the whole piece at once.
Once the old surface is out, check what's underneath. DoItYourself's step-by-step walkthrough on repairing a fireplace hearth outlines the standard sequence: clear debris, prepare forms where needed, then pour or set new hearth material. If the substrate shows signs it needs rebar or wire mesh reinforcement, that's a signal the job may exceed DIY scope, since reinforcement work ties into the structural support beneath the hearth.
From there, the process follows this sequence:
- Build simple wood forms if you're pouring concrete, sized to the hearth's exact dimensions.
- Mix and pour concrete, or reset stone and tile pieces, working in manageable sections.
- Level the surface with a screed board, then smooth with a trowel.
- Grout tile joints or finish concrete edges once the base material has set enough to hold shape.
- Let the new hearth cure for the time specified by your material, typically several days before any heat exposure.
Before your first real fire, run a brief, low, supervised burn to check for cracking, uneven heating, or smoke behavior that seems off. If cracks reappear in the same spot after a proper cure, that's often a sign of movement below the slab rather than a workmanship issue, and it's worth a follow-up inspection rather than another patch.
When inspection levels matter: NFPA and CSIA red flags
Professional chimney and hearth inspections follow a tiered system defined by NFPA 211. A Level 1 inspection covers readily accessible parts of the chimney and hearth and is the standard annual check. A Level 2 inspection goes further, adding video scanning of the flue and broader access, and it's required when you're selling a home, changing fuel types or appliances, or when you suspect structural damage or a chimney fire has occurred.
Call a professional rather than continuing DIY work when you see:
- Separation at the hearth-to-firebox joint that exposes framing behind the brick.
- Deep cracks that run the full depth of the hearth material.
- A hearth section that has visibly sunk or tilted.
- The same crack returning after a proper patch and cure.
- Any sign of a past chimney fire, such as warped metal or heavy creosote buildup.
If any of these apply, stop using the fireplace, document what you see with photos, and arrange a Level 1 inspection first. A qualified inspector will tell you whether the situation calls for escalation to Level 2.
What hearth repair costs and how long it takes

Cost depends heavily on scope. A cosmetic patch on a chip or hairline crack is inexpensive and quick. Resetting a loose tile costs more in time than materials. A full hearth rebuild, especially one that requires new reinforcement or reveals hidden damage once you open up the area, runs the highest and takes the longest.
Timelines generally break down this way:
- A small surface patch: same day to 48 hours, including cure time.
- Tile replacement: 2 to 4 days, accounting for adhesive and grout curing.
- Full hearth rebuild: several days to a week, plus additional curing time before use.
When you request quotes, ask for an itemized breakdown rather than a flat number, request photos of the problem areas the contractor identifies, and confirm the scheduling window and warranty terms in writing before work begins.
Heat-rated mortars, grout, and the tools you'll need
Not every mortar or grout is rated for fireplace heat, so check labels carefully before buying. Look for products marked as refractory mortar, high-temperature grout, or heat-rated thin-set, since standard construction adhesives and grout break down under repeated heat cycling.
For tools, a basic homeowner kit covers most repairs:
- A masonry chisel and hammer for removing damaged material.
- A grinder with a diamond blade for cutting tile or stone, used only with eye and ear protection since it throws dust and debris.
- Trowels in a couple of sizes, a shop vacuum, and standard PPE: gloves, a dust mask, and safety glasses.
Pro Tip: Keep the product data sheet and your receipt for any heat-rated material you buy. If you ever need warranty support or have to file an insurance claim after fire damage, that paperwork saves time.
Buy fireplace-rated products specifically, not general-purpose versions, and if a job calls for specialized refractory castable or firebox panel replacement, that's usually a sign to bring in a mason rather than improvise.

How a specialist approaches hearth repair
Experience in masonry repairs emphasizes matching existing materials closely enough that the repair disappears into the surrounding structure. That means sourcing brick, stone, or tile that mirrors the original in color and texture, not just a close approximation.
Our process combines traditional masonry techniques with current materials and methods, and every estimate includes:
- A documented inspection with photos of the damage and its likely cause.
- A clear scope and timeline before any work starts.
- A written proposal backed by a 5-year workmanship guarantee.
We also offer free estimates on every job, so you know the full scope before committing.
A practical note on recurring damage
I'd patch a chip or hairline crack myself without hesitation. The moment a crack comes back after a proper repair, though, that's not a patching problem anymore, it's a sign something underneath needs attention. Document what you see, keep your photos, and get a professional opinion before the damage spreads.
— Thomas
Get a free hearth repair estimate from Heritage Masonry & Brick

If your inspection turned up more than a surface fix, that's exactly where we come in. We handle brick repair, structural masonry repairs, and chimney repair, all backed by material matching and a 5-year workmanship guarantee.
At your estimate, expect:
- A full inspection with photos documenting the damage and its cause.
- An itemized, written proposal with a realistic timeline.
- A workmanship guarantee covering the completed repair.
Request your free estimate today and get a documented plan before the damage gets worse.
FAQ
How much does it cost to replace a hearth?
Cost depends on scope: a cosmetic patch costs far less than a full rebuild, and hidden damage or reinforcement needs can raise the price once a contractor opens up the area. For an accurate number, request an itemized quote from a mason after an in-person inspection.
How can I repair cracks in my fireplace hearth?
Small hairline cracks can be cleaned and filled with a heat-resistant patching compound or refractory epoxy, then left to cure fully before you use the fireplace again. Deep, full-depth cracks or ones that keep returning after a patch usually point to a structural issue and need a professional inspection rather than another DIY fix.
How do I redo a fireplace hearth?
A full redo starts with removing the damaged hearthstone or tile, checking the substrate for needed reinforcement, then pouring new concrete or resetting stone and tile before leveling, grouting, and curing. Step-by-step guidance covers the standard sequence, though jobs needing new rebar or mesh often call for a professional.
Can you replace a fireplace hearth?
Yes, a damaged hearth can be fully replaced, either by resurfacing the existing base or rebuilding it from the substrate up. Whether that's a reasonable DIY project or a job for a mason depends on whether the damage is cosmetic or involves structural elements like reinforcement and framing.
Sources
- Level 1 Inspection of a masonry fireplace — CSIA / NFPA guidance
- The importance of annual fireplace inspections — The Grate Haus
- Repairing a Fireplace Hearth — DoItYourself