
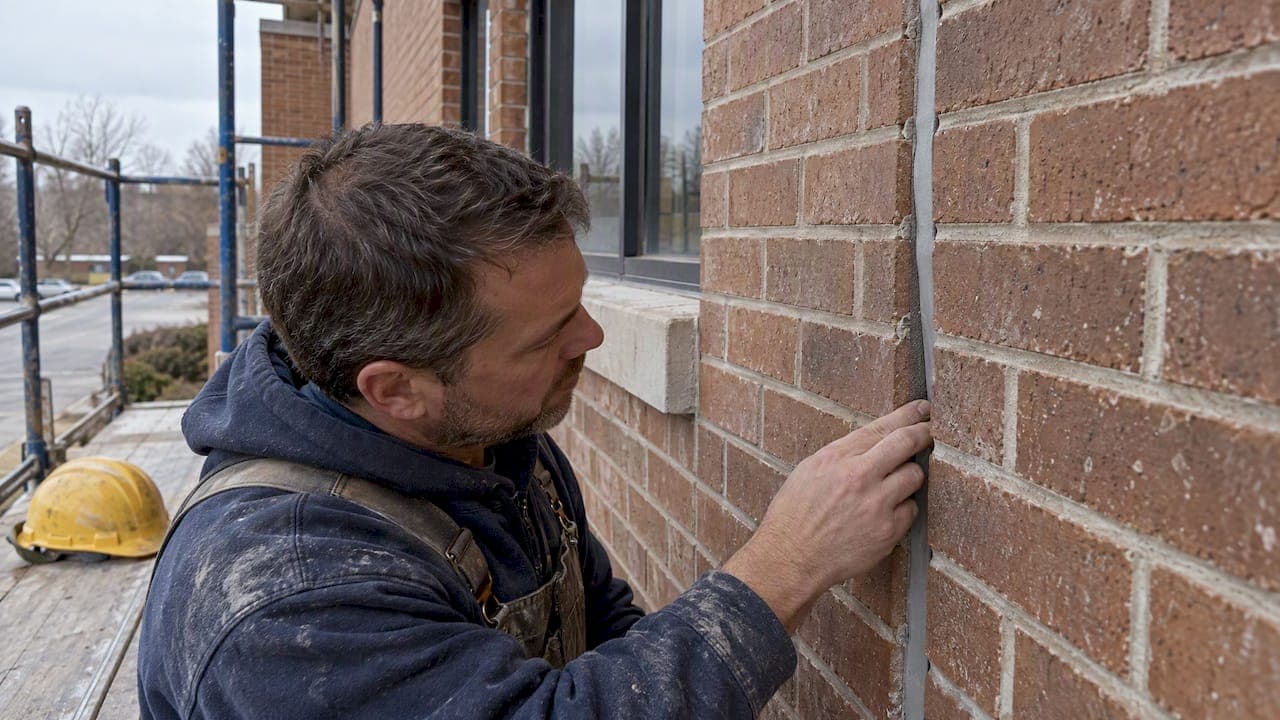
Yes, most long runs of clay-brick veneer need expansion joints, because fired brick expands as it absorbs moisture and heat, and a wall with nowhere to move eventually cracks. The standard assembly is a compressible backer rod set to the correct depth, topped with a compatible elastomeric sealant, in a joint typically 3/8 to 1/2 inch wide. If you see stair-step cracking, bridged joints, or missing joints on a long wall, it's time to call a masonry professional for an assessment.
TL;DR:
- Proper spacing of expansion joints generally ranges from 20 to 25 feet based on wall complexity and openings, with tighter spacing needed around multiple openings and parapets.
- Sealant and backer rod installation depth are critical; incorrect application height or skipping the backer can lead to early joint failure and cracking.
- Cracks at joints often indicate improper installation or structural issues rather than just the need for sealant replacement.
- Water intrusion caused by failed joints can lead to steel tie corrosion, insulation damage, and structural deterioration over time.
- Correct assessment involves checking ties, flashing, active cracks, and connection with structural supports before replacing or adding joints.
Table of Contents
- What Expansion Joints Are and How They Differ From Control Joints
- Where Expansion Joints Go: Spacing and Placement Rules
- Sizing the Joint and Choosing Backer and Sealant Materials
- How Expansion Joints Get Installed in the Field
- Diagnosing Cracks: Repointing, Joint Replacement, or Structural Repair
- What Heritage Masonry & Brick Checks Before Recommending Joint Work
- Coordinating Joints With Reinforcement, Ties, and Material Transitions
- Case Studies in Successful and Failed Expansion Joint Installations
- Why Improper Expansion Joints Threaten Building Durability
- The Overlooked Variable in Expansion Joint Failures
- Sources
- FAQ
What Expansion Joints Are and How They Differ From Control Joints
An expansion joint is a purpose-built gap in a brick wall, filled with a compressible material and sealed, that allows brick to grow slightly without cracking the wall around it. A control joint does the opposite job on a different material: it's a designed weak point in concrete masonry (CMU) that lets the block shrink in a predictable, hidden line rather than a random crack across the face.
The two get confused constantly, but the physics behind them run in opposite directions. Fired clay brick absorbs moisture from the air after it comes out of the kiln and expands permanently over time, then continues to expand and contract seasonally with temperature and humidity. Concrete masonry does the reverse: it loses moisture as it cures and shrinks for years afterward. According to Brick Industry Association guidance, that expansion in clay brick is typically no more than 0.10 inches over a 25-foot run, which sounds small until you consider that brick has almost no ability to stretch without cracking.
That's the core problem expansion joints solve: cumulative movement. A single brick barely moves at all, but string a few hundred feet of them together into one continuous veneer and the total growth adds up fast. Without a place to release that stress, it concentrates wherever the wall is weakest, usually at a corner, an opening, or a change in support. Segmenting a long wall into shorter panels with expansion joints keeps each section's movement small enough that the mortar joints and sealant can absorb it.
The distinction matters most at the point of use:
- Brick veneer on a wood or steel frame almost always needs expansion joints because the brick moves independently of the structure behind it.
- Structural (load-bearing) masonry built with brick and CMU together needs both expansion joints in the brick and control joints in the block, since the two materials move in opposite directions.
- Short walls under roughly 20 feet with few openings sometimes get by without a joint, but that's a judgment call, not a rule to lean on.
- Parapets and freestanding brick walls are exposed on both faces to temperature swings and usually need closer joint spacing than a shaded veneer wall.
Getting this right at the design stage is far cheaper than diagnosing a cracked wall later, which is why the spacing rules in the next section exist in the first place.
Where Expansion Joints Go: Spacing and Placement Rules
Placement is less about picking a number off a chart and more about identifying every point where a brick wall's movement path gets interrupted. Spacing rules give you a starting point, but corners, openings, and support changes usually decide the final layout.
- Set a baseline spacing of roughly 20 to 25 feet on straight runs. CMHA TEK guidance recommends spacing closer to 20 feet on walls with multiple openings and allows up to 25 feet on plainer walls with few interruptions.
- Tighten spacing whenever openings multiply. Every window or door is a stress riser, and a wall punched full of openings needs its movement broken into smaller segments than a solid one.
- Place a joint at every outside corner or within a few feet of it. Corners see the combined movement of two intersecting wall planes and are among the first places cracking shows up when a joint is missing.
- Add joints at wall offsets and setbacks. Any change in the wall's plane concentrates stress in the same way a corner does.
- Locate joints at intersections with dissimilar materials or structural elements. Where brick meets a different wall system, a column, or a structural frame, the two components rarely move at the same rate.
- Terminate horizontal expansion joints at shelf angles or other supports. Per BIA Technical Note 18A, a horizontal joint only works if the brickwork above it is independently supported, so the joint has to line up with wherever that support actually is.
- Reduce spacing on parapets. Parapets are exposed on both sides to the weather and swing through wider temperature ranges than a shaded veneer wall, so they generally need closer-spaced vertical joints, sometimes with an added vertical joint terminating into a horizontal one.
- Group joints around window and door clusters rather than spacing them evenly. A ribbon of openings behaves as one long weak zone, and joints should bracket the whole group instead of falling at an arbitrary interval.
- Match joint locations to structural modules where the building's frame dictates movement. If the structure behind the veneer has its own expansion joints or movement points, the brick joints should align with them, not run on an independent grid.
- Treat mixed brick and CMU bands as a special case. CMHA guidance notes that because brick expands while concrete masonry shrinks, a narrow band of one material set into the other either needs extra expansion joints of its own or the design has to accept and cosmetically repair the cracking that will eventually appear in the CMU.
None of these rules replace an engineer's judgment on a specific building, but they give you a reasonable way to check whether an existing wall's joint layout makes sense or whether it was value-engineered out during construction, which happens more often than anyone likes to admit.
Sizing the Joint and Choosing Backer and Sealant Materials
A brick expansion joint is only as good as its width-to-depth ratio, called the shape factor, and the materials packed into it. Get either one wrong and the sealant fails long before the brick does.
Most residential and light commercial expansion joints run 3/8 to 1/2 inch wide, sized to the expected movement of the panel they serve. Wider joints are needed on longer panels or in climates with bigger temperature swings, since the joint has to absorb more total movement. ASTM C1472 lays out the calculations designers use to size a joint to the movement it will actually see, rather than guessing.
The brick's own expansion is the starting number behind all of this.
Brick moisture expansion typically runs no more than 0.10 inches per 25 feet of wall, and that figure, combined with expected thermal movement, is what a joint width calculation is built around.
The backer rod's job is often underrated. It's a compressible foam cylinder pushed into the joint before the sealant goes in, and it does two things: it controls how deep the sealant sits, and it stops the sealant from bonding to the back of the joint. That second point matters more than most homeowners realize.
- Backer depth controls sealant shape. CMHA TEK 19-06A notes that for joints between 1/4 and 1/2 inch wide, sealant depth generally shouldn't exceed the joint's width, and the backer rod is the tool that keeps that depth consistent along the whole run.
- Three-sided adhesion is a common failure mode. If sealant bonds to the back of the joint as well as both sides, it can't stretch and compress the way it's designed to, and it tears.
- Sealant needs a rated movement capacity, not just a good reputation. ASTM guidance points to elastomeric sealants with movement capacity around ±12.5% for many products, chosen to match the calculated joint width and expected cyclic movement.
- Polyurethane, silicone, and polysulfide are the common choices, each with tradeoffs. Polyurethane is workable and paintable, silicone handles UV exposure and temperature extremes well, and polysulfide holds up under sustained chemical exposure, but all three depend on the right primer for the specific brick and mortar being sealed.
- Primer isn't optional on porous or dusty masonry. Skipping it, or using the wrong one for the sealant chemistry, is one of the more preventable reasons a joint fails within a few years instead of lasting the length of its warranty.
A premium sealant installed at the wrong depth, without a backer rod, or without the right primer will fail no matter what the label promises. The material matters, but the geometry it's installed into matters just as much.
How Expansion Joints Get Installed in the Field
A correctly sized joint still fails if it's installed poorly, and workmanship is the variable that shows up most often when a joint doesn't make it to its expected service life.
- Rake out the mortar to full joint depth. Any residual mortar left in the cavity defeats the purpose of the joint by giving the brick something rigid to push against.
- Clean both faces of the joint thoroughly. Dust, mortar fines, and old sealant residue all interfere with adhesion, and a wire brush or grinder pass followed by a blow-out is standard practice.
- Install the backer rod at the calculated depth. The rod should sit slightly compressed in the joint, controlling sealant depth without protruding past where the sealant needs to sit.
- Apply primer if the sealant and substrate call for it. This step gets skipped under time pressure more than any other, and it's rarely visible until the joint has already failed.
- Apply the sealant and tool it to a smooth, slightly concave profile. Tooling isn't cosmetic. It seats the sealant against both side walls and eliminates air pockets that would otherwise become tear points.
- Time the installation around temperature. Sealant applied in extreme heat or cold cures differently than it was designed to, and most manufacturers specify an application temperature range for good reason.
The most common errors show up in a predictable pattern: mortar bridging the joint during a repointing job that wasn't planned around it, backer rod set too shallow or too deep, three-sided adhesion from skipping the backer rod entirely, and sealant applied outside its rated temperature range, as explained in detail in Polymeric Sand Problems: Common Failures and Fast Fixes. Each one is preventable and each one shortens the joint's working life significantly.
Pro Tip: After the sealant cures, a light tug test at a few points along the joint, checking that it flexes and releases cleanly without pulling away from either brick face, is a quick way to confirm adhesion before calling the job finished.
Diagnosing Cracks: Repointing, Joint Replacement, or Structural Repair
Not every crack near a brick joint means the same thing, and figuring out which category a crack falls into is the first real decision point in any repair.
Start with the basics: is the wall veneer or structural? A veneer wall's brick is decorative and non-load-bearing, tied back to a frame, while a structural wall carries load itself. That distinction changes what a crack might mean and how urgently it needs attention.
- Check flashing and weeps. Missing or deteriorated flashing lets water sit behind the brick, and trapped moisture accelerates both brick expansion and mortar deterioration.
- Inspect the ties. Veneer ties need to hold the brick to the backup wall while still allowing enough flex for panels on either side of an expansion joint to move independently.
- Look at shelf angles for signs of overload or corrosion. A shelf angle that's rusted or undersized can't support the brick above it, which throws off the whole logic of a horizontal joint.
- Determine whether a crack is active. A simple monitoring approach, marking the crack width and rechecking it over weeks or months, shows whether it's stable or still opening.
- Map where the cracking concentrates. Stair-step cracking at a corner, diagonal cracking from a window corner, or cracking that lines up with a missing or bridged joint all point toward restrained movement rather than a foundation problem.
The decision flow from there is fairly direct. If the joint is simply missing, bridged with mortar, or undersized and the surrounding brick otherwise looks sound, replacing or adding the joint with proper backer and sealant usually resolves it. If flashing, weeps, or ties are also compromised, the fix needs to include those components, not just the sealant. And if the cracking traces back to differential settlement, an undersized shelf angle, or a structural issue with the backup wall, no amount of sealant work will hold, and the wall needs a structural evaluation before any cosmetic repair happens. A more detailed walkthrough of that decision process, including when a DIY patch is reasonable and when it isn't, is covered in this guide to diagnosing and repairing brick cracks.
What Heritage Masonry & Brick Checks Before Recommending Joint Work
Heritage Masonry & Brick treats an expansion joint problem as an assembly problem, not a caulk-gun problem, because a joint that's failing is often a symptom of something else going on behind the brick face. Before recommending any joint repair, the assessment covers a consistent set of checks.
- Tie condition and spacing, confirmed by probing at accessible points to see whether the veneer is still properly anchored.
- Flashing and weep function, checked for water staining, efflorescence, or blockages that suggest moisture is trapped rather than draining.
- Active crack testing, using simple width monitoring over time to separate a stable, cosmetic crack from one still opening.
- Panel isolation, verifying that expansion joints actually run through the full assembly rather than stopping short at the mortar joint above or below.
On the installation side, backer rod depth, tooling quality, and sealant compatibility with the existing brick and mortar are non-negotiable steps, not optional refinements. That level of attention is backed by a workmanship guarantee, which gives clients a concrete assurance that the joint work is expected to perform, not just look finished on handoff.
Some jobs call for more than a joint swap. When flashing or ties turn up compromised during inspection, repointing and tuckpointing work usually needs to happen alongside the joint replacement, and when cracking traces back to a structural cause, that gets flagged for structural brick and masonry repair rather than patched over. Clients are walked through which fix addresses the actual cause versus which fix only buys time, so the money goes toward the repair that actually holds.
Coordinating Joints With Reinforcement, Ties, and Material Transitions
An expansion joint doesn't work in isolation. It has to be coordinated with the reinforcement, ties, and structural supports around it, or the joint becomes decorative rather than functional.
- Joint reinforcement must stop at the expansion joint, not run through it. Continuous horizontal reinforcement across a joint locks the two panels together and defeats the purpose of separating them.
- Veneer ties on either side of a joint need enough flexibility to allow in-plane movement while still holding each panel to its backup wall. A rigid tie right at the joint line can crack the brick around it instead of letting the joint absorb the stress.
- Horizontal joints typically terminate at shelf angles, since BIA guidance treats the shelf angle as the support point that lets the brick above move independently. On parapets and at lintels, that means the horizontal joint location is dictated by where the support actually sits, not by an arbitrary height.
- Mixed brick and CMU bands need their own detailing. Because the two materials move in opposite directions, a narrow brick band set into block, or vice versa, either needs an extra expansion joint of its own or an accepted plan for cosmetic cracking in the CMU over time.
Case Studies in Successful and Failed Expansion Joint Installations
The pattern in successful installations is consistent: joints placed at every corner and opening cluster, backer rod set to the calculated depth, and sealant matched to the brick's expected movement. Walls built this way tend to show tight, uniform joints years later with no stair-step cracking radiating from corners or window heads.

Failed installations tend to share a different set of traits. A long veneer run with no joint at all, or one placed at a single arbitrary interval regardless of corners and openings, typically shows diagonal cracking fanning out from window corners within a few years. Bridged joints, where mortar or old paint sealed over the gap during a repointing job that didn't account for the joint's purpose, show the same pattern: the wall had a release valve and someone closed it. Three-sided adhesion from a skipped backer rod shows up as sealant that's torn away from one face while still bonded to the back of the joint, a telltale sign the joint was never able to flex.
The lesson across both outcomes is the same one that runs through every section above: placement and workmanship matter as much as the sealant brand on the tube.
Why Improper Expansion Joints Threaten Building Durability
A missing or failed expansion joint rarely stays a cosmetic issue. Once brick movement is restrained, stress concentrates at corners, openings, and support changes, and that stress has to go somewhere. It shows up as cracked brick and mortar first, but the same restrained movement can eventually loosen ties, stress flashing, and open paths for water intrusion behind the veneer.
Water is the real long-term threat. A cracked joint or an overstressed sealant lets moisture behind the brick face, where it can corrode steel ties and shelf angles, saturate insulation, and accelerate freeze-thaw damage in colder climates. What started as a joint problem becomes a tie problem, then a flashing problem, then a structural problem, each stage more expensive to fix than the last.
Safety enters the picture when the damage reaches shelf angles or ties, since a veneer wall depends on both to stay attached to the structure behind it. That's a slow-developing risk rather than a sudden one, but it's exactly why a hairline crack near a missing joint is worth taking seriously well before it becomes a falling-brick hazard.
The Overlooked Variable in Expansion Joint Failures
Most advice on brick expansion joints fixates on spacing charts, as if picking the right number of feet between joints solves the problem. It doesn't. The technical guidance from BIA, ASTM, and CMHA is solid, but spacing is only the starting point, and workmanship is where most real-world failures actually originate.
A joint sized and spaced correctly on paper still fails if the backer rod sits at the wrong depth, if mortar bridges the gap during a later repointing job, or if the sealant goes in on a freezing day with no primer. Homeowners tend to focus on whether a joint exists at all, when the more useful question is whether it was installed correctly and whether it's still doing its job.
If you take one thing from all of this, it's that a crack near a corner or window isn't automatically a foundation problem, and it isn't automatically fixed by a tube of caulk either. It's worth figuring out which one it actually is before spending money on the wrong repair.
— Thomas
Sources
- Accommodating Expansion of Brickwork (BIA Technical Note 18A)
- ASTM C1472 guide (sealant joint sizing) / referenced standards
- CMHA guidance on movement joints and spacing
- CMHA TEK 19-06A: Joint sealants for concrete masonry
- ASTM C1472-16 Guide for Calculating Movement and Other Effects When Establishing Sealant Joint Width
FAQ
Do brick walls need expansion joints?
Most long runs of clay-brick veneer need expansion joints because brick expands as it absorbs moisture and heat, and a wall with no release point will eventually crack under that restrained movement. Short walls with few openings sometimes get by without one, but that's a judgment call best confirmed by a masonry professional.
How far apart should expansion joints be in brickwork?
A common starting point is spacing closer to 20 feet on walls with multiple openings and up to 25 feet on plainer walls, though corners, offsets, and support changes often dictate the final layout more than the spacing number itself. Parapets and freestanding walls generally need tighter spacing because they're exposed to wider temperature swings.
Do you caulk expansion joints in brick?
Yes, but the caulk, technically an elastomeric sealant, only works correctly over a compressible backer rod set to the right depth, never applied directly into an open joint. Skipping the backer rod is one of the most common reasons sealant tears away from the brick within a few years.
What to use in brick expansion joints?
A typical assembly uses a foam backer rod to control depth, followed by a compatible elastomeric sealant, commonly polyurethane, silicone, or polysulfide depending on exposure and movement needs. The right primer for the specific brick and sealant combination is also part of the assembly, not an optional add-on.