
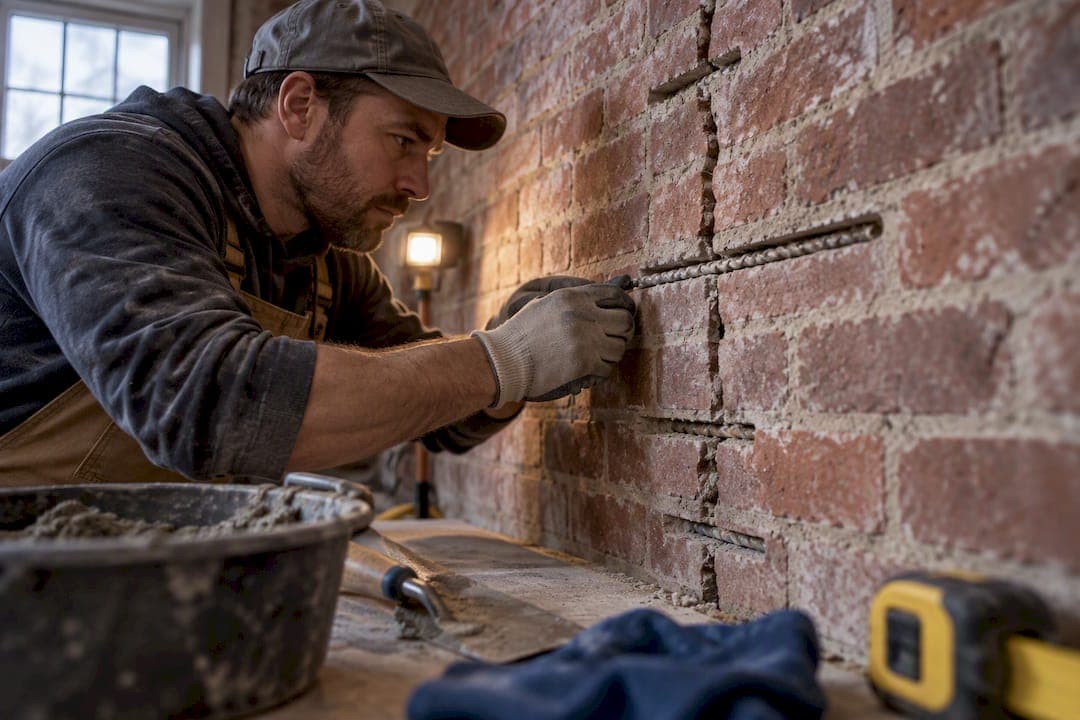
Masonry crack stitching is a permanent structural repair that uses stainless-steel helical bars bonded into grout to reconnect masonry that has cracked along its bed joints. It works best on standing walls with settlement or thermal cracking that has stopped moving, and it preserves original brick and stone rather than requiring a rebuild. If a crack is actively widening or the wall shows signs of tilting, inspect it, monitor it for a few weeks, and bring in a structural engineer before any repair begins.
TL;DR:
- Crack stitching reconnects masonry with stainless-steel helical bars, but it does not address the underlying cause of ongoing movement or settlement.
- The repair is suitable only once movement has stopped, and cracks wider than 5 millimeters or spanning multiple courses should prompt professional assessment.
- Proper installation requires careful slot cutting, thorough cleaning, and matching grout and materials to ensure durability and avoid premature failure.
- If cracks are caused by foundation or structural issues, crack stitching will not prevent re-widening and must be preceded by a structural diagnosis.
- Homeowners should request a detailed inspection, monitor crack progress, and consult with certified professionals for load-bearing or active cracks before DIY repairs.
Table of Contents
- What crack stitching is, and where it works best
- Common causes of masonry cracking and what the pattern tells you
- Step-by-step: how helical bar crack stitching is installed
- Materials, tools, and technical specs for a durable repair
- Inspecting your wall and knowing when to escalate
- Deciding between a DIY repair and hiring a contractor
- How Heritage Masonry & Brick approaches crack-stitching projects
- A straight answer on doing this right
- Get a professional assessment for your cracked masonry
- Sources
- FAQ
What crack stitching is, and where it works best
Crack stitching involves cutting shallow slots into the mortar joints on either side of a crack, embedding helical bars in those slots, and bonding them with grout so the two sides of the wall act as one continuous section again. The helical shape of the bar grips the surrounding grout along its full length, which spreads load across the repair instead of concentrating it at a single point.
The method has a specific set of practical advantages for homeowners and property managers dealing with cracked brick or block walls.
- The repair is concealed once repointed, so the wall's appearance is restored rather than patched.
- It avoids the cost and disruption of partial rebuilding, since only the mortar joints are opened, not the masonry units.
- It preserves original brick, stone, or historic fabric, which matters for older homes and conservation properties.
- It can be phased alongside repointing work, so a wall gets structural and cosmetic repair in one project.
Crack stitching has real limits, though. It reconnects the masonry, but it does not address whatever caused the crack in the first place. A foundation that is still settling, a lintel that is still deflecting, or a drainage problem that keeps soaking the footing will keep moving the wall regardless of how many bars go into it. Professional guidance on crack stitching consistently frames it as a stabilization method that has to follow, not replace, a proper diagnosis of the root cause. Anyone unsure whether their crack reflects a one-time event or an ongoing problem should treat that uncertainty as the first thing to resolve, not the repair itself.
Common causes of masonry cracking and what the pattern tells you
Most masonry cracks trace back to one of five mechanisms: foundation settlement, freeze-thaw cycling in the mortar, thermal expansion and contraction, a failing lintel or bearing point over an opening, or moisture intrusion that has softened the mortar or corroded embedded metal. Reading the crack pattern is the fastest way to narrow down which one you are dealing with.
- Stair-step cracks that follow the mortar joints diagonally usually point to differential settlement under one part of the foundation.
- Vertical cracks running straight through several courses often indicate thermal movement or a control joint that was never installed.
- Horizontal bed-joint separations can signal masonry that has bowed outward, sometimes from corroded wall ties or expansive soil pressure.
- Hairline cracks under about 1.5 millimeters are frequently cosmetic, while cracks that keep widening are a structural warning sign.
A homeowner's guide to stair-step cracks breaks down how to read the direction and width of stepped cracking in more detail, which is useful before deciding on repair scope. The red flags that should stop any DIY plan are cracks wider than roughly 5 millimeters, diagonal cracking that runs through multiple courses in a stair pattern, doors and windows that have started binding, or any visible tilt or bulge in the wall. Manufacturer guidance for helical bar systems is explicit that a structural engineer should be consulted before structural repair work begins when the cause of the cracking is not already understood.
Step-by-step: how helical bar crack stitching is installed
Before any slot gets cut, the crack needs a baseline record: width at three or four points, photos with a scale reference, and a note on whether the crack has changed over the prior weeks. This record matters both for verifying the repair worked and for any future insurance or resale conversation.
- Confirm the wall is stable. Check for active movement, dampness in the substrate, and any deflection in nearby lintels before committing to a repair plan.
- Mark slot locations. Space horizontal slots roughly every 4 to 6 brick courses, which typically works out to 300 to 450 millimeters depending on wall thickness, following manufacturer spacing guidance for helical bar systems.
- Cut the slots. Use a chasing saw or angle grinder to cut into the mortar joint, not the brick itself, extending each slot at least 500 millimeters past the crack or past the edge of any opening it runs near.
- Clean the slots. Remove all dust and loose mortar with compressed air so the grout can bond directly to sound masonry.
- Mix and apply grout. Inject a continuous bead of grout into the slot using a grout gun, filling it before the bar goes in rather than after.
- Insert the helical bar. Press the bar into the wet grout so it sits fully embedded, overlapping adjoining bar sections by at least the manufacturer's recommended distance where a single slot needs more than one length.
- Bend bars around corners. Where a slot turns a corner, bend the bar to follow it and maintain the same embedment depth rather than terminating it at the corner.
- Top off and tool the joint. Apply a final layer of grout flush with the joint face, then tool it to match the surrounding mortar profile.
- Repoint to match. Blend the repaired joint into the surrounding wall using mortar matched for color and texture.
- Monitor after the repair. Recheck the crack at intervals over the following months to confirm no further movement.
Pro Tip: Photograph each slot before grouting so you have a visual record of bar placement and depth if a warranty or resale inspection ever asks for one.
Materials, tools, and technical specs for a durable repair
The bars themselves are typically 6 millimeter diameter stainless-steel helicals, with 304 grade adequate for most inland walls and 316 grade recommended near coastal salt exposure or where de-icing salts are common. Grout selection depends on the application: cementitious grout suits most masonry crack stitching, while resin or epoxy-based systems are specified for higher-load anchoring work, including the two-component structural epoxies that the New York State DOT specification for cross-stitching PCC pavement requires for concrete slab repairs. That DOT spec is written for pavement, not brick walls, but its drilling and anchoring discipline, angled holes at 30 to 35 degrees and spacing of 16 to 20 inches, illustrates the same quality-control logic that governs any structural anchoring: clean holes, correct bit size, and full anchor engagement.
- Slot depth and bar cover follow wall thickness, with manufacturer tables specifying deeper slots for thicker walls to keep adequate grout cover on all sides of the bar.
- Overlap joints and corner bends should extend at least 500 millimeters beyond the crack, opening, or corner.
- Drilled holes should be cleaned with compressed air before anchoring material goes in, a step the DOT spec calls out explicitly for concrete anchoring.
- A basic tool kit includes a chasing saw or grinder, a grout gun, a mixing paddle, compressed air, and dust control equipment along with standard PPE: gloves, eye protection, and a dust mask rated for silica.
Skipping the hole-cleaning step is one of the most common reasons a stitched crack fails prematurely, since dust left in the slot blocks the grout from bonding fully to the masonry.
Inspecting your wall and knowing when to escalate
A simple crack gauge, or even a strip of masking tape marked with a date and a pencil line, lets you track whether a crack is widening over a few weeks. Photograph it against a ruler at the same angle each time so the measurements are comparable.
- Check for dampness or efflorescence near the crack, since moisture intrusion changes both the urgency and the likely cause.
- Note whether the crack appears only on the exterior face or extends through to an interior wall, which helps distinguish a cosmetic issue from a structural one.
- Treat any crack wider than roughly 5 millimeters, any stair-step pattern spanning multiple courses, or any sign of wall bulge or tilt as a reason for immediate professional assessment.
- Expect an engineer's survey to produce a written report identifying the likely cause, a recommended repair scope, and often a monitoring period before repair work starts.
A broader walkthrough on assessing brick cracks and knowing your DIY limits covers the difference between cracks that are safe to watch and ones that need a same-week call to a professional.
Deciding between a DIY repair and hiring a contractor
Small, stable hairline cracks in a garden wall or a non-load-bearing partition are reasonable DIY candidates for anyone comfortable with a grinder and a grout gun. Cracks in load-bearing walls, chimneys, retaining walls, or anywhere near a foundation should go to a licensed contractor or structural engineer, since a misdiagnosed cause can mean a repair that looks fine for a year and then reopens.
- Ask how many years the contractor has performed crack stitching specifically, not just general masonry repair.
- Request references or photos from prior stitching jobs, ideally with before-and-after documentation.
- Confirm which bar and grout system they use and whether it matches manufacturer specifications for your wall type.
- Ask what warranty covers the repair and for how long.
- Get a written quote that separates diagnostics, materials, labor, access or scaffolding, and any post-repair monitoring.
A guide to repointing tests and contractor questions has additional vetting questions worth asking when a project combines stitching with repointing.
How Heritage Masonry & Brick approaches crack-stitching projects
The company has experience providing masonry and brick repair services, including structural repairs, repointing, and tuckpointing across residential and commercial properties. A crack-stitching project typically starts with a site survey to identify the likely cause of the cracking, followed by a documented repair plan that specifies bar placement, grout type, and finish work before anything gets cut into the wall.
Every completed project is supported by a workmanship guarantee, and mortar work is matched to the existing wall to ensure the repair blends in once repointed. That combination of documentation and material matching is what turns a structural repair into one a lender or future buyer can review with confidence, not just a patched-over crack.

A straight answer on doing this right

The biggest mistake homeowners make with crack stitching is treating it as a fix for the crack rather than a fix for the masonry once the actual cause is understood. A bar and some grout will reconnect a wall beautifully, but if the footing underneath is still settling, that reconnected wall will crack again in a different spot within a year or two.
Get the diagnosis right first, even if that means paying for a survey before you touch a grinder. A correctly specified installation, with the right slot depth, the right bar spacing, and a grout that matches the load it needs to carry, holds up for decades. A rushed one is a cosmetic patch wearing a structural repair's reputation.
— Thomas
Get a professional assessment for your cracked masonry
For those preferring a documented, warrantied repair over a weekend project with uncertain outcomes, free estimates on crack stitching, structural repairs, and finishing repointing are offered by a local masonry contractor. The structural masonry repair service offered covers everything from diagnostic assessment through matched repointing and is backed by a workmanship guarantee on every completed project.

A typical visit starts with a walk-through of the affected wall, a written scope covering materials and access requirements, and a quote broken out the way any careful contractor should present one. If your crack has been widening, or you simply want a second opinion before committing to DIY, request a structural brick and masonry repair quote and get a plan you can act on with confidence.
Sources
- Masonry Crack Stitching System (BrickFix technical datasheet)
- 512.1M000018 – Cross stitching longitudinal cracks in PCC pavement (NY DOT spec)
FAQ
Does crack stitching work?
Crack stitching works reliably when the underlying cause of the crack has stopped moving and the installation follows manufacturer specifications for bar spacing, overlap, and grout selection. It reconnects the masonry structurally, but it will not hold if the wall is still settling or shifting from an unresolved cause.
What is crack stitching in brickwork?
Crack stitching in brickwork is a repair method that embeds stainless-steel helical bars into mortar joint slots on either side of a crack, bonding them with grout to reconnect the two sides of the wall. It is typically finished with repointing so the repair blends into the surrounding brick.
How much does crack stitching repair cost?
Cost depends on wall thickness, crack length, access requirements, and whether repointing is included, since each of those changes the labor and materials involved. Heritage Masonry & Brick provides free estimates based on a site survey rather than a flat rate, since scope varies significantly by project.
How do you stitch concrete cracks?
Concrete crack stitching for pavement follows a different specification than masonry, typically using drilled holes at angled orientations with two-component structural epoxy anchors rather than helical bars set in mortar slots, as outlined in the New York State DOT specification. Masonry wall stitching instead uses helical bars bonded into cut mortar joints, which is the method this guide focuses on.