
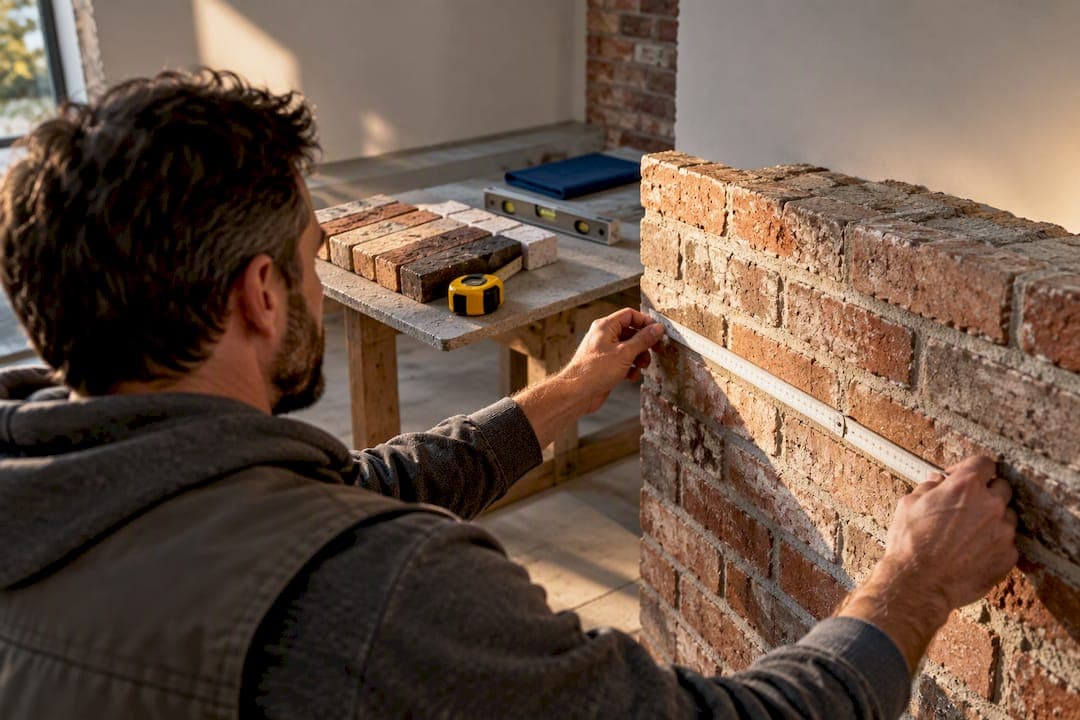
A complete masonry estimate spells out scope, exact quantities, material specs, mortar and reinforcement, labor hours, waste allowances, permits, and payment terms in writing. This masonry estimate checklist walks through every line item a contractor should include, shows the formulas behind a real takeoff, and gives you a worked example so you can check any quote before you sign it.
TL;DR:
- Masonry estimates must include precise scope details, such as structure type, square footage, and specific work divisions to avoid hidden costs.
- Accurate quantity takeoffs require measuring net area, converting to unit counts, and applying waste factors, which can significantly impact overall material costs.
- Labor constitutes the largest project cost, with productivity affected by crew size, wall height, pattern complexity, and overhead margins.
- Bids should be compared only if they include unit breakdowns, scope consistency, and clear assumptions about permits, exclusions, and material sourcing.
- Contingency line items are essential for addressing unforeseen conditions like hidden damage or structural surprises that can increase scope and costs mid-project.
Table of Contents
- What Should a Masonry Estimate Checklist Include?
- How Do You Calculate Masonry Quantities? A Step-By-Step Takeoff
- Why Labor Drives Most of Your Masonry Cost
- What Should a Masonry Cost Calculator Show You?
- How Do You Compare Multiple Masonry Estimates?
- Which Estimating Tools Actually Speed This Up?
- Why Flashing and Weep Hole Placement Matters on Your Estimate
- Why Material Prices Swing Mid-Project
- How to Talk to Subcontractors and Suppliers During Estimating
- Why You Need a Contingency Line on Every Masonry Estimate
- What's the Typical Timeline From Estimate to Finished Project?
- Common Estimating Mistakes We See, and How We Protect Clients
- Sources
- FAQ
What Should a Masonry Estimate Checklist Include?
A masonry contractor checklist only works if it forces specificity. Vague estimates hide vague work, and vague work is where cost overruns live. Before you compare bids or start a brickwork budgeting exercise, run every quote through the categories below.
1. Project scope and work type
Every estimate needs to state, in plain language, exactly what kind of work is being done and where.
- Repair versus full replacement (repointing a section versus tearing out and rebuilding a wall)
- Veneer masonry versus load-bearing structural masonry
- Specific structures: chimneys, patios, retaining walls, steps, walkways, or exterior walls
- Square footage or linear footage for each distinct area, not one lump total
A quote that lumps "chimney repair" and "patio work" into a single number without breaking out square footage for each is a red flag. You cannot verify pricing you cannot separate.
2. Site conditions and assumptions
The estimator should document what they saw and what they're assuming, because both affect price.
- Access constraints (tight side yards, second-story chimney work, no truck access)
- Staging and material storage location
- Existing drainage, grading, or water intrusion issues
- Condition and extent of existing damage, photographed and noted
3. Material specifications
- Brick or block type, size, and color match
- Mortar type and color (Type N, S, or O, and how it will be color matched to existing work)
- Flashing and weep hole materials and placement
- Wall ties, lintels, and any sealers or water repellents
4. Quantity lines
- Square footage or linear footage per structure
- Unit counts (individual bricks or blocks)
- Mortar bags, sand, and aggregate volumes
- Rebar or reinforcement for retaining walls or structural sections
- Scaffolding hours or rental days for elevated work
5. Equipment and sitework
- Demolition and debris disposal
- Scaffolding or lift rental
- Material hoisting, especially for chimney or second-story work
6. Permits, exclusions, and terms
- Permit fees and who is responsible for pulling them
- Whether structural engineering review is included
- Explicit exclusions (what the estimate does NOT cover)
- Change-order process and how added scope gets priced
- Payment schedule, deposit amount, and workmanship warranty terms
A reliable mason estimate template should also list the contractor's license number, drainage and reinforcement details, and an estimate validity window, typically around 30 days, so the price you're reviewing doesn't drift before you sign.
Pro Tip: Ask every contractor for the same unit breakdown, even if their formats differ. If one bid shows "$8,400 total" and another shows "412 sq ft at $18/sq ft plus $600 for flashing," you can actually compare them apples to apples.
For a shorter version of this walkthrough built for first-time homeowners, our 5 point masonry contractor checklist covers the same ground with less detail.
How Do You Calculate Masonry Quantities? A Step-By-Step Takeoff
Quantity takeoff is where most estimating mistakes start, because small assumption errors compound fast across a whole wall.
Step 1: Measure net area. Measure the total wall or patio area, then subtract windows, doors, and other openings. Work in the same unit throughout, either square feet for wall area or linear feet for coping, steps, or wall caps.

Step 2: Convert area to unit count. Standard modular brick counts run about 7.0 to 7.5 bricks per square foot, depending on joint width and bond pattern. CMU block counts are typically closer to 1.0 to 1.2 units per square foot, since blocks are larger.
Step 3: Estimate mortar and reinforcement. Mortar yield is usually calculated per 100 or 1,000 units laid, not per square foot, because joint thickness varies. Retaining walls and structural sections need separate rebar and grout lines.
Step 4: Apply a waste factor. Add 5 to 10% for cuts and breakage on new work; repair and restoration jobs often run toward the higher end because matching existing brick means more cutting and more discarded pieces.
Here's a worked example for a 300 square foot veneer wall with one door opening (20 sq ft):
That waste factor difference between 5% and 10% moved this order by more than 100 bricks. On a job with tighter margins or harder-to-match historic brick, that gap gets even wider.
Why Labor Drives Most of Your Masonry Cost
Labor is usually the single biggest line item on a masonry estimate, often running 50 to 65% of total project cost. Material prices swing, but labor rarely comes down.
Skilled masons typically lay 300 to 500 bricks per day, and the median annual wage for masonry workers was $56,600 as of May 2024. A crew that's slower than expected, or a pattern that's more complex than assumed, changes the labor line fast.
A few factors that move productivity, and therefore price:
- Crew mix: a mason paired with a tender moves faster than a mason working alone
- Wall height: work above 10 feet slows everyone down and adds scaffolding time
- Pattern complexity: herringbone or running bond restoration work takes longer than a straight new wall
- Overhead and profit: most contractors add 10 to 20% on top of raw labor and material costs to cover insurance, tools, and margin
Small differences in assumed bricks per day compound quickly. A crew estimated at 400 bricks per day that actually runs at 300 adds real hours, and real dollars, to a job that looked fine on paper.
What Should a Masonry Cost Calculator Show You?
Installed brick and masonry work commonly runs $10 to $30 per square foot, with a midpoint near $18, depending on material match, mortar type, and flashing complexity. Repair work that requires matching historic brick tends to sit higher in that range than straightforward new construction.
Common allowances that should appear as separate line items:
- Permit fees, which vary by jurisdiction and project type
- Engineering review, required for most retaining walls and some structural repairs
- Deposits, usually 30 to 50% of the total project cost collected upfront
A sample build-up for our 280 square footwall example: 2,157 bricks and 15 mortar bags at material cost, plus labor at the crew's daily rate, plus scaffolding if the wall exceeds 10 feet, plus permit and overhead. If that math lands near $18 per square foot and a bid comes in at $9 or $10 per square foot for the same scope, ask why. Bids well below the midpoint usually mean thinner mortar joints, mismatched material, or skipped flashing, not a better deal. Our breakdown of brick patio costs walks through a similar build-up specific to outdoor hardscape work.
How Do You Compare Multiple Masonry Estimates?
Comparing masonry pricing guides side by side only works when you're comparing the same scope. Start with these checks before ranking bids by price alone.
Confirm each estimate includes:
- A unit breakdown (quantities and unit price, not just a lump sum)
- A stated waste percentage
- Explicit mortar type, color match, and flashing/weep placement
- Whether engineering review is included or excluded
Then walk through this short decision sequence:
- Do all bids cover the identical scope and structures?
- Does the payment schedule, deposit, and warranty match across bids?
- Are there unexplained gaps of more than 20% between bids for the same scope?
- If yes, ask the low bidder directly what's excluded before assuming it's the better deal.
Red flags include no license number listed, a payment schedule that front-loads more than half the cost, and vague material descriptions like "matching brick" with no spec. Our guide on Richmond brick repair costs shows real-world price spreads that illustrate exactly how wide these gaps can get. A property-management-focused renovation mistakes checklist covers similar red flags from the buyer's side of a broader remodeling contract.
Which Estimating Tools Actually Speed This Up?
Quick online calculators are fine for a rough sanity check on a small job, but they're not a substitute for a full takeoff on anything structural or over a few hundred square feet.
- Use free masonry cost calculators for a fast ballpark before requesting formal bids
- Use a full takeoff spreadsheet once you have real measurements and a specific brick or block product picked out
- Ask your contractor directly for their estimate template, then compare the fields it includes against this checklist. If it's missing waste percentage, mortar type, or a payment schedule, ask for a revised version before you sign
Why Flashing and Weep Hole Placement Matters on Your Estimate
Code compliance is one of the most commonly skipped line items on a masonry quote, and it's also one of the most expensive to fix after the fact. The 2021 International Building Code, Section 1404.4.2, requires flashing and weep holes for anchored veneer to sit no more than 10 inches above finished ground level, and at every point where the wall transitions to a new support below.
That requirement exists because water that gets behind brick veneer has to have somewhere to drain out. Without properly placed flashing and weeps, moisture sits inside the wall cavity, and that's how you end up with efflorescence, spalling brick, and eventually structural deterioration that costs far more to fix than the flashing would have cost to install correctly the first time.
Ask every contractor a direct question: where will flashing and weep holes be located on this specific job, and does that placement follow current code? A contractor who can answer that in specific inches and specific courses has thought through the detail. A contractor who says "we always do it right" without specifics has not given you anything you can verify.
Permits matter for the same reason. Some jurisdictions require a permit for retaining walls above a certain height or for structural masonry repairs, but not for cosmetic repointing. Confirm which category your project falls into and who, you or the contractor, is responsible for pulling the permit, and get that responsibility written into the estimate itself, not just discussed verbally.

Why Material Prices Swing Mid-Project
Brick, mortar, and block prices move with regional supply, transportation costs, and manufacturing capacity, and none of that is fully in a contractor's control. A quote written in one season can look different by the time material actually gets ordered, especially on larger jobs with a gap between signing and start date.
Matching existing historic brick adds another layer of difficulty on top of price volatility. Older brick is frequently no longer manufactured in the exact size, color, or texture used decades ago, which means sourcing sometimes means special ordering, salvage yard searching, or custom color matching mortar to get close. That work takes time and adds cost that a generic "brick replacement" line item doesn't capture.
A well-written estimate should note whether pricing is locked for a specific window, typically 30 days, or whether it's subject to change if material costs shift before the order is placed. If your estimate doesn't say either way, ask. It's a fair question, and a contractor who has thought through sourcing will have a straightforward answer.
For historic or hard-to-match projects, ask specifically how the contractor plans to source matching material and whether that sourcing has already been confirmed, or is still speculative at the time the estimate is written. A confirmed source is worth more than a lower price with an unconfirmed material plan behind it.
How to Talk to Subcontractors and Suppliers During Estimating
Clear communication during the estimating phase prevents most of the disputes that show up later during the job itself. The estimate is the moment to get specific, not the moment to assume everyone is picturing the same finished project.
- Confirm brick, block, and mortar specs by product name or supplier code, not general description
- Ask suppliers directly for current lead times before locking a project start date
- Get any subcontractor scope (engineering review, specialty stonework, drainage tie-ins) itemized separately, with its own price and timeline
- Put verbal clarifications in writing, even a short follow-up email, so the final signed estimate reflects what was actually discussed
If a subcontractor or supplier is vague about specs or timing during the estimate phase, that vagueness tends to carry through into the job itself. Precise questions during estimating are cheap. The same questions asked mid-project, after material is already ordered, are not.
Why You Need a Contingency Line on Every Masonry Estimate
Masonry work involves opening up existing structures, and existing structures sometimes hide problems nobody could see during a site visit. A contingency line isn't padding. It's an honest acknowledgment that repair and restoration work carries more uncertainty than new construction on an open lot.
Common unforeseen conditions on masonry jobs include hidden water damage behind veneer, deteriorated structural elements discovered mid-demolition, and soil conditions on retaining wall projects that differ from what a visual site inspection could catch. Any of these can add scope, and therefore cost, after work has already started.
New construction on unobstructed sites can usually carry a smaller contingency, since there's less hidden structure to uncover.
The estimate should spell out how a contingency gets triggered and billed. Does the contractor call before proceeding with extra work, or bill it after the fact? Is there a cap on how much contingency work can be authorized without your explicit sign off? These are questions worth settling before the first brick comes off the wall, not during a phone call mid-demolition when you're already committed.
What's the Typical Timeline From Estimate to Finished Project?
Most masonry projects follow a similar sequence, though the length of each stage depends heavily on project size and whether structural engineering or permits are involved.
A typical residential repair or small patio project runs roughly two to four weeks from signed estimate to completed work, once you account for material ordering and scheduling. Larger structural repairs, full chimney rebuilds, or retaining walls requiring engineering review often stretch to six to ten weeks, mostly due to permit processing and specialty material sourcing rather than the actual masonry work itself.
The sequence generally looks like this: site visit and estimate, contract signing and deposit, permit application if required, material ordering and lead time, scheduled start date, the masonry work itself, final walkthrough, and warranty documentation. Weather is the wildcard that can shift any stage, since mortar cure times and mason safety both depend on temperature and precipitation.
Ask your contractor for a written estimate of each stage's duration, not just a total project length. A contractor who can break down "two weeks for material lead time, one week for the work itself" has a realistic schedule. One who only offers a single vague total may not have thought through the sequence in detail.
Common Estimating Mistakes We See, and How We Protect Clients
The mistake we see most often is homeowners accepting the lowest bid without checking whether flashing, weeps, and mortar match are actually included. A bid that skips those details isn't cheaper, it's incomplete.
The contractor writes line-item estimates that specify material match, mortar type, and code-compliant flashing placement. Free estimates and workmanship guarantees are often offered. Before hiring anyone, ask for photos of past work, call a reference, and confirm the warranty in writing.
If you're ready to move forward on a repair, a new patio, or a structural repointing job, our team can walk your project through this exact checklist and put a written line-item estimate in your hands with no obligation. Start with a free estimate for brick repair, or if your project is mostly about restoring old mortar joints before they fail, look at our repointing and tuckpointing services directly.
— Thomas
Sources
- Brickmasons, blockmasons, and stonemasons - Occupational Outlook Handbook | U.S. Bureau of Labor Statistics
- 2021 International Building Code (IBC) - 1404.4.2 Masonry
- Brick & Masonry Cost Calculator 2026 | Instant Brick & Masonry Estimates
- Free Mason Estimate Template - TradeTab
FAQ
How Do You Estimate Masonry Work?
Measure net area after subtracting openings, convert to unit counts using standard bricks or blocks per square foot, add a waste factor of 5 to 10%, then price materials, mortar, and labor separately before adding overhead. Labor typically makes up 50 to 65% of the total cost, so productivity assumptions matter as much as material quantities.
How Do You Quote a Masonry Job?
A complete quote lists scope by structure, unit quantities, material specs including mortar type and flashing placement, labor hours, waste allowance, permits, exclusions, payment schedule, and warranty terms. Installed brick and masonry work commonly runs $10 to $30 per square foot, so a quote should show enough detail to explain where in that range a specific job lands.
What Is the Best Estimating Software for Masonry Projects?
There's no single tool that fits every job size. Quick online calculators work for rough ballpark pricing on small projects, while larger structural or restoration jobs need a full takeoff spreadsheet built from actual measurements and a specific product spec sheet.
What Is a Masonry Estimator?
A masonry estimator is the person, often the contractor or a dedicated estimating specialist, who calculates material quantities, labor hours, and total project cost based on measured scope and site conditions. Their job is to turn a wall or patio's dimensions into an accurate, line-itemized price before work begins.