
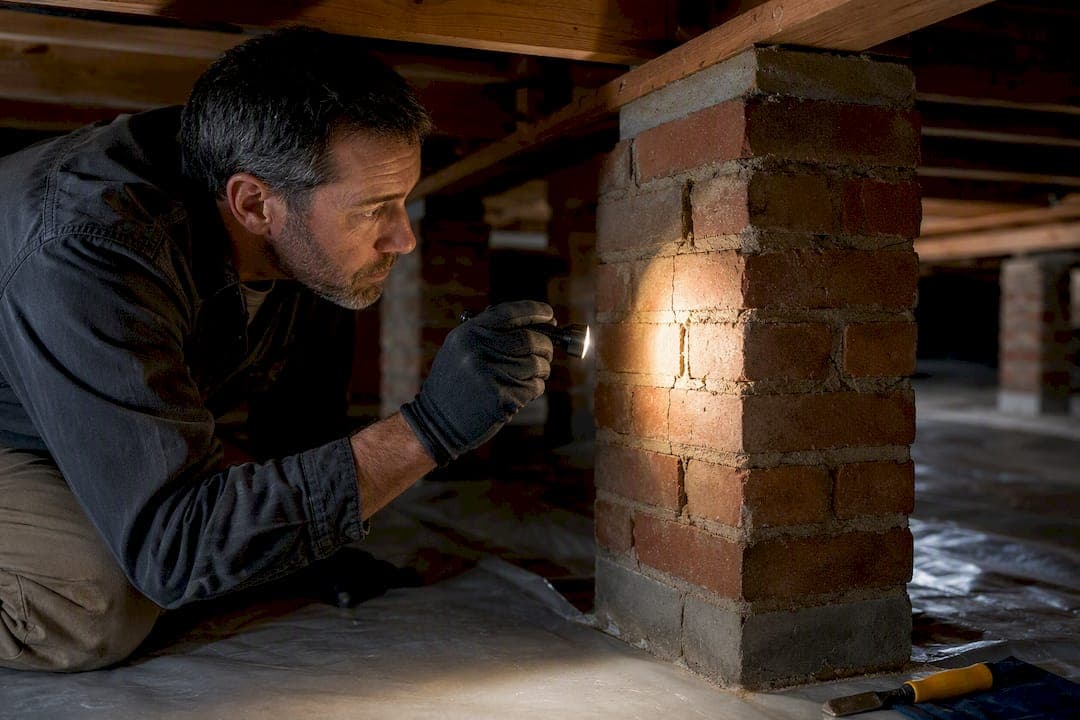
Most failing brick piers need one of three fixes: repointing the mortar joints, rebuilding the pier on a proper footing, or engineered underpinning with piles. Start by inspecting the pier's plumb, mortar condition, and beam connection; then check for moisture at the base. If bricks are crushed, displaced, or the pier looks like it is sinking, stop and call a structural professional before doing anything else.
TL;DR:
- Repointing is effective only when the bricks are sound, the pier is plumb, and the footing is stable, otherwise structural repairs are necessary.
- Underpinning solutions like micropiles and helical piles are needed if the soil or footing has failed, especially with settlement or unstable ground beneath the pier.
- Proper inspection follows the load path, requiring documentation of moisture, bearing, and connection issues to ensure all underlying problems are addressed.
- Using mortar softer or similar in strength to the original prevents future spalling and ensures the mortar will wear before the brick in movement cycles.
- Contractors should provide a detailed scope, engineering approval, and warranties; avoid those unwilling to show documentation or incorporate unverified temporary supports.
Table of Contents
- Crawl space inspection checklist and red flags
- When mortar-only repairs restore performance
- When to expect an engineered repair or underpinning
- What each repair method actually involves
- How to choose mortar and materials so repairs last
- Step-by-step homeowner workflow from inspection to sign-off
- What affects cost and how long typical repairs take
- Questions to ask contractors and red flags that mean walk away
- Practical lessons from a masonry pro
- How Heritage Masonry & Brick can help
- Sources
- FAQ
Crawl space inspection checklist and red flags
A homeowner can safely assess a lot before ever calling a contractor. The goal is to separate cosmetic mortar loss from actual bearing failure, because the two problems have very different fixes and very different costs.
Start above the crawl space. Sagging floors, doors that stick in their frames, and new cracks in interior walls often trace back to a pier that has lost bearing capacity below. Then head into the crawl space itself with a flashlight, a notepad, and a phone camera.
- Check plumb and lean. A pier that leans visibly out of vertical, even slightly, signals movement worth tracking over time.
- Look for cracked or spalled bricks. Flaking brick faces or hairline cracks across multiple courses point to stress the mortar alone cannot explain.
- Watch for crushed courses. Bricks that have compressed or shattered under load mean the pier has already lost structural integrity.
- Note missing or crumbling mortar. Joints you can scrape out with a finger are a repointing candidate, not necessarily a rebuild.
- Inspect the beam connection. Gaps between the top of the pier and the beam it supports often mean settlement has already occurred.
- Check what the pier is bearing on. Piers resting on bare soil, loose shims, stacked concrete blocks, or an unstable pad are not properly supported no matter how good the brickwork looks.
Improvised supports like stacked blocks or added shims do not restore any lost capacity. A home inspection review of crawl-space framing found that these makeshift fixes are common but should prompt a full evaluation by a contractor or structural engineer rather than being treated as a permanent solution.
Document everything before you call anyone. Take wide shots showing the pier in context and close-ups of any cracking or spalling. Note the pier's location relative to others, its height, and the clearance around it. Date-stamp your photos. This record speeds up estimates, gives an engineer a baseline for comparison if movement continues, and can matter if you ever file an insurance claim.
A proper inspection follows the load path, not just the visible symptom. DOE and Building America crawlspace retrofit guidance recommends documenting conditions inside the house, inside the crawl space, and around the exterior before any repair scope is written, because a pier problem traced only to the brick you can see often gets fixed twice.
When mortar-only repairs restore performance
Repointing works when the problem is confined to the mortar joints and everything structural around them is still sound. It does not work as a substitute for structural repair, and knowing the difference before you sign a contract saves money and prevents repeat failures.
The Brick Industry Association's repointing guidance sets a clear threshold: repointing is appropriate when the bricks themselves are substantially sound, the pier is plumb, and the footing underneath is stable. If those three conditions hold, replacing deteriorated mortar restores the joint's performance without touching the masonry units.
A contractor doing this work correctly follows a specific sequence:
- Remove failed mortar to a consistent depth, typically two to three times the joint width, until reaching sound material.
- Prehydrate the joint so the surrounding brick does not pull moisture out of the new mortar too fast, which weakens the bond.
- Match the mortar composition to the original in strength, color, and permeability rather than matching by eye alone.
- Pack mortar in thin layers, letting each layer firm up before adding the next, instead of overfilling in one pass.
- Tool the joint to match the original profile once the mortar has set enough to hold a thumbprint.
The reasoning behind matching mortar strength is not cosmetic. The BIA guidance explains that mortar is meant to be the sacrificial part of the assembly. It should flex and eventually wear before the brick does. A repointing mortar that is stronger than the original concentrates stress in the brick face instead of the joint, and that is often what causes spalling years after a well-intentioned repair.
Pro Tip: If a contractor proposes a straight Type S or Type M mortar for repointing on a pier older than 50 years, ask why. Older brick almost always calls for something softer.
Repointing stops being sufficient once the damage moves past the joints. Watch for these signs that mortar work alone will not hold:
- Bricks that are displaced out of alignment, not just cracked in place.
- Crushed or spalled courses where the unit itself has lost material, not just its mortar.
- Visible loss of bearing, where the pier no longer makes full contact with the beam above it.
- Active, ongoing settlement rather than old, stable damage.
If you are unsure whether a joint is failing cosmetically or the pier underneath is failing structurally, a homeowner guide to testing mortar joints walks through simple checks you can do before calling a contractor for an estimate.
When to expect an engineered repair or underpinning
Some pier problems cannot be solved with brick and mortar at all. When the footing itself has failed, or the soil beneath it is no longer stable, the fix has to go below the pier, not just into it.
Common root causes that push a repair into engineering territory include:
- Footing failure, where the concrete pad under the pier has cracked, shifted, or was undersized from the start.
- Settlement, often uneven, that has already thrown piers out of plumb across the crawl space.
- Altered load paths, from a remodel or an addition that shifted weight onto piers never designed to carry it.
- Crushed masonry, where bricks have failed under load rather than deteriorated from moisture.
- Expansive soils, which swell and shrink with moisture changes and can move a footing over a single wet season.
Once one of these is in play, the standard toolkit is underpinning: adding new, deeper support that bypasses the failed soil or footing entirely. Engineers typically choose from a few methods depending on soil conditions and access.
Micropiles and other grouted, small-diameter piles are frequently specified for crawl-space work because the drilling equipment fits through tight clearances and can reach deeper, more stable soil layers. Research on grouted micropiles in expansive soils points to this as their main practical advantage: they let engineers use the existing structure as reaction and drive support past the unstable zone, though the connection detail tying the pile to the grade beam is what actually determines whether the fix holds.
Helical piles and push piers work on a similar principle but install differently. Helical piles are screwed into the soil in sections, while push piers are driven hydraulically using the structure's own weight for resistance. Both avoid the vibration and spoil removal that come with drilled piers, which matters in a confined crawl space where hauling out excavated soil is its own logistical problem.
Access is often the deciding factor, not soil type alone. A case study on retrofits under limited clearance found that clearance under 24 inches can rule out standard equipment entirely, forcing engineers to redesign the sequence or switch to compact methods built for tight spaces. If your crawl space is low, ask early which methods your contractor's equipment can actually reach.
What each repair method actually involves
Knowing the name of a repair method is not the same as knowing what happens on-site. Here is what to expect from each, so you can read a contractor's proposal and know whether the steps match what your pier actually needs.
Repointing, covered in detail above, follows a joint-by-joint sequence: removal, prehydration, layered mortar packing, and tooling. It is the least invasive option and, done correctly, the fastest.
Rebuilding a pier on a prepared footing is a bigger job with its own sequence:
- Shore the load temporarily so the beam above stays supported while the old pier comes down.
- Excavate to sound bearing soil, removing any loose fill or organic material the original pier may have been sitting on.
- Pour or set a new footing pad, sized to the load it needs to carry, and let it cure before building on it.
- Rebuild the pier in brick or block, matching the original bond pattern and dimensions where the pier is visible.
- Install a cap and confirm the beam connection, making sure the new pier makes full, even contact with the beam it supports.
- Remove temporary shoring only after the new pier has cured and the connection is verified.
Shoring and jacking deserve their own attention because doing them wrong can cause more damage than the original problem. The sequence matters: temporary supports go in first, load transfers gradually rather than all at once, and permanent connectors get installed only after the structure has settled onto its new support. A contractor who skips the gradual transfer step risks cracking floors or walls that were fine before the repair started.
Underpinning installation looks different depending on the method:
- Micropiles use small, often skid-mounted drilling rigs that can operate in low-clearance crawl spaces, drilling and grouting in stages.
- Helical piles are turned into the soil with a hydraulic drive head, section by section, until they reach the specified torque or depth.
- Push piers are driven hydraulically using the house's own weight as reaction, then locked off once they reach load-bearing strata.
- Drilled and grouted piers combine a drilled shaft with pressure-grouting to lock the pier into surrounding soil.
Every underpinning method ends the same way: verification. The engineer or contractor should confirm each pile or pier reaches its design depth or torque, document that reading, and check that the connection to the existing grade beam is solid before calling the job complete.
How to choose mortar and materials so repairs last
Mortar selection is where a lot of otherwise good repairs go wrong. The rule from the Brick Industry Association is simple to state and easy to ignore: replacement mortar should be similar to or weaker than the original, never stronger.
Stronger mortar sounds like an upgrade. In practice, it removes the joint's ability to flex with seasonal movement, and that stress has to go somewhere. It usually goes into the brick face, which is softer and more porous than a hard cement mix, and the result is spalling that shows up months or years after the repair.
Most repointing work falls into a few standard mortar types:
- Type N, a medium-strength mortar, is the default for most above-grade residential repointing.
- Type O, softer and more permeable, suits older or historic brick that was originally laid with lime-rich mortar.
- Type K, the softest common mix, is reserved for very soft historic brick where even Type O would be too hard.
Older piers, particularly anything built before the widespread use of Portland cement in residential construction, were often laid with lime mortar. Matching that with a modern high-cement mix is one of the most common mistakes homeowners run into when a well-meaning contractor repoints without checking the building's age first.
Pro Tip: If your home was built before 1930, ask your contractor whether they have tested or assumed the original mortar composition. Historic lime mortars need a softer replacement than most modern default mixes.
For most homes, visual inspection and age-based inference are enough to pick the right mortar. For historic properties or projects where an exact match matters, ASTM C1324 laboratory testing can analyze the original mortar's composition directly rather than relying on a guess.

Step-by-step homeowner workflow from inspection to sign-off
A repair that lasts follows a sequence, not a single visit. Skipping steps, especially moisture control, is the most common reason a "fixed" pier fails again within a few years.
- Inspection and documentation. Walk the crawl space, photograph every pier showing signs of distress, and note moisture, bearing, and beam connection issues alongside the brickwork itself.
- Scope of work. A credible SOW spells out footing dimensions, mortar type, connection details at the beam, and how the contractor will verify the work once it is done, not just a one-line description of "repair pier."
- Moisture control first. DOE and Building America guidance places moisture correction, grading, drainage, and vapor barriers ahead of structural and finish work, because standing water or chronic dampness will undermine a new footing the same way it undermined the old one. Standing water around the foundation perimeter deserves attention too; a homeowner guide to yard drainage covers common fixes for water pooling near a foundation before it reaches the crawl space.
- Permits and engineering. Structural work, including pier rebuilds and any form of underpinning, typically requires a permit and, for underpinning specifically, engineered drawings. Confirm with your local building department before work starts, not after.
- Execution. Shoring, excavation, footing work, masonry rebuild, or pile installation proceeds according to the SOW, with photos taken at each stage that would otherwise be covered up.
- Verification and sign-off. The contractor should confirm bearing capacity, provide photographic records of buried work, and deliver warranty paperwork before calling the project finished.
Homeowners who skip straight from "inspection" to "execution" without a written SOW are the ones most likely to end up with a repair that addressed the brick but not the moisture or bearing problem underneath it. A broader guide to brick foundation repair walks through what a full scope of work should include if you want a second reference before signing.
What affects cost and how long typical repairs take
Bids for the same-looking pier can vary widely, and most of that variation comes down to access, soil conditions, and which of the three repair categories applies.
The biggest cost drivers are:
- Access and clearance, since a low crawl space slows every stage of the job and can rule out standard equipment.
- Soil and footing condition, which determines how much excavation and new concrete a rebuild requires.
- Underpinning versus masonry rebuild, since pile-driving equipment and engineering design cost more than brick and mortar.
- Engineering time, required for any underpinning or significant structural rebuild.
- Moisture remediation, which adds drainage work, vapor barriers, or grading before structural work can even begin.
Timelines follow the same pattern. Repointing a small area of joints typically runs one to three days depending on how many piers need attention. Rebuilding a pier on a new footing takes longer, often several days once you factor in curing time for the new concrete before it can bear load. Underpinning timelines depend heavily on the site: some jobs proceed pier by pier, with each pile installed and verified before moving to the next.
When comparing bids, look for line items rather than a single lump sum. A detailed bid should separate shoring, excavation, concrete, pile or pier installation, engineering fees, and cleanup. A bid that bundles everything into one number is harder to compare and harder to hold a contractor to if part of the scope changes mid-job.
Questions to ask contractors and red flags that mean walk away
The right questions upfront prevent most of the bad outcomes homeowners run into with pier repairs.
Before signing anything, ask to see:
- Proof of insurance, including liability coverage for structural work.
- References from similar pier or foundation jobs, not just general masonry work.
- A signed, itemized scope of work, not a verbal agreement or a one-line estimate.
- Engineering drawings, when the job involves underpinning or a significant structural rebuild.
- Written warranty terms, spelling out what is covered and for how long.
A few responses should end the conversation entirely. A contractor who cannot describe the scope beyond "we'll fix the pier," who presents temporary shoring as a permanent repair, or who refuses to bring in an engineer when the damage clearly calls for one is not someone to hire for structural work. The same goes for a contractor unwilling to show photos or details from comparable jobs they have completed.
A reliable masonry contractor should provide a free estimate, a documented scope of work, and a workmanship guarantee on completed projects, the kind of baseline every homeowner should expect before committing to structural work.
Practical lessons from a masonry pro
The most common mistake I see in crawl spaces is a homeowner treating a leaning pier as a cosmetic problem because the bricks still look mostly intact. Bricks can look fine right up until the footing underneath gives out. By the time cracking shows up in the brick face, the pier has usually been carrying an uneven load for a while.
The second mistake is fixing the pier without touching the moisture. At Heritage Masonry & Brick, the piers we get called back to are almost always the ones where someone repointed the joints but never addressed standing water at the base. Moisture control and proper bearing matter more than how clean the new mortar line looks. Get those two right first, and the cosmetic work holds for decades instead of seasons.
— Thomas
How Heritage Masonry & Brick can help
If your inspection turned up mortar loss but a plumb, stable pier, that is a repointing job, and it is one of the services we handle regularly across Richmond. If you found displaced brick, crushed courses, or a pier that is no longer bearing properly, that moves into structural territory, and we coordinate that work directly with the engineering it requires.

Heritage Masonry & Brick offers:
- Brick Repair for isolated damage that does not require a full rebuild.
- Brick Repointing & Tuckpointing for mortar-only restoration using mortar matched to your home's age and original mix.
- Structural Brick & Masonry Repairs for pier rebuilds, footing work, and coordination with engineered underpinning when a pier's bearing capacity has failed.
Every estimate starts with a site visit and photo documentation of the crawl space, followed by a written scope of work before any repair begins. Projects carry a 5-year workmanship guarantee, so you know what is covered after the work is done. If your crawl space piers show any of the warning signs covered above, request a free estimate on our brick repair page and we will walk the space with you before recommending a fix.
Sources
The guidance in this article draws on the Brick Industry Association's repointing standards, DOE and Building America's crawlspace retrofit workflow, and research on micropile underpinning in expansive soils. For homeowner-level inspection guidance on support columns and framing, see the Vaughn Home Inspection review of improper joist supports and Inspections Plus's overview of crawl-space support columns.
- Brick Industry Association — Repointing brick masonry
- Energy Efficient Crawlspace Foundation Retrofit: Mixed Humid Climate (DOE / Building America)
- Grouted micropiles for foundation remediation in expansive soil (University of Houston / conference paper)
- Improper floor joist supports in a crawlspace | Vaughn Home Inspection
FAQ
Does homeowners insurance cover crawl space repair?
Coverage depends on the cause: most standard policies exclude damage from gradual settlement, soil movement, or long-term moisture, which are the most common causes of pier failure. Sudden, covered perils like a burst pipe causing rapid water damage are more likely to be covered, so check your specific policy language before assuming either way.
Are piers considered a permanent foundation?
Properly engineered piers, built on adequate footings or paired with underpinning where soil conditions require it, are considered permanent structural support. Piers that are undersized, improperly bearing on soil, or installed without an engineered footing are not a permanent fix and are the type most likely to need future repair.
How do you repair a pier and beam foundation?
Repair depends on what the inspection finds: mortar-only deterioration gets repointed, while a pier that has lost bearing or plumb typically needs to be rebuilt on a new footing or reinforced with piles. The process follows an inspection first, then a written scope of work, moisture correction, any required permits or engineering, and finally the repair itself with verification before sign-off.
Can homeowners install their own foundation piers?
Simple repointing on a stable, plumb pier is within reach for a careful homeowner with the right tools and mortar. Rebuilding a pier on a new footing or installing engineered underpinning involves load calculations, permits, and connection details that call for a structural engineer and a licensed contractor, not a DIY approach.