
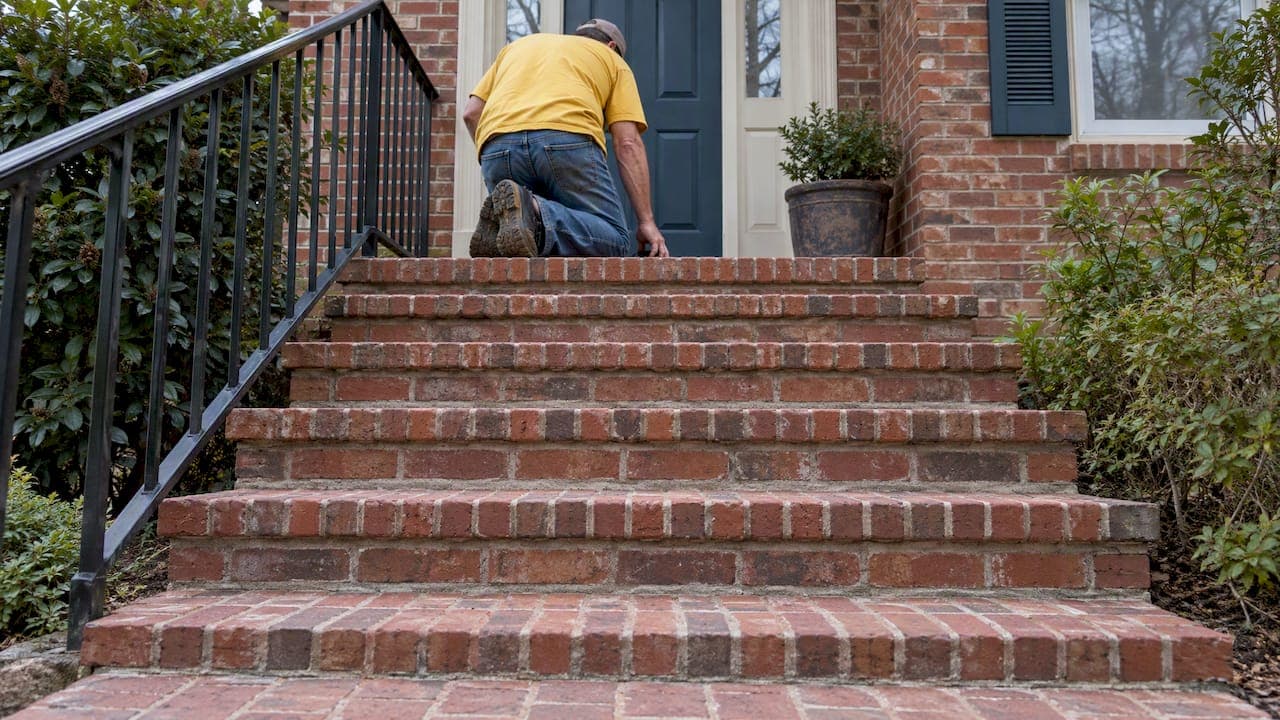
A good brick step design starts with pattern choices like running bond, herringbone, or a curved layout, but none of that matters if the numbers underneath are wrong. Every safe, long-lasting staircase follows a riser of about 6 to 7 inches, a tread of 11 to 12 inches, a slight drainage slope, and a reinforced concrete footing. The sections below walk through inspiration, layout math, and the structural details that keep your steps standing for decades.
TL;DR:
- Proper brick stair construction relies on a solid concrete footing below the frost line, typically 4 to 6 inches thick with reinforcement.
- Riser heights should generally be between 6 to 7 inches, with maximum code allowances around 8 inches, especially important for households with limited mobility.
- Brick pattern choices like running bond are most durable, while curved steps increase labor and material waste due to customized cutting.
- Using exterior-rated face brick and specific mortar types (Type N, S, or M) is essential for weather resistance and structural integrity.
- Regular maintenance, including mortar resealing, joint repointing, and prompt repair of loose bricks, extends the staircase's lifespan and safety.
Table of Contents
- Design patterns and style ideas to match your home
- Key dimensions and code-aware measurements every homeowner should use
- Footing, frost protection, and reinforcement you must plan for
- Choosing bricks, mortar, and safe nosing/tread finishes
- How to lay out steps: measuring, rise/run math, and top-down layout technique
- Full new-build vs. veneer/refacing: choosing the right installation method
- What affects cost and the red flags that mean you should hire a masonry contractor
- Maintenance and repair tips for brick steps
- Common issues and troubleshooting: settling, cracking bricks, and mortar deterioration
- Safety considerations: lighting, handrails, and visibility
- Contractor perspective: common mistakes and priorities when building brick steps
- How Heritage Masonry & Brick helps with new steps and repairs
- FAQ
- Sources
Design patterns and style ideas to match your home
Pattern choice shapes both the look and the durability of a brick staircase. Running bond, where each course overlaps the one below by half a brick, is the industry standard because it distributes loads evenly across the structure. Herringbone creates a woven, interlocked look that reads as more custom, while stack bond lines up every brick in a grid for a cleaner, modern vertical effect.
Curved or rounded steps add real curb appeal but cost more to build. Every brick on a curved riser needs individual cutting, which slows down labor and raises material waste compared to a straight run.
A few finishing choices make a bigger visual difference than people expect:
- Mortar color: A contrasting mortar color emphasizes the brick pattern itself, while a matching color blends the steps into the wall or house.
- Brick caps: Rounded or beveled cap bricks on the top riser give a finished edge and reduce chipping.
- Landing treatment: A wider top landing, even just one extra brick course, makes entry and exit feel less cramped.
Key dimensions and code-aware measurements every homeowner should use
Comfortable steps follow a narrow range of numbers, and skipping them is the fastest way to build something that feels off even when it looks fine.
- Riser height: Aim for 6 to 7 inches per step. Experts recommend this range for comfort, and the International Building Code commonly allows a maximum riser height around 8 inches, so check your local code before finalizing a plan.
- Tread depth: Plan for 11 to 12 inches of usable tread so a full foot lands comfortably on each step.
- Drainage slope: Slope each tread about 1/8 to 1/4 inch per foot away from the house so water sheds instead of pooling against the brick.
Standard building codes often cap riser height at 8 inches, which the IBC's means of egress chapter sets as a common ceiling. Staying closer to 7 inches, rather than building to the maximum, matters most for households with older adults or anyone with limited mobility. Local amendments can tighten these numbers further, so a quick call to your building department before you pour anything saves rework later.
Footing, frost protection, and reinforcement you must plan for
Nothing above ground matters if the base below it fails. A concrete footing poured below your region's frost line is what keeps brick steps from heaving, cracking, and separating from the house over a few winters. When water in the soil freezes and expands above the frost line, it pushes unsupported masonry upward unevenly, and that movement is the leading cause of the stair-step cracks and gaps homeowners see within a few seasons.
Professional guidance points to a few consistent numbers:
- Footing thickness: Concrete footings are typically 4 to 6 inches thick, depending on soil and load conditions.
- Reinforcement: A rebar grid spaced at roughly 12-inch centers is common practice for tying the footing together and resisting cracking.
- Depth: The footing bottom needs to sit below your local frost line, which varies by region and is set by your building department.
Call a contractor or structural engineer when you see existing settlement, when the new stairs tie directly into the house foundation, or when the total rise exceeds a few steps, since the margin for error shrinks fast on taller runs.
Choosing bricks, mortar, and safe nosing/tread finishes
Not every brick belongs outdoors on a step that takes direct weather and foot traffic. Face brick rated for exterior exposure resists freeze-thaw cycling far better than brick meant for interior veneer, and matching the color and texture to your home's existing brick keeps new steps from looking bolted on.
Mortar type matters almost as much as the brick itself:
- Type N: A general-purpose mortar suited to most above-grade residential brickwork.
- Type S: A stronger mix for load-bearing applications and areas with more movement.
- Type M: The highest-strength option, often reserved for retaining structures or heavy exposure.
For traction, skip adhesive vinyl or rubber tread covers. Mechanically fastened aluminum or metal nosing and contractor-grade anti-slip treads anchor directly into the step and hold up through wet seasons, while stick-on covers tend to peel and fail outdoors. A textured, high-traction masonry coating is a reasonable secondary option where a full nosing retrofit isn't practical.
Pro Tip: Wet your bricks before laying them in warm weather; dry brick pulls moisture out of fresh mortar too fast and weakens the bond.
How to lay out steps: measuring, rise/run math, and top-down layout technique
Brick stair layout works backward from where the steps end, not where they start. Masons begin at the finished top porch elevation and measure downward, fine-tuning each course's mortar joint thickness in small increments to hit the target riser height, since brick units themselves come in fixed sizes.
- Measure total rise: Find the exact vertical distance from the bottom landing to the top porch surface.
- Choose a unit riser: Pick a riser between 6 and 7 inches, then divide total rise by that number to get your step count, rounding to a whole number.
- Recalculate actual riser: Divide total rise by the final step count to get the precise riser height each course needs to hit.
- Set tread run: Base tread depth on your brick's unit width plus mortar joints, targeting 11 to 12 inches of usable surface.
- Confirm with permits and footing layout: Check permit requirements, excavate the footing to below the frost line, and plan waterproofing or weep vents where steps meet the house.
- Schedule curing time: Protect fresh brickwork from freezing or rapid drying and avoid foot traffic until the mortar cures fully.
Full new-build vs. veneer/refacing: choosing the right installation method
Two build paths cover most residential projects, and picking the wrong one is an expensive mistake.
- Full new-build: Pouring a new reinforced concrete base and building brick steps from scratch is the right call when you're changing elevation, replacing a failed structure, or starting from bare ground.
- Veneer or refacing: Applying brick over sound existing concrete steps costs less, but it only works when that base concrete is structurally solid and properly flashed to keep moisture from getting trapped behind the new brick skin.
Curved steps and veneer work both add labor time compared to a straight new-build, since cutting brick to a radius or tying new brick into an existing structure takes more hours per step than laying a straight run on a fresh footing.
What affects cost and the red flags that mean you should hire a masonry contractor
A handful of factors drive most of the price swing on a brick step project:
- Step count and curvature: More steps and any curved sections multiply both material cutting and labor hours.
- Brick and mortar grade: Higher-end face brick and specialty mortar colors cost more than standard stock.
- Footing condition: Repairing or replacing a failed footing adds significant cost before the visible brickwork even starts.
- Permits and local labor rates: These vary widely by region and project scope.
A few warning signs mean it's time to call a professional rather than DIY the fix. Stair-step cracks running diagonally through the mortar joints usually point to settlement rather than a cosmetic issue. Unpredictable soil behavior, visible tilting, or a staircase tied directly into your home's foundation are all situations where getting it wrong risks the whole structure, not just the steps.
Maintenance and repair tips for brick steps
Brick steps need less upkeep than most exterior features, but a little attention early prevents expensive repairs later. Rinse steps a few times a year to clear dirt, leaves, and organic buildup that trap moisture against the mortar. A stiff brush and mild detergent handle most grime without damaging the brick face or mortar joints.

Reseal mortar joints when you notice them becoming soft, crumbly, or recessed, since deteriorating mortar lets water penetrate and accelerates freeze-thaw damage. Repointing, which means removing old mortar and packing in fresh mortar to matching depth and color, addresses this before it becomes a structural issue rather than a cosmetic one.
Check for loose or rocking bricks after winter, since frost heave can shift individual units even when the footing itself holds. A single loose brick is a quick fix if caught early. Left alone, it widens the surrounding joints and lets water intrude further into the structure.
Clear gutters and downspouts near the stairs so runoff doesn't dump directly onto the brick. Concentrated water flow is one of the more common causes of accelerated mortar wear on steps positioned near a roofline.
If nosing or anti-slip treads start to loosen, reanchor or replace them promptly rather than waiting. A failed tread surface is both a safety hazard and often a sign that moisture is working its way under the fastening points.
Common issues and troubleshooting: settling, cracking bricks, and mortar deterioration
Most brick step failures trace back to one of three root causes, and telling them apart matters for picking the right fix.

Settling shows up as the entire staircase tilting away from the house or sinking at one corner. This usually means the footing wasn't poured deep enough below the frost line, or the soil beneath it compacted unevenly after construction. A localized patch won't fix settling. It requires addressing the footing itself.
Cracking bricks, as opposed to cracking mortar, often signal structural stress rather than simple weathering. A crack that runs diagonally across several courses in a stair-step pattern is a classic sign of movement in the substructure, while a crack confined to one or two bricks might just be a defective unit that needs replacing.
Mortar deterioration is the most common and least urgent of the three, at least early on. Mortar is designed to be the sacrificial material, softer than the brick so it wears first and protects the brick units. Crumbling, powdery, or receding mortar joints are normal after years of freeze-thaw cycling and get fixed through standard repointing. Left unaddressed for too long, though, deteriorated mortar lets water reach the brick and footing, which can eventually trigger the settlement and cracking problems above.
Safety considerations: lighting, handrails, and visibility
A beautifully built staircase still needs to be safe to use in the dark, in rain, and for every member of the household. Lighting matters more than most homeowners budget for: low-voltage step lights recessed into the riser face or mounted along the adjacent wall mark each tread edge clearly at night, which cuts down on missed-step falls dramatically more than a single porch light ever will.

Handrails become necessary once a staircase rises past a few steps, and local code often sets the exact threshold along with required rail height. Even where code doesn't strictly require one, a rail is worth adding on any run with more than three or four risers, especially for households with young children or older adults.
Visibility ties back to the drainage slope and nosing choices covered earlier. A tread edge that's hard to see in low light, combined with water pooling from poor slope, is a common combination behind slip injuries on outdoor brick stairs. Keeping nosing distinct in color or texture from the tread surface helps the eye register where each step ends.
Contractor perspective: common mistakes and priorities when building brick steps
The most expensive mistakes we see are invisible ones: a shallow footing, a missing drainage slope, a cheap adhesive tread cover. These fail quietly, usually after the first hard freeze or wet season, long after the homeowner has stopped thinking about the project. Prioritize the footing and drainage before you ever pick a brick pattern. A plain running-bond staircase on a solid base outlasts a herringbone showpiece on a weak one every time.
— Thomas
How Heritage Masonry & Brick helps with new steps and repairs
If you'd rather hand the footing math, mortar matching, and code research to someone who does this daily, that's exactly where we come in. We build new brick steps and handle step repairs across residential and commercial properties, matching existing brick and mortar so repairs blend in rather than stand out.

Our work includes:
- New brick steps and step repair: Full rebuilds or targeted fixes for settling, cracking, or deteriorated mortar.
- Repointing and tuckpointing: Restoring joint strength and appearance without replacing sound brick.
- Historic material matching: Sourcing brick and mortar color to blend seamlessly with older homes.
We back every project with a free estimate and a 5-year workmanship guarantee, and we stay current on local code requirements so your steps pass inspection the first time. Request a free estimate on new steps or repairs to get started, or browse our masonry advice blog for more homeowner guidance.
FAQ
How do you lay out brick steps?
Start measuring from the top porch elevation and work downward, dividing total rise by your target riser height to set the number of steps. Masons then fine-tune mortar joint thickness in small increments across courses to hit the exact riser needed, since brick units come in fixed sizes.
How much do brick steps cost?
Cost depends on step count, curvature, brick grade, footing condition, and local labor rates, so there's no single number that applies everywhere. Heritage Masonry & Brick provides free estimates based on your specific site and design.
What are the different types of brick steps?
Common patterns include running bond, which distributes load evenly and is the most durable standard choice, herringbone for a woven interlocked look, and stack bond for a clean modern grid. Curved or rounded steps are also an option but require more cutting and labor than straight runs.
Are brick steps cheaper than concrete?
Plain poured concrete steps are typically less expensive upfront than brick because they skip the unit-by-unit labor and mortar work brick requires. Brick steps cost more to build but often add more visual value to a home's exterior, and veneering brick over an existing sound concrete base can narrow that cost gap.
Do brick steps need a concrete footing?
Yes, a concrete footing poured below the local frost line is essential for preventing frost heave, which is a leading cause of cracking and separation in brick stairs. Footings are typically 4 to 6 inches thick with rebar reinforcement spaced around 12-inch centers.
Sources
Check your local building department for exact code requirements before construction. See our deck stair code guide for related riser and railing rules.
- International Building Code (IBC) 2018 — Chapter 10 Means of Egress
- JLC | Layout for a brick staircase
- Amstep — Treads & nosing for brick stairs