
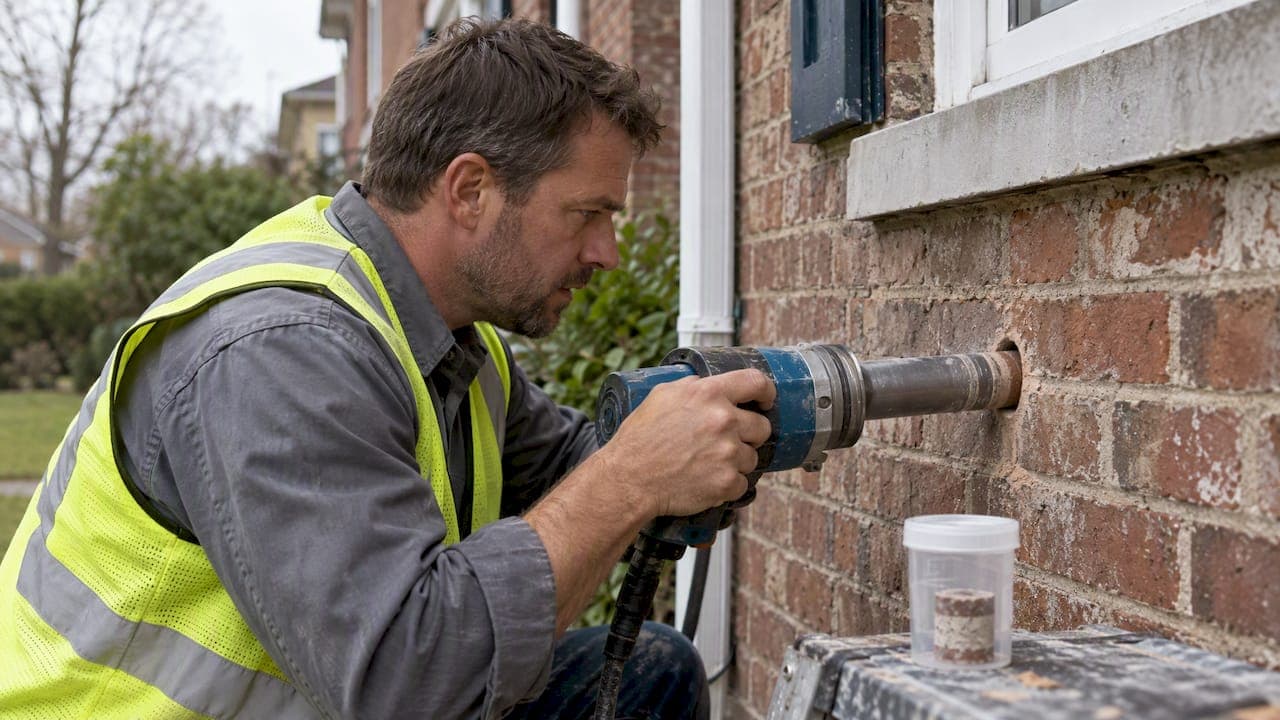
Best practice for brick moisture testing combines non-destructive field surveying with targeted gravimetric (oven-dry) confirmation, calibrated to the specific wall. Use pin, dielectric, or microwave meters to map suspect areas, then pull physical samples to confirm. Research-derived guidance treats mass moisture content (Um) up to about 3% as generally permissible, while readings above 5% typically call for remedial work.
TL;DR:
- Scan with a dielectric meter before using pin probes, then compare both methods; salts can make resistance readings falsely suggest dampness.
- For decisions with legal or contractual consequences, confirm field readings through oven drying, and record sample depth, location, temperature, and recent weather.
- Spread samples from the wall base to the top and along its length, targeting stains, damaged joints, and rendered sections separately.
- Use RILEM tube tests to compare surface absorption before and after water repellent treatment, but never treat one small patch as proof of wall performance.
- Readings between 3% and 5% call for monitoring and usually a gravimetric check; investigate the water source before choosing repairs.
Table of Contents
- Why brick moisture testing matters and how moisture moves through brick
- Field methods: pin, dielectric, microwave, and infrared compared
- Gravimetric sampling: the reference method and when it's required
- RILEM tube testing: method and limitations
- Standards and numeric thresholds worth citing
- Sampling strategy: where, how many, and how to calibrate
- Avoiding misreads: salts, renders, and single-point errors
- What to do after testing: a short action plan
- Practitioner notes from Heritage Masonry & Brick
- Why a calibrated, documented approach protects homeowners
- Moisture diagnostics and repair from Heritage Masonry & Brick
- FAQ
- Sources
Why brick moisture testing matters and how moisture moves through brick
Moisture in brick masonry drives several distinct failure patterns, and each one justifies a different inspection response. Freeze-thaw cycling expands trapped water inside pores and can spall the face of a brick within a few winters. Salt crystallization, often fed by rising damp or hard water, pushes crystals through the brick surface and breaks it down from within. Biological growth thrives wherever moisture sits for extended periods, and sustained dampness also accelerates thermal stress on mortar joints, weakening the bond between brick and mortar faster than dry cycling alone.
Brick itself is not a uniform material, and that variability is the reason a single reading rarely tells the full story. Pore structure, firing temperature, and the age of the unit all change how a given brick absorbs and releases water, so two bricks from the same wall can show different readings under identical conditions.
This is also why we distinguish between two kinds of data:
- Mass moisture content (Um): the actual weight of water in a sample relative to its dry weight, expressed as a percentage.
- Relative or non-destructive readings: meter outputs (resistance, capacitance, microwave attenuation) that correlate with moisture but are not themselves a direct measurement of Um.
A field meter tells you where moisture is elevated relative to a baseline. Only gravimetric data tells you the actual percentage, which is why a defensible assessment uses both.
Field methods: pin, dielectric, microwave, and infrared compared
Non-destructive tools let you survey a large wall quickly before deciding where to sample. Each technology reads a different physical property, and each has a sweet spot.
- Pin/resistance meters push two electrodes into or against the brick and measure electrical resistance, which drops as moisture rises. They're inexpensive and fast, but salts and efflorescence conduct electricity too, so a pin meter can read "wet" on a brick that's actually dry but salt-contaminated. Best used for quick spot checks once you've ruled out visible salt deposits.
- Dielectric/capacitive meters read a volume of material beneath the sensor plate without penetrating the surface, making them useful for mapping larger areas without marking the brick. Their sampling depth is shallow and manufacturer calibration curves rarely match a specific brick type, so local correlation against gravimetric samples is necessary for anything beyond relative comparison.
- Microwave and electrical tomography probe deeper into the wall section, which makes them suited to thick historic walls where surface readings alone miss moisture trapped mid-wall. These methods are more specialized and typically require a trained operator, but they're increasingly paired with modeling approaches: recent work on random-forest algorithms validated against gravimetric sampling suggests machine-learning models can improve how non-invasive readings are scaled to real moisture content, particularly in historic masonry where destructive sampling is limited.
- Infrared thermography and visual inspection don't measure moisture directly but reveal temperature differentials that often correlate with wet zones, especially right after rain or a change in outdoor temperature. It's a fast triage step: thermography tells you where to point the meters, not what the moisture content actually is.
The field workflow that holds up under scrutiny starts with two complementary non-destructive techniques, typically a pin meter and a dielectric scan, to locate hotspots across the wall. Where the two disagree, or where readings sit near a decision threshold, that's where you commit to physical sampling.
Pro Tip: Run your dielectric scan before any pin testing, since pin probes leave small puncture marks that can skew subsequent capacitive readings on the same spot.
Gravimetric sampling: the reference method and when it's required
Oven-drying is the method everything else gets measured against. It's slower and requires lab access, but it's the only approach that gives you an absolute percentage rather than a relative signal.
- Collect the sample. Extract a small core or drilled sample from the brick at the depth of interest, sealing it immediately in an airtight container to prevent evaporation before weighing.
- Weigh wet, then dry to constant mass. Record the initial wet weight, then dry the sample in an oven (typically following procedures aligned with ASTM C67) until successive weighings show no further mass loss.
- Calculate Um. Mass moisture content is the weight lost during drying divided by the dry weight, expressed as a percentage.
Gravimetric results matter most when a decision carries legal or contractual weight: a pre-purchase inspection, a dispute over water intrusion, or a warranty claim where a specific moisture figure needs to hold up. Field meters are excellent for screening, but they aren't the number you want written into a contract.
On practicalities, sample mass should be large enough to weigh accurately on a lab balance (a few grams at minimum), and depth should match the zone in question, surface versus core, since moisture gradients within a single brick can be significant. Document the exact sample location, depth, ambient temperature, and recent weather, since all three affect how the reading should be interpreted later.
RILEM tube testing: method and limitations
The RILEM induction (Karsten) tube test measures how much water a brick surface absorbs over time, and it's one of the most widely referenced field tests for surface porosity.
- Seal the tube to the brick face with putty or a comparable adhesive, creating a watertight contact ring around the open end.
- Fill the tube with water to a marked starting level, per the RILEM induction method procedure, which specifies the apparatus and timing intervals for the test.
- Record absorption at set intervals, typically noting the milliliters absorbed at several time checkpoints rather than a single endpoint.
- Repeat at multiple locations to capture variability across the wall face rather than relying on one reading.
The test has real limitations that industry guidance from the Brick Industry Association is explicit about: results vary considerably even across bricks from the same wall, and a tube test only measures a small surface patch, so it does not represent how the whole wall assembly performs against water intrusion. A tube test is not a substitute for assessing flashing, weeps, or cavity drainage.
Where it earns its place is in comparative work: checking surface porosity before and after applying a water-repellent treatment, or comparing one section of wall against another to flag unusually absorbent brick. Treat it as one data point in a broader assessment, not a standalone verdict on whether a wall leaks.

Standards and numeric thresholds worth citing
When you write up findings, cite recognized standards rather than rules of thumb. ASTM C67, Standard Test Methods for Sampling and Testing Brick and Structural Clay Tile, covers absorption, initial rate of absorption, saturation coefficient, and related lab procedures used to evaluate brick durability and moisture behavior. It's the reference point for any lab that processes gravimetric samples professionally.
- Um up to about 3% is generally treated as permissible under research-derived guidance.
- Um above about 5% typically signals the need for remedial measures.
- The band between 3% and 5% warrants monitoring and, in most cases, a follow-up gravimetric check rather than an immediate verdict.
One figure worth flagging for every inspection report: mass moisture content above a moderate single-digit percentage is the point where industry guidance shifts from monitoring to action, making it the single threshold most worth documenting clearly for a homeowner or client.
These thresholds shift with brick type and salt content, so a reading near the boundary deserves a second look rather than a snap judgment. A sample that absorbs more moisture than expected at that humidity level is a strong indicator of salt contamination rather than straightforward dampness.
Sampling strategy: where, how many, and how to calibrate
A single reading, wherever it's taken, tells you about one spot. A defensible assessment comes from a sampling plan that covers the wall's variability on purpose.
- Spread samples across height. Take readings near the base (where rising damp concentrates), mid-wall, and near the top, since moisture sources differ by elevation.
- Target suspected ingress points. Sample near visible staining, cracked mortar joints, or areas below window sills and flashing lines.
- Compare rendered and exposed sections. Rendered or plastered areas behave differently from bare brick and need their own baseline.
- Spread samples along the wall's length, not just at one problem spot, to confirm whether an issue is localized or systemic.
Pairing meter readings with a modest number of gravimetric samples builds what's often called correlational dependence: a local calibration curve that tells you what a given meter reading on this specific brick actually means in terms of Um. Comparative testing between non-destructive and destructive methods consistently recommends this pairing rather than relying on factory calibration settings, since brick composition varies enough between sources to make generic calibration unreliable. Within-wall variation can be substantial even at a small scale, so a sampling plan with more points, not fewer, produces a more trustworthy average.
Pro Tip: Record ambient temperature and recent rainfall alongside every reading. A dielectric scan taken the morning after heavy rain tells a very different story than the same scan a week into dry weather.
Present results as a moisture profile rather than a list of numbers: a simple height profile (base to top), a depth series (surface versus core) where gravimetric data allows it, and a plan-view map showing where readings cluster. That visual record is what makes a report useful to a homeowner, a buyer's inspector, or a contractor deciding where to start repairs.
Avoiding misreads: salts, renders, and single-point errors
The most common mistake in brick moisture testing isn't a broken meter, it's misreading what the meter is actually responding to.
- Efflorescence and salt deposits inflate electrical readings. Salts conduct electricity, so a pin meter on a salt-contaminated brick can read "wet" even when the moisture content is unremarkable. Industry guidance on damp meters recommends a visual check for white, powdery deposits before trusting a resistance reading, and our guide to diagnosing efflorescence walks through what those deposits typically indicate.
- Render and plaster hide what's happening in the brick behind it. A dry-looking painted surface can sit over consistently wet masonry, since coatings slow evaporation and mask the moisture that a bare brick would show.
- A single reading proves little on its own. Variability within one brick, let alone one wall, means that one high number needs context: is it an outlier, or part of a pattern.
When a reading is ambiguous, three checks settle most disputes. First, a basic salt test (even a simple taste or field kit check, though lab salt analysis is more reliable) separates salt-driven conductivity from true dampness. Second, repeating the reading over a few weeks shows whether moisture is seasonal or persistent. Third, combining meter types, a pin reading alongside a dielectric scan, catches cases where one technology is fooled and the other isn't.
What to do after testing: a short action plan
Once you have readings in hand, the next step depends on where they fall.
- Non-critical findings (Um comfortably under 3%, or meter readings low and consistent): log the results with date, location, and conditions, then recheck on a seasonal basis rather than acting immediately.
- Moderate findings (readings in the 3% to 5% range, or inconsistent between methods): commission a targeted gravimetric sample to confirm the number, then investigate the likely source, whether that's a leak near a flashing or weep detail or a grading issue pushing water against the foundation.
- Confirmed elevated findings (Um above 5%, or clear visual damage): commission lab testing if you haven't already, and bring in a masonry contractor to assess the full wall assembly, including flashings, cavity drainage, and weep function, not just the brick face.
Practitioner notes from Heritage Masonry & Brick
We have seen certain moisture patterns repeat across very different properties. Render masking is common on older homes where a prior owner painted or parged over brick that was already compromised. Salt banding near grade shows up often where soil moisture wicks upward through the base courses. Failed weep holes or flashing details are behind a sizable share of the water intrusion cases we're called in to evaluate.
We build moisture findings directly into our repair proposals, pairing field observations with a clear scope of work. We provide free estimates, and our work is guaranteed.
Why a calibrated, documented approach protects homeowners
Having spent years around masonry inspections, my own view is that the industry's biggest blind spot is overconfidence in a single meter reading. A number on a screen feels authoritative, but without calibration against gravimetric samples, it's a relative signal dressed up as a fact. The inspectors who serve homeowners best are the ones willing to say "this reading is uncertain, here's what we did to check it," and to put that reasoning in writing rather than just a verdict.
— Thomas
Moisture diagnostics and repair from Heritage Masonry & Brick
When testing turns up elevated moisture, the fix usually isn't the brick itself, it's what's letting water in. We offer moisture diagnostics alongside the repair work that actually resolves it: repointing to close failed mortar joints, structural repairs where water damage has compromised the wall, and chimney work where flashing failures are often the hidden culprit.

We provide free estimates on every project and back completed work with a workmanship guarantee, so you know the repair is built to last once the moisture issue is addressed. If your brick moisture testing has flagged a wall worth a closer look, start with our brick repair services to get a straightforward assessment and a clear scope of work.
FAQ
What draws moisture out of concrete?
Evaporation driven by temperature and airflow is the main mechanism that removes moisture from concrete, along with the material's own porosity allowing water to migrate toward drier surfaces over time. Dehumidification and increased ventilation accelerate this process in enclosed spaces.
How can you test moisture in wood?
Pin-type and pinless (capacitive) moisture meters are the most common field tools for wood, working on the same resistance and dielectric principles used in brick testing. For precise figures, an oven-dry gravimetric test, weighing a sample before and after drying to constant mass, remains the reference method.
Is 40% moisture normal in a room?
Context matters though, since the appropriate range shifts with climate, season, and building type.
Is 15% moisture in drywall considered bad?
It doesn't automatically mean mold has developed, but it's a signal to check for an active leak or condensation issue nearby.
Sources
- ASTM C67, Standard Test Methods for Sampling and Testing Brick and Structural Clay Tile
- RILEM tube testing and brick masonry (Brick Industry Association brief)
- Classification of the moisture content and salinity of brick walls (ResearchGate figure/context)
- Surface water permeability (RILEM induction method) procedural document