
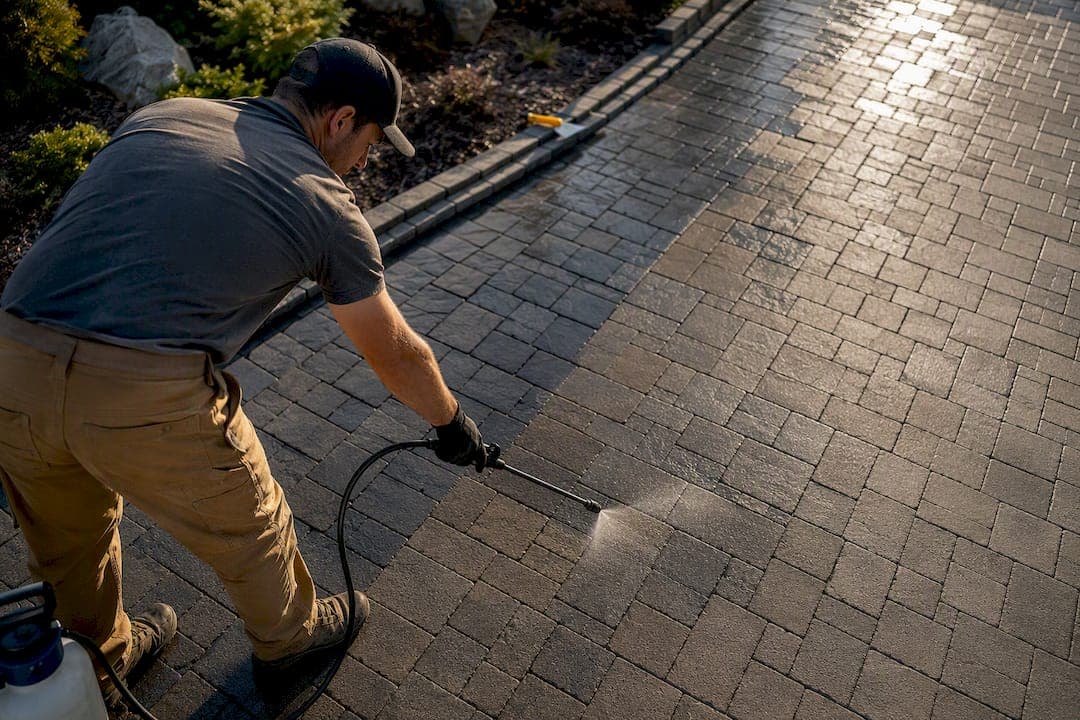
Sealing a paver patio is usually worth doing. It resists stains, keeps color from fading, and locks joint sand in place against wind and rain. But sealing before fixing drainage or a failing base only traps the real problem under a glossy finish. Watch for staining, joint sand washing out, or repeated freeze and thaw cycles. Those are your signals to seal, once the ground beneath the pavers is sound.
TL;DR:
- Sealers are most effective after fixing underlying drainage or base issues, as trapping moisture can cause cracking and worsening of problems.
- Penetrating sealers are ideal for freeze-prone regions and pools because they are breathable and prevent moisture buildup behind the surface.
- Proper surface preparation, including cleaning, efflorescence removal, joint filling, and ensuring dryness, is crucial for a long-lasting seal.
- Applying two thin coats with proper tools and timing ensures better adhesion and reduces the risk of peeling or haze.
- Frequent reapplication is necessary for film-forming sealers, while penetrating formulas tend to last longer, with visible signs like water sheeting indicating when to reseal.
Table of Contents
- Quick Decision Checklist: Do This First
- Sealer Types Explained: Penetrating vs Film-Forming
- How Do You Prep a Patio Before Sealing?
- What's the Right Way to Apply Paver Sealer?
- Common Sealing Problems and How to Fix Them
- How Often Should You Reseal, and What Does It Cost?
- Should You DIY or Hire a Masonry Pro?
- Author Perspective: Field-Tested Priorities for Sealing
- When to Call Heritage Masonry & Brick for Sealing Work
- Sources
Quick Decision Checklist: Do This First
Before buying a single can of sealer, walk your patio and check five things. This five-minute inspection tells you more than any product label.
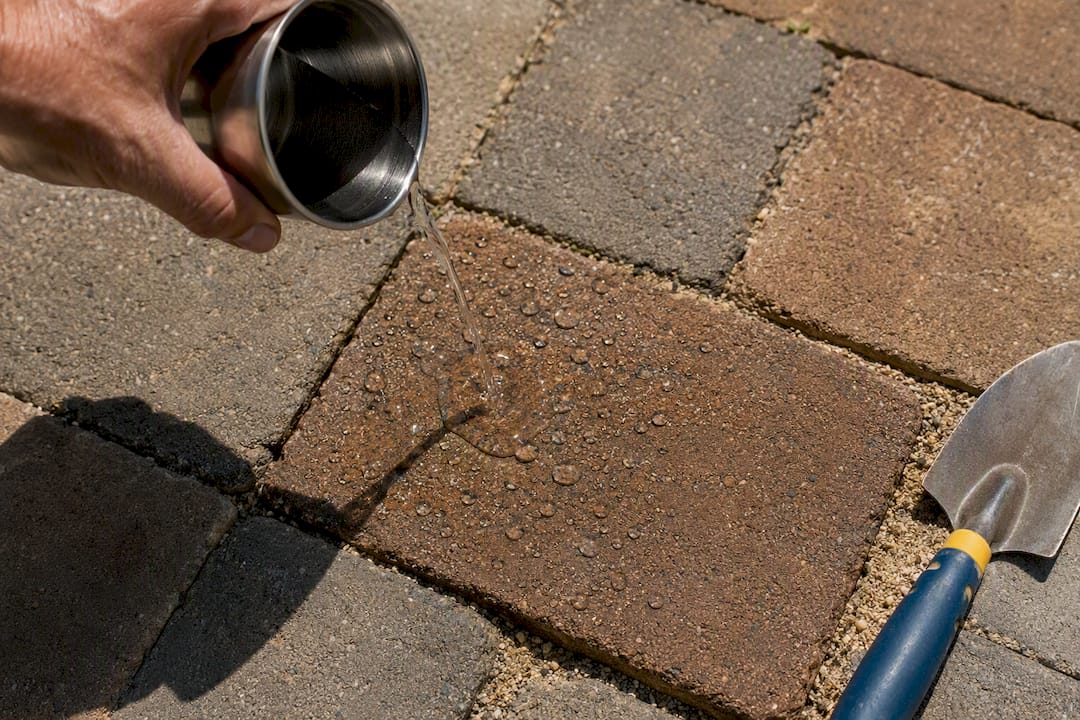
- Porosity test: splash water on the pavers. If it soaks in fast instead of beading, the surface is thirsty and will benefit from a sealer.
- Stains: oil, rust, or leaf tannin marks mean a sealer will help prevent the next one from setting in.
- Joint sand condition: loose, low, or washed-out joints point toward a joint-stabilizing sealer, not just a cosmetic coat.
- Efflorescence: that chalky white bloom on the surface is a warning sign, not a cleaning problem you can seal over.
- Drainage: standing water after rain, or pavers that rock underfoot, mean the base needs attention before any sealer goes down.
If two or more of these signals show up, sealing paver patios is almost certainly worth the weekend. If drainage or base issues are the culprit, fix those first. Our guide to diagnosing brick patio drainage walks through the 20 minute test that reveals whether water is pooling because of the patio's slope or its base compaction.
Once the ground checks out, match the sealer to the job. Choose a penetrating formula if you want breathability and a natural look. Choose a film-forming, joint-stabilizing sealer if you want a color boost and tighter joints.
Pro Tip: Do the water-bead test on a hot, dry afternoon. Morning dew or recent rain will give you a false reading on how porous the pavers really are.
Sealer Types Explained: Penetrating vs Film-Forming
Two families of sealer dominate the market, and they behave almost opposite to one another.
Penetrating sealers rely on silane or siloxane chemistry that soaks into the paver instead of sitting on top. They leave little to no sheen, breathe moisture vapor out of the material, and tend to last the longest of any category. That makes them a strong match for pool decks and any patio that sees regular freeze and thaw cycles, since trapped moisture behind a film is what causes cracking in cold climates.
Film-forming sealers (acrylics and urethanes) sit on the surface and cure into a topcoat. They deliver the "wet look" color enhancement homeowners often want, and joint-stabilizing versions lock polymeric sand in place against wind and rinse-out. The trade-off is a shorter service life, often requiring recoating every few years, compared with longer-lasting penetrating formulas, and a higher chance of slipperiness when wet.
- Penetrating: breathable, subtle finish, best for pools and freeze-prone regions.
- Film-forming: color boost, joint lock, needs more frequent recoating.
- Water-based: lower odor, lower VOC content, easier cleanup.
- Solvent-based: deeper color saturation, stronger fumes, often better penetration in cooler weather.
Independent testing from BobVila rated Foundation Armor AR350 and Ghostshield Siloxa-Tek 8500 among the top performers for protection and stain resistance, with AR350 delivering the strongest wet-look color and Siloxa-Tek 8500 standing out as a penetrating option. Solvent-based acrylics can produce a deeper gloss but tend to be more slippery when wet, which a nonslip additive in the second coat corrects. Natural stone patios are the exception to most of these rules: many stones need a specific breathable, non-darkening formula, so check the manufacturer's stone compatibility chart before assuming any generic sealer will work.
How Do You Prep a Patio Before Sealing?
Every professional guide agrees on one thing: prep decides whether a sealing job lasts five years or fails in five months. Skipping steps here is the single biggest reason DIY jobs turn hazy or peel within a season.
- Pressure-wash the surface on a wide fan setting to avoid gouging the paver face. For oil or rust stains, use a stain-specific cleaner rather than scrubbing harder with plain water. Our preservation-first cleaning method covers safe technique for brick and concrete pavers alike, and a soft-wash versus pressure-wash comparison is worth reading if you're unsure which method fits your surface.
- Treat efflorescence properly. That white haze is mineral salt pushed up by moisture, and sealing over it just locks it under the finish. A proprietary efflorescence remover is safer than muriatic acid, which can etch the paver surface if diluted incorrectly. If the bloom keeps coming back after cleaning, the underlying cause is usually moisture moving through the base, not a surface problem sealer can fix.
- Refill and cure the joints. Sweep in polymeric sand for joints that need to resist erosion, or use regular sand if you're pairing it with a joint-stabilizing sealer. Polymeric sand needs 24 to 72 hours to cure before you seal, and sealing too early traps moisture under the surface.
- Wait for a dry window. The pavers need to be fully dry, not just surface-dry, before you apply anything. Two to three dry days minimum is the safe rule, longer after heavy rain.
Pro Tip: Wear gloves and eye protection any time you're handling efflorescence removers or solvent-based sealers. Fumes and splashback are easy to underestimate on a calm day.
What's the Right Way to Apply Paver Sealer?
Once the surface is clean, dry, and sanded, the application itself is fairly forgiving if you follow a few rules.
Tools you'll need:
- A pump sprayer for flooding joints and covering large areas evenly.
- A low-nap roller for smooth film-forming coats on flat paver surfaces.
- A stiff broom to work polymeric sand into joints before sealing.
- Gloves, eye protection, and a respirator rated for solvent fumes if you're using a solvent-based product.
- Test a small patch first. Independent testers use this step to check color, adhesion, and slip resistance before committing to the whole patio, and you should too.
- Choose your method by sealer type. Joint-stabilizing sealers should be applied by flooding the joints with a sprayer and working the material in, then back-brushing any pooled excess off the paver face. Straight film-forming acrylics on smooth pavers go on cleanly with a roller.
- Apply two thin coats, not one heavy one. Overapplication is the most common DIY mistake, and it's the direct cause of most peeling. Two light coats bond better and dry more evenly than a single thick pass.
- Keep a wet edge. Work in manageable sections so you never let one area dry before the adjoining section is coated, or you'll see lap marks once it cures.
- Respect the temperature window. Surface temperatures between 50°F and 85°F give the sealer time to cure properly without flashing off too fast or refusing to set.
- Restrict traffic during cure. Keep foot traffic off for at least 24 hours and vehicles off patios or driveways for 48 to 72 hours, depending on the product label.
Common Sealing Problems and How to Fix Them
Even careful DIYers run into trouble. Here's what the most frequent failures look like and how to recover.
- White haze or blushing usually means moisture got trapped under the film during cure, often from sealing too soon after rain or over damp joints. A light buff with a soft pad sometimes clears it; if not, a full strip and recoat is the fix.
- Peeling or flaking points to incompatible chemistry (sealing a solvent-based product over an old water-based coat, for example) or skipped prep. The fix is stripping the failed coat completely, cleaning down to bare paver, and starting the prep sequence over.
- Slippery surfaces are common with glossy film-formers, especially near pools. Adding a nonslip additive to the final coat solves most cases, or switch to a penetrating sealer next time around, since it preserves natural traction.
Pro Tip: If you're constantly fighting haze or peeling on the same patio, stop resealing and start investigating the base. Recurring failures are almost always a moisture problem, not a product problem.
How Often Should You Reseal, and What Does It Cost?
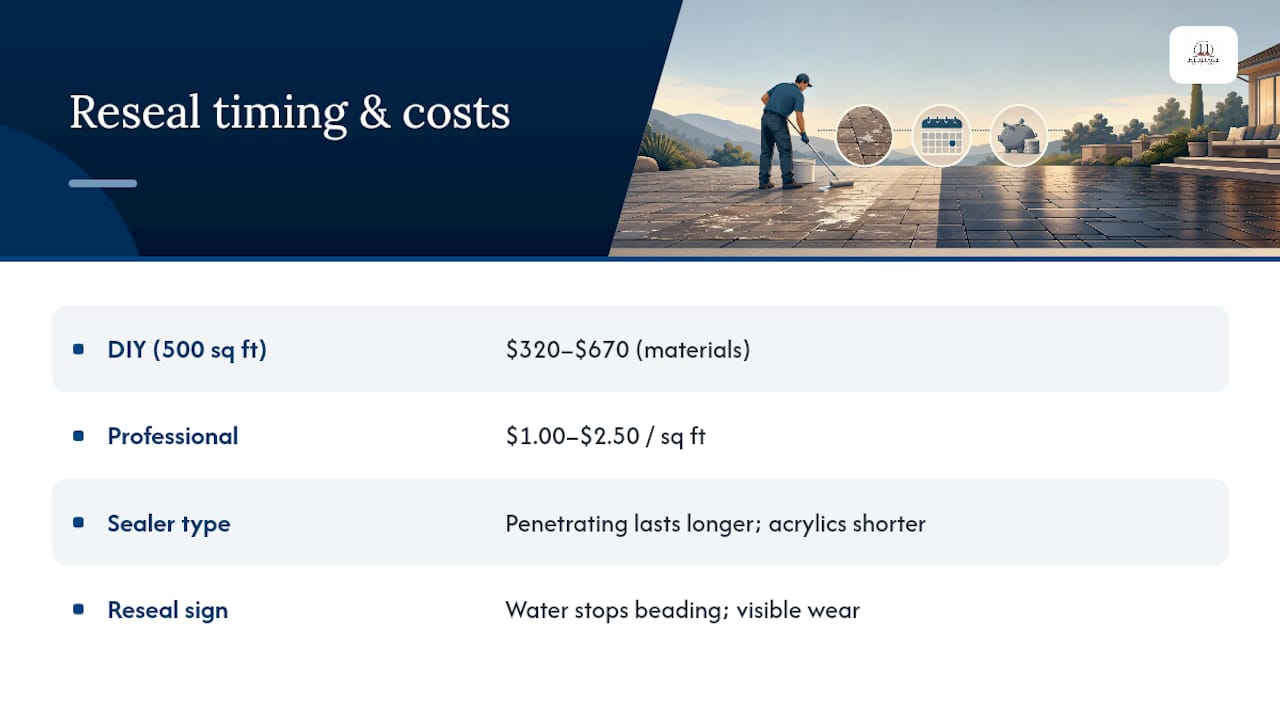
Reseal timing varies with the sealer type and patio use, with penetrating sealers typically lasting longer and film-forming acrylics needing more frequent recoating. A practical sign to reseal is when water stops beading on the surface or wear patterns appear in high-traffic areas.
For a 500 square foot patio, DIY material costs typically run $320 to $670, covering sealer, sprayer rental, and sand, plus a weekend of labor. Hiring a professional for a seal-and-sand job generally runs $1.00 to $2.50 per square foot, climbing higher when stripping an old failed coat or extensive prep is involved. If you're still budgeting the original installation, our brick patio cost breakdown covers what the base project itself typically runs.
Should You DIY or Hire a Masonry Pro?
The honest answer depends on scope, not skill level. A straightforward reseal on a healthy patio is a reasonable weekend project. A patio with recurring efflorescence, a failing base, or a previous sealer that's peeling is a different job entirely.
- DIY fits when: the patio is under roughly 800 square feet, there's no standing water after rain, and this is a routine reseal rather than a strip-and-redo.
- Hire a pro when: efflorescence keeps returning, joints are washing out despite fresh sand, or the existing sealer needs full removal before recoating.
If you do bring in a contractor, ask these questions before signing anything:
- What warranty backs the workmanship, and for how long?
- Have they stripped and reapplied sealer before, or do they only spray fresh coats?
- Which products do they use, and are they suited to your specific paver material?
- Will they test a patch first, and what's their timeline around weather?
A scope that includes stripping, joint repair, and drainage correction is a full masonry job, not a simple spray-on service. If joints are failing structurally rather than just needing sand, that overlaps with repointing and tuckpointing work rather than sealing alone.
Author Perspective: Field-Tested Priorities for Sealing
Most sealing failures we get called to fix didn't start with a bad product. They started with sealing over a drainage problem that was never going to stay hidden. A beautiful wet-look finish over a base that's shifting or holding water just delays the reckoning by a season or two.
Our field priority is always the same: fix the ground first, then coat the surface. We've seen the pattern often enough in drainage repairs that it's practically a rule of thumb now. Professionals who work on masonry every week don't treat sealing as a one-time job either. We inspect annually and reseal based on real performance cues, like water no longer beading, not on a fixed calendar.
— Thomas
When to Call Heritage Masonry & Brick for Sealing Work
Richmond, VA homeowners who want the prep done right the first time, instead of paying twice: once for a rushed DIY seal, and again to fix what it hid, should consider professional help. Some companies handle efflorescence remediation down to its root cause, repointing loose joints, drainage corrections, and sealing itself, sometimes backed by workmanship guarantees.

If your patio has recurring white haze, a base that's settling, or a sealer job from a previous contractor that's already peeling, that's a strip-and-repair scope rather than a weekend project. We offer free estimates for Richmond-area patios, walkways, and brickwork, and you can start with our masonry advice resources or reach out directly through Heritage Masonry & Brick to get a professional read on what your patio actually needs before you spend a weekend on it.
Sources
For deeper technical detail, BobVila's hands-on sealer testing compares product performance, Unilock's manufacturer guidance covers cure conditions, and J. Signor Exteriors offers additional perspective on professional masonry scopes.
- The Best Paver Sealers for Protecting Your Patio, Tested — BobVila
- How to Seal Pavers: Step-by-Step Guide — DGFloors
- How to Sand and Seal Patio Pavers: Complete DIY Guide — PatioPaversDIY
- How To Seal Pavers: Pro Tips for a Lasting Finish — Unilock