
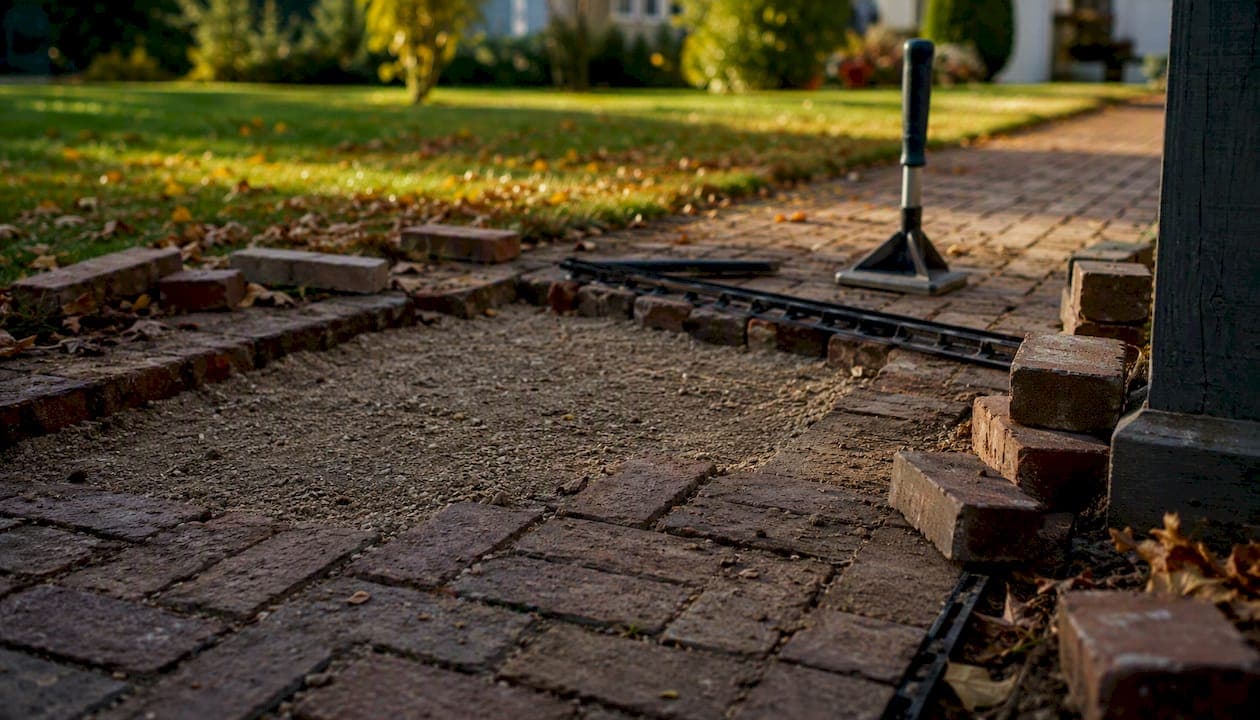
Most brick walkway problems are fixable in a weekend: loose bricks, thin or crumbling joints, and small settled patches respond well to DIY brick walkway repair with basic tools and a few hours. Widespread base failure, standing water that won't drain, or a walkway sinking across more than a quarter of its length is a different story. Those call for a masonry contractor, not a rental compactor.
Start by inspecting the walkway and sorting what you find into two buckets: surface problems (loose bricks, worn joints, weeds) or subbase problems (settling, heaving, large dips). That single classification decides whether you spend an afternoon or a weekend, and whether you need a trowel or a plate compactor.
- Surface issue? A few loose bricks, sandy joints, weeds poking through. Continue reading. This is a same-day fix.
- Subbase issue? Bricks tilting together, a dip you can roll a ball into, or water pooling for hours after rain. Plan on a weekend project or a call to a pro.
- Both, and it covers a large area? Skip ahead to the section on hiring help.
A brick walkway that's sinking in one 3 foot by 3 foot patch is a DIY job. A walkway sinking along a 20 foot run, with soft ground underneath, is a drainage or grading problem no amount of polymeric sand will solve.
Key Takeaways
Most brick walkway repairs succeed or fail based on the compacted crushed-stone base underneath, not the joint material or brick color on top.
| Point | Details |
|---|---|
| Classify before you dig | Sort the damage into surface issues (joints, loose bricks) or subbase issues (settling, heaving) first. |
| Rebuild the base in lifts | Compact crushed stone in 2 inch layers and maintain a quarter inch per foot slope to stop repeat failures. |
| Match sand to the job | Use polymeric sand for most joints, plain sand for permeable installs, mortar for wide or historic joints. |
| Budget realistically | Small patches often run under $200 and a few hours; base rebuilds take a full weekend and more materials. |
| Call a pro for big jobs | Heritage Masonry & Brick handles widespread settling, drainage problems, and historic brick matching with a 5-year workmanship guarantee. |
Table of Contents
- How Do You Inspect and Diagnose a Brick Walkway?
- What Tools and Materials Do You Need for Brick Path Maintenance?
- Fixing Loose Bricks and Repointing Joints
- How Do You Fix a Settled or Sunken Brick Walkway?
- Edges, Sealing, and Weed Control That Make the Repair Last
- What Does Brick Walkway Repair Cost, and How Long Does It Take?
- When Should You Call a Masonry Contractor Instead?
- Where Homeowners Get Brick Walkway Repair Wrong
- Get Expert Help From Heritage Masonry & Brick
- Frequently Asked Questions
- Sources
How Do You Inspect and Diagnose a Brick Walkway?
Before you touch a single brick, walk the entire path slowly and look for patterns, not just individual flaws. A walkway that's failing in one isolated spot has a different story than one failing in a straight line, which usually points to a buried pipe, root, or drainage swale underneath.
Work through this checklist section by section:
- Sinking or heaving: Look for bricks that dip below their neighbors or push up above the line. Both point to subbase movement.
- Loose or wobbly bricks: Step on each brick near the edges. Movement or a hollow sound means the setting bed underneath has eroded.
- Cracked bricks: Hairline cracks are often cosmetic; bricks split clean through usually mean freeze-thaw damage or a heavy load overhead.
- Joint erosion and weeds: Gaps deeper than a quarter inch, or weeds growing between bricks, signal the joint material has washed out or was never packed properly.
- Ponding and slope: Check for standing water or dark, damp staining after a rain. Brick walkways need roughly a quarter inch of drop per foot to shed water.
- Root lines: A raised ridge running diagonally across the path usually traces a tree root pushing up from below.
Run two quick tests while you're out there. First, the tap test: tap each suspect brick with a rubber mallet and listen for a hollow or shifting sound compared to solid neighbors. Second, lay a straight 4 foot board or level across any dip and measure the gap underneath with a tape measure. Anything over half an inch across that span usually means the base has compacted unevenly or washed out.
Inspect again right after a rainstorm if you can. Water pooling for more than a few hours reveals grading problems that look invisible on a dry day.
Pro Tip: Photograph every problem area before you start, and mark the boundaries with spray paint or garden stakes. This gives you an accurate footprint for ordering crushed stone, sand, and replacement bricks, and it prevents the common mistake of underestimating how far a "small" repair actually needs to extend.
What Tools and Materials Do You Need for Brick Path Maintenance?
Buy or borrow everything before you pull the first brick. Running to the hardware store mid-project with a half-disassembled walkway is how a two-hour job turns into a three-day one.
Materials:
- Replacement bricks (matched for color, size, and wear, ideally sourced from the same manufacturer or a reclaimed-brick supplier)
- Crushed stone, 3/4 inch, for base rebuilding
- Stone dust or paver sand for the setting bed
- Polymeric sand (or mortar, for repointing brick joints)
- Concrete mix, if you're adding a poured edge restraint
Tools:
- Rubber mallet
- Pointing trowel and a mason's line
- Hand tamper for small patches, or a rented plate compactor for anything larger than a few square feet
- Flat pry bar for lifting bricks without chipping them
- Shovel, wheelbarrow, push broom, and a 4 foot level
- Gloves and safety glasses
A hand tamper works fine for patching one or two bricks. Anything covering more than roughly 10 square feet is worth renting a plate compactor for the day. Most equipment rental centers charge by the half day, and a single rental usually covers everything you need for one focused weekend project.
Pro Tip: Bring a sample brick with you when shopping for replacements. Color and texture vary by clay source and manufacturing batch, and a mismatched brick sticks out far more than a slightly uneven joint ever will.
Fixing Loose Bricks and Repointing Joints
Small, isolated problems, a couple of loose bricks or crumbling mortar joints, are the easiest entry point into brick walkway repair, and most homeowners finish this kind of job in an afternoon. Clear the area first: pull weeds from the joints, sweep away loose debris, and let the surface dry completely if you're using polymeric sand, since it won't bond properly to damp joints.
Repointing joints
- Remove damaged or crumbling mortar to a depth about two to two and a half times the joint's width, using a grout saw or a flathead screwdriver and hammer for stubborn spots.
- Vacuum or brush out all loose debris and dust from the joint.
- Mix your mortar according to the manufacturer's directions, or pour polymeric sand and work it into the joints with a push broom if you're going that route instead.
- Pack the joint firmly with a pointing trowel, slightly overfilling, then strike it level with the brick surface.
- Mist polymeric sand lightly with water to activate the binders, following the product's timing instructions closely, or let mortar cure per its label directions, typically keeping it damp for 24 to 48 hours.
Removing damaged mortar to the right depth before applying new material is what separates a repair that lasts from one that cracks out again within a season.
Replacing a single brick
- Use a flat pry bar to lift the damaged brick, working from opposite corners to avoid chipping the neighbors.
- Clean out the cavity completely, removing old sand, mortar, or setting bed material down to firm ground.
- Rebuild a compacted setting bed of stone dust roughly an inch deep, tamping it firm and level with the surrounding bricks.
- Set the new brick in place, tapping it gently with a rubber mallet until it sits flush.
- Check it against a straight edge or level laid across the neighboring bricks, adjusting the bed thickness until it matches exactly.
- Sweep polymeric sand or pack mortar into the surrounding joints and finish as described above.
Polymeric sand suits most everyday walkways because it locks joints tight against washout and resists weeds, while mortar makes more sense for repairs matching an existing mortared walkway or for joints wider than about half an inch. Choose based on what's already there rather than switching materials halfway down the path.
Getting the setting bed depth right matters more than getting the mortar color perfect. A brick that's a shade off blends in after a season of weathering. A brick that sits a quarter inch proud trips someone within a week.
Photograph the cavity before you rebuild the bed, and again once the new brick is set and leveled. Those two photos, shot from directly overhead, make it easy to spot a lean or a low spot you might otherwise miss until the mortar's already cured.
How Do You Fix a Settled or Sunken Brick Walkway?
A single sunken brick is a five minute fix. A dip spanning several feet, or a section that's visibly lower than the rest of the walkway, means the base underneath has compacted, washed out, or was never built to spec in the first place. This is where most fixing brick walkway projects graduate from an afternoon task to a weekend one.
Use this rule of thumb to decide how far to excavate: if less than 25 percent of the affected area shows visible base erosion, a localized rebuild usually solves it. If the damage covers more than that, or if you find soft, waterlogged soil under multiple spots, plan on excavating the entire section back to solid ground.
- Remove the bricks in the affected area and set them aside in order, so you can match their exact positions later.
- Excavate down to stable, undisturbed soil, removing any soft or muddy material completely.
- Install crushed stone in 2 inch lifts, compacting each layer with a hand tamper or plate compactor before adding the next.
- Continue building the crushed stone base until you're about an inch below your final target height.
- Screed a 1 inch layer of stone dust or paver sand across the compacted base, maintaining a slope of roughly a quarter inch per foot away from the house or any structure.
- Reset the bricks in their original pattern, tapping each one level with a rubber mallet as you go.
- Run a plate compactor over the finished surface to seat the bricks fully, then sweep polymeric sand into every joint and run the compactor once more to work sand deep into the gaps.
A properly compacted crushed-stone base with the right slope is the difference between a repair that holds for a decade and one that sinks again by next winter. Skipping the compaction step, or eyeballing the slope instead of measuring it, is the single most common reason DIY walkway repairs fail early.
Reserve the hand tamper for patches smaller than roughly 10 square feet. Anything bigger benefits from a rented plate compactor, which achieves far more consistent density across the base than manual tamping ever will, and cuts the labor time significantly.
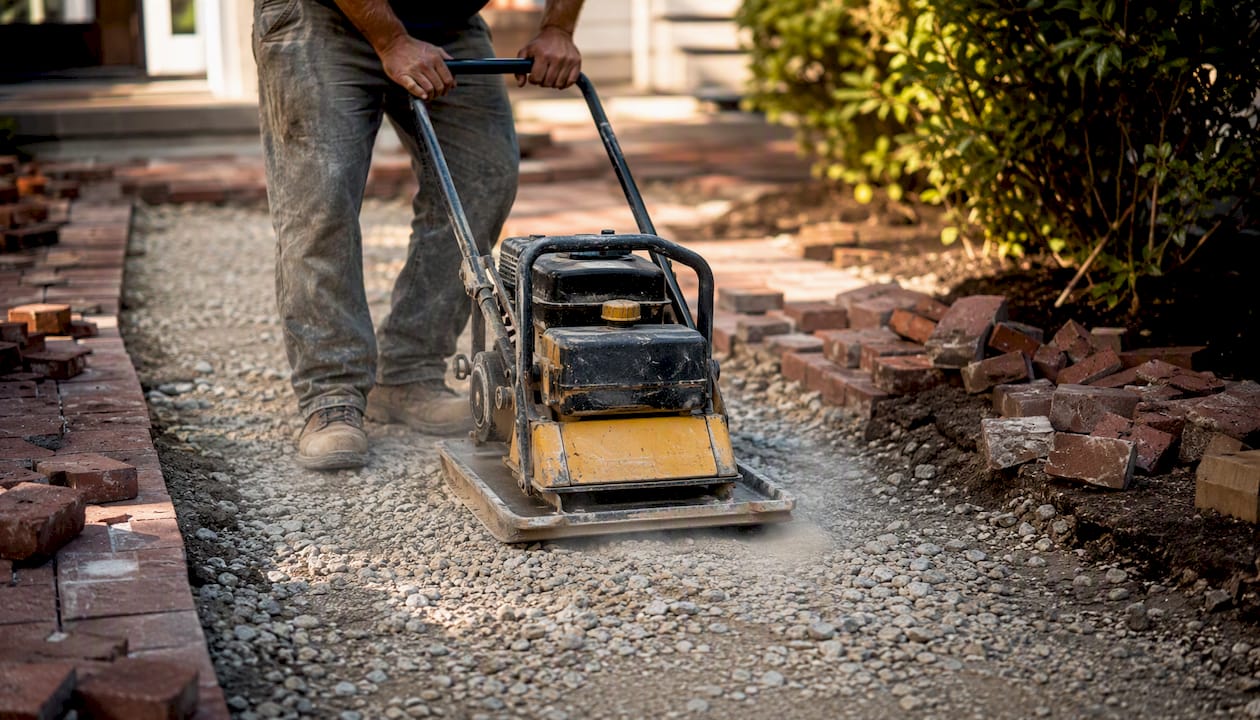
Pro Tip: Compact each 2 inch lift of crushed stone separately rather than dumping it all in at once and tamping the top. A single deep pass leaves the bottom layers loose, and that's exactly where next winter's frost heave starts.
Edges, Sealing, and Weed Control That Make the Repair Last
An edge restraint keeps rebuilt bricks from creeping outward over time, which is often what causes joints to open back up within a year or two of an otherwise solid repair. Plastic edging is the cheapest and easiest to install, but it's also the least durable and can work loose in freeze-thaw climates. A poured concrete band or a mortared brick or stone curb costs more upfront and takes longer to install, but holds its shape for decades and looks more finished against a traditional brick path.
Joint finishing follows the same logic as the repair steps above: polymeric sand for most walkways, mortar for wide or historically mortared joints. Polymeric sand's chemical binders lock in place once activated with water, which resists both washout and weed growth far better than loose sand ever did. One exception matters here: if your walkway relies on permeable joints to let water filter through into the ground below, polymeric sand can block that drainage path entirely, so stick with plain sand on any permeable installation.
Sealing is optional and situational. A penetrating sealer helps resist staining and can deepen brick color on a patio, but it's rarely necessary on a walkway unless you're dealing with heavy foot traffic or want a uniform look after patching in new bricks. Skip it entirely on permeable sections.
- Sweep the walkway regularly to keep grit from grinding into the joints.
- Pressure-wash gently, keeping the nozzle under roughly 1,200 PSI, to avoid blasting sand out of the joints.
- Pull weeds by hand as soon as they appear rather than letting roots establish in the joint sand.
- Check the walkway each spring and fall for new gaps or shifting, since catching a loose brick early is far easier than rebuilding a whole section later.
Pro Tip: Re-sand joints every couple of years even if nothing looks obviously wrong. Joint sand erodes gradually from rain and foot traffic, and topping it off before a real gap opens is far less work than a full brick reset.
What Does Brick Walkway Repair Cost, and How Long Does It Take?
A single loose brick or a short run of repointing typically takes a few hours from start to finish, tools out to tools away. A localized base rebuild, digging out a settled section, compacting new stone, and relaying brick, usually runs one full day to a weekend, depending on the area's size and how much hand tamping versus machine compaction it needs.
Small patch repairs often run under $200 in materials when you're supplying your own labor, though costs climb with the size of the area and whether you need to rent equipment.
Time and cost tip the scale toward hiring a pro once a project needs permits, spans a large area, or involves specialized grading equipment you'd only rent once. At that point, the cost of a few days of rental gear starts to rival what a contractor would charge for the whole job, done right the first time.
Pro Tip: If you're on the fence about renting a plate compactor, renting for a single weekend is almost always more cost-effective than buying one unless you're planning multiple hardscape projects down the road.
When Should You Call a Masonry Contractor Instead?
Some brick walkway problems are beyond a weekend DIY fix, no matter how much crushed stone and patience you bring to it. Call a pro if you're seeing widespread base failure across the whole path, more than roughly a quarter to half of the bricks fractured, active drainage problems that keep the ground saturated, movement near a retaining wall, or grading complex enough that water keeps finding its way toward your foundation instead of away from it.
A masonry contractor brings a few things a DIY repair typically can't match: a full subgrade evaluation to catch problems before they resurface, an engineered and properly compacted base, historic brick matching for older homes, and structural repair capability for issues that go beyond the surface. Heritage Masonry & Brick's brick repair services include exactly this kind of subgrade work alongside repointing and material matching.
Before hiring anyone, ask a few direct questions:
- How many years of masonry experience does your crew have, and can you show examples of similar walkway repairs?
- What base preparation method do you use, and how deep do you excavate?
- Is there a written estimate, and what's included in it?
- What does your workmanship guarantee cover, and for how long?
That last question matters more than most homeowners realize. A five year workmanship guarantee, which Heritage Masonry & Brick includes on its projects, shifts the risk of a repair failing back onto the contractor instead of onto you. That's a meaningfully different calculation than a DIY repair you're troubleshooting alone.
Where Homeowners Get Brick Walkway Repair Wrong
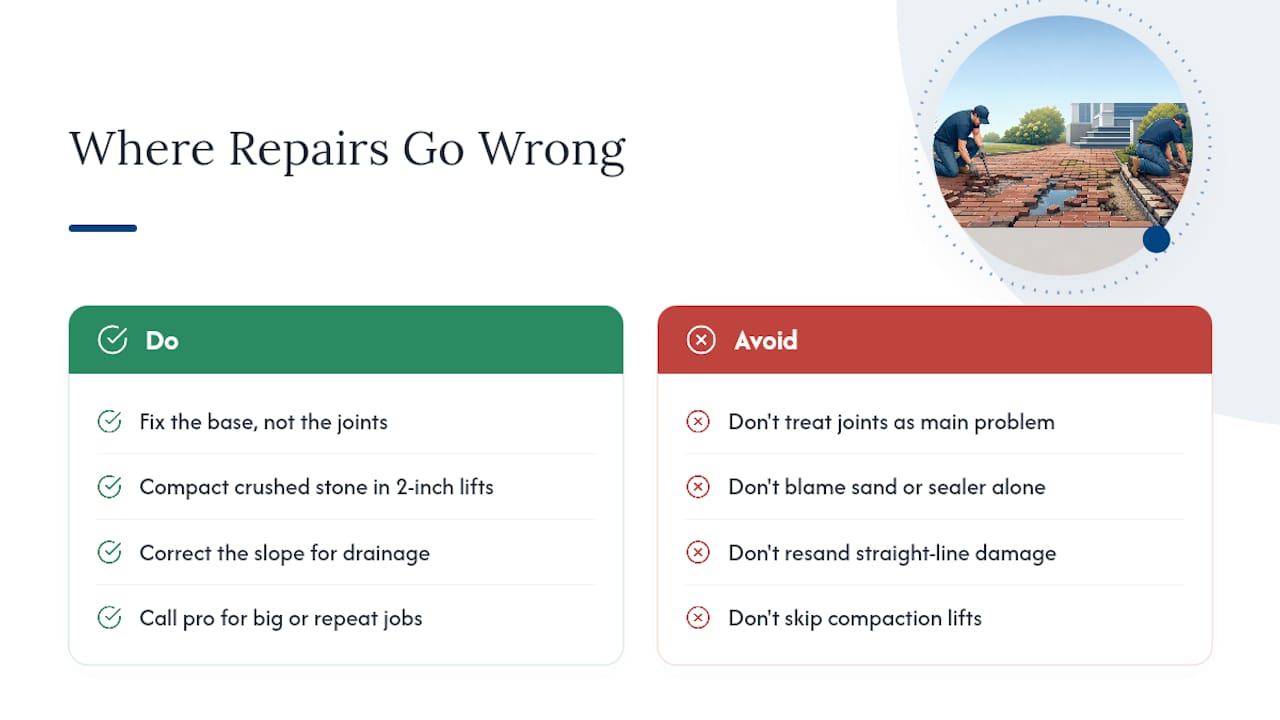
Most guides make brick repair sound like a joint-sand problem. It usually isn't. The joints are the symptom; the base is the disease. I've seen more failed walkway repairs traced back to skipped compaction lifts and ignored slope than to any mortar mix or sand brand.
The conventional advice leans hard on product choice, polymeric sand versus mortar, which sealer to buy, when the real variable that determines whether a repair lasts one season or fifteen years is almost always underneath the bricks. A homeowner who compacts crushed stone in proper 2 inch lifts and gets the slope right will outlast a neighbor who bought premium bricks but tamped the base once and called it done.
The second thing people underestimate is how much a straight line of damage, rather than an isolated patch, tells you. That pattern almost always means a root, a pipe, or a drainage path is working against you below grade, not just above it. Treating that as a resanding job instead of a base problem is the single most common reason repairs fail again within a year.
If your walkway's problem covers more ground than you can excavate in a weekend, or if you've found the same failure twice already, that's your signal to stop DIYing and bring in someone who deals with Richmond's clay soil and freeze-thaw cycles every week.
Get Expert Help From Heritage Masonry & Brick
Heritage Masonry & Brick is the option for Richmond homeowners whose walkway problem outgrew a weekend project: widespread settling, a walkway that keeps failing in the same spot, or historic brick that needs matching rather than replacing with whatever the hardware store stocks. With over 25 years in Richmond masonry, the team rebuilds the subgrade properly the first time, matches existing brick color and texture instead of leaving a patchwork look, and backs every job with a 5-year workmanship guarantee.

That guarantee matters most for exactly the repairs this guide flags as too big for DIY: large sunken sections, active drainage issues, or walkways tied into retaining walls and steps. Rather than gambling another weekend on a repair that might fail again by spring, request a free estimate for your brick walkway and get a contractor's assessment of what's actually happening under the surface before you dig another inch.
Frequently Asked Questions
Can you repair a brick walkway yourself, or do you need a professional? Most surface problems, loose bricks, worn joints, small settled patches, are well within DIY reach with basic tools and a weekend. Widespread base failure, drainage issues, or more than a quarter of the bricks cracked usually call for a masonry contractor.
How do you fix a sunken section of a brick walkway? Excavate the sunken area down to stable soil, rebuild the base with compacted crushed stone in 2 inch lifts, add a 1 inch stone dust setting bed with proper slope, then relay the bricks and compact the surface.
What's better for brick joints: polymeric sand or mortar? Polymeric sand suits most everyday walkways because it locks joints against washout and weeds once activated with water. Mortar makes more sense for wide joints or walkways that were originally mortared.
How much does DIY brick walkway repair cost? Small patch repairs often cost under $200 in materials, though larger base rebuilds cost more once you factor in additional crushed stone, sand, and any equipment rental.
How long does brick sidewalk repair take? A simple repointing or single-brick swap takes a few hours. A localized base rebuild for a settled section typically takes one full day to a weekend.
Sources
- How To Repair a Brick Walkway to Boost Curb Appeal - This Old House
- Rapidrepair
- Brick Walkway Repair: Fix Sunken Paths in 4 Easy Steps