
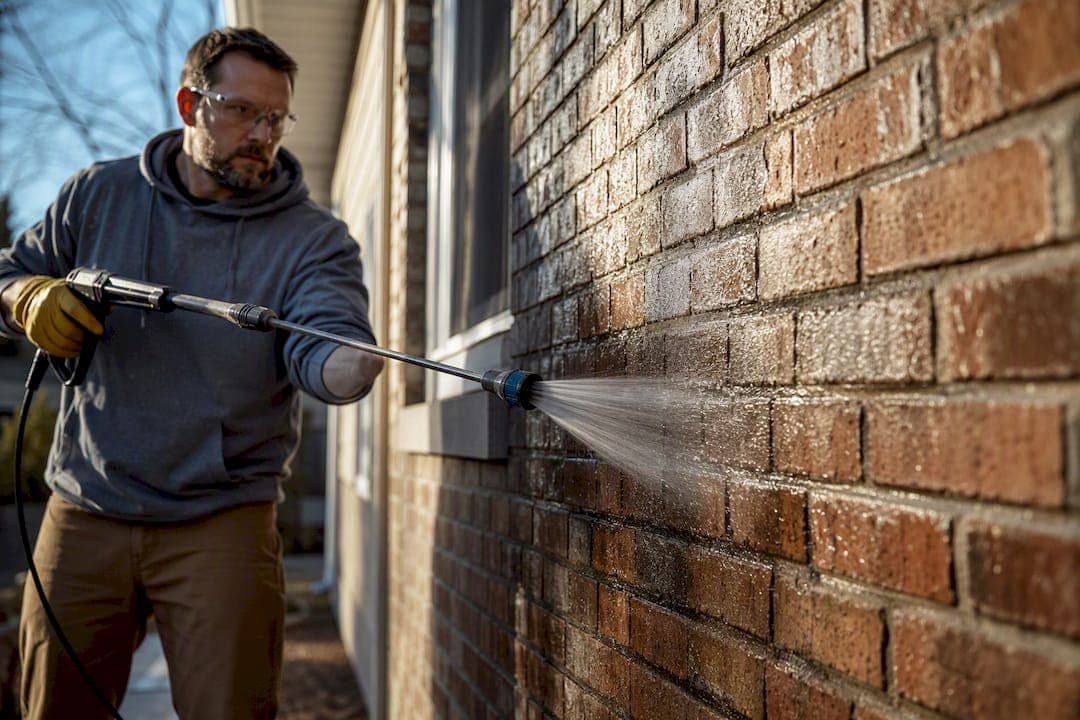
Pressure washing can strip mortar, crack the brick face, and drive water into wall cavities when the PSI is too high or the nozzle is wrong, as explained in End Five Year Weed Costs: Rubberway® for HOAs and Cities. It's not automatically unsafe, but standard power-washing equipment (1,500 to 4,000 PSI) exceeds what most brick can tolerate. The safer standard is a preservation-first approach: soft-wash or low-pressure methods, tested first on a hidden section, with a professional called in for anything older or already compromised.
TL;DR:
- Pressure washing brick with PSI above 500 can cause mortar erosion, spalling, moisture intrusion, and efflorescence formation.
- Soft washing at below 300 PSI with wide-fan nozzles and proper chemical use is safest for historic or delicate brick.
- Always inspect, wait 28 days after mortar repair, test on a hidden patch, and let the wall dry fully before cleaning or sealing.
- Damaged mortar and existing structural cracks should be repaired first to prevent worsening damage during cleaning.
- Post-cleaning signs like white blooms, uneven patches, or interior dampness indicate damage that needs professional repair rather than additional pressure washing.
Table of Contents
- What Are the Real Risks of Pressure Washing Brick?
- How Do You Safely Pressure Wash Brick?
- What Is the Safest Order of Operations for Cleaning Brick?
- When Should You Call a Masonry Professional Instead?
- What Experienced Masons Say About Cleaning Brick Safely
- Why Bad Pressure Washing Costs You More Later
- What Are the Warning Signs of Pressure Washing Damage?
- Does Pressure Washing Brick Have Environmental Downsides?
- How Does Pressure Washing Compare to Other Brick Cleaning Methods?
- Why Contractors Push for Repointing Before Cleaning
- Get a Professional Test-Clean Before You Commit
- Sources
- FAQ
What Are the Real Risks of Pressure Washing Brick?
Brick looks tough. It isn't, at least not against a stream of water moving at highway speed. The damage from pressure washing brick risks usually falls into four categories, and they compound each other over time.
Mortar erosion comes first, and it's often invisible until it's structural. Mortar is softer than the brick it holds together, which is intentional. It's designed to wear down and get replaced through repointing rather than let the brick crack. A pressure washer set too high blasts that mortar out of the joints in seconds, leaving gaps that let water and wind attack the wall from the inside. A wall that loses enough mortar volume can start shifting under its own weight.
Spalling comes next. Brick has a hard outer layer, sometimes called a fire skin, formed during the firing process. Aggressive mechanical cleaning strips that layer off, exposing the softer clay underneath. Once that skin is gone, it doesn't grow back. The brick face starts flaking, cracking, and crumbling at an accelerated rate, especially through freeze-thaw cycles.
Water ingress is the slow, expensive one. High-pressure water can force its way through mortar joints and hairline cracks into the wall cavity behind the brick. That moisture can sit there for months, feeding rot in wood framing or mold growth long before it ever shows up on the surface.
Efflorescence often follows a rushed rinse. Leftover detergent and dissolved salts migrate to the surface as the wall dries, leaving a white, chalky bloom that's a cosmetic headache and a symptom of moisture that hasn't fully cleared. Manufacturer guidance is direct on this: thorough rinsing after any detergent application is not optional.
- Mortar loss weakens joints and invites structural movement
- Spalling permanently exposes softer, more vulnerable clay
- Trapped moisture causes hidden rot or mold behind the wall
- Poor rinsing leaves salts and residue that resurface as efflorescence
Standard pressure washers run 1,500 to 4,000 PSI, while historic brick is generally rated for only 100 to 500 PSI. That gap is where most brick damage from pressure washing actually happens.
How Do You Safely Pressure Wash Brick?
Safe brick cleaning is mostly about restraint. The goal isn't to get the wall spotless in one pass. It's to lift dirt and biological growth without touching the brick or mortar underneath it.
Match your PSI to your brick's age and density. Historic or soft-fired brick generally tolerates only 100 to 500 PSI, and softer, older mortar can fail even below that if it's already weakened. Newer brick can often handle 1,000 to 1,500 PSI. Anything from 800 to 1,500 PSI should be treated as an upper limit reserved for dense, modern brick in good condition, and even then, rinsing pressures above 1,000 PSI can permanently damage sensitive masonry. If you're not sure which category your wall falls into, assume it's the more fragile one.
Choose a wide-fan nozzle, never a pinpoint jet. A 25° to 40° fan tip spreads the water's force across a wider area instead of concentrating it. Zero-degree and 15-degree nozzles are built for stripping paint off concrete, not for brick, and they're one of the fastest ways to carve grooves straight into a mortar joint.
Keep distance and angle consistent. Hold the nozzle at least 12 inches from the surface, angle it slightly downward, and move in a steady, sweeping motion rather than lingering on one spot. Pausing on a joint for even a few extra seconds is often enough to blow it out.
Use the right chemistry, not just more pressure. A non-ionic detergent or a masonry-specific cleaner does the actual work of lifting dirt and organic growth, so the water doesn't have to. Pre-wet the brick before applying any cleaner, and rinse it completely once the dwell time is up, since leftover chemical residue is a common cause of staining and efflorescence.
- Soft-wash under 300 PSI for historic or soft brick
- 300 to 800 PSI for general rinsing on standard residential brick
- 800 to 1,500 PSI only for dense, modern brick, and only with caution
- Wide-fan nozzles (25° to 40°), never 0° or 15° jets
- 12-inch minimum standoff distance, angled slightly downward
Pro Tip: Run your test patch in a corner near the ground, not at eye level on the front elevation. If the pressure or chemical strips color or texture, you want to find that out somewhere nobody will notice for the two weeks it takes the brick to weather back to a matching tone.
What Is the Safest Order of Operations for Cleaning Brick?
Skipping steps is how a routine cleaning turns into a repair bill. Follow this sequence and you'll catch most problems before they start.
- Inspect the wall first. Look for loose or missing mortar, cracked brick, and any signs of previous water damage. Repair those issues before you introduce more water and pressure into the equation.
- Respect mortar cure time. If any repointing or new brickwork has gone in recently, wait a minimum of 28 days before cleaning. Cement mortar that hasn't cured can wash right out of the joint.
- Run a test patch. Pick an inconspicuous section, apply your planned pressure and cleaner, and document how the brick responds before committing to the full wall.
- Pre-wet, apply cleaner, then rinse. Wet the brick down first so it doesn't absorb the cleaner too fast, apply the product per its label, and don't let it dry on the surface. Follow with a low-pressure sweeping rinse.
- Let it dry fully before judging the result. Give the wall at least 48 hours of good drying weather before deciding whether it needs a second pass or a sealant.
| Step | What to check | Risk if skipped |
|---|---|---|
| Inspect | Cracks, loose mortar, prior water stains | Water forced into existing damage |
| Cure wait | 28 days minimum on new mortar | Uncured mortar washes out of joints |
| Test patch | Color, texture, mortar response | Full-wall damage discovered too late |
| Rinse | Cleaner fully removed | Efflorescence, staining, streaking |
| Dry time | 48+ hours before sealing | Sealant traps moisture inside the wall |
When Should You Call a Masonry Professional Instead?
Some walls simply aren't a do-it-yourself job, and knowing the difference before you rent equipment saves you from an expensive mistake.
- Brick from before 1950, which is typically softer and fired at lower temperatures than modern brick
- Mortar that's already crumbling, powdery, or missing in sections
- Visible efflorescence, which can signal moisture already trapped behind the wall
- Structural cracks, bowing, or any sign the wall has shifted
- Painted or glazed brick, where pressure and chemicals interact unpredictably
A professional brings more than bigger equipment. They calibrate pressure to the wall's actual porosity, run controlled test patches before committing to the whole surface, and repoint failing mortar before cleaning instead of after the damage shows up. When you're vetting a contractor, ask for examples of comparable projects, confirm whether they test first, and ask about a workmanship guarantee.
What Experienced Masons Say About Cleaning Brick Safely
Heritage Masonry & Brick's Thomas puts it simply: when in doubt, choose the gentler method and test it. That single habit prevents most of the expensive mistakes homeowners make with rented equipment.
New cement mortar needs a full 28 days to cure before it meets any water pressure at all. Washing it early can pull mortar right out of the joint, undoing repair work that just went in. During and after any cleaning job, check interior walls near the exterior brick for new dampness or musty smells. Moisture pushed through a wall from a pressure washer doesn't always show up outside first.
Why Bad Pressure Washing Costs You More Later
Brick damage from pressure washing rarely announces itself immediately. A spalled brick face or a blown-out mortar joint might look like a cosmetic issue for the first year or two, but it changes how the wall performs going forward.
Once mortar erodes below a certain depth, the wall loses its designed resistance to water penetration. Each rain event pushes a little more moisture into joints that are supposed to be sealed. That accelerates freeze-thaw cracking in colder climates, since water trapped in a joint expands when it freezes and widens the gap further with every cycle. What started as a pressure-washing mistake becomes a repointing job within a few years instead of the decade or more a properly maintained joint should last.
Spalled brick follows a similar curve. Once the fire skin is gone, the exposed clay absorbs water more readily and weathers faster than the brick around it, creating uneven wear across a wall that used to age uniformly. That mismatch is often what pushes a homeowner toward full brick replacement in a section, rather than a simple repointing job, because the surrounding brick and the damaged brick are aging at different rates. The cheapest fix is almost always catching the problem in year one instead of year five.
What Are the Warning Signs of Pressure Washing Damage?
Some damage from pressure washing brick risks shows up right away. Other signs take weeks or months to surface, which is exactly why a post-cleaning inspection matters.
Immediate signs include visibly lighter or blotchy patches where the brick's surface layer has been stripped unevenly, mortar joints that look noticeably deeper or rougher than before cleaning, and any chipped or flaking brick edges near the areas you sprayed longest.
Delayed signs are trickier. Watch for a white, powdery bloom appearing on the surface days or weeks after cleaning, which usually points to efflorescence from trapped moisture or leftover cleaning residue. Musty smells or damp patches on interior walls that back onto the cleaned brick can indicate water pushed through the wall during cleaning. Small cracks that widen over the following winter often mean freeze-thaw damage got a head start from moisture that shouldn't have been there.
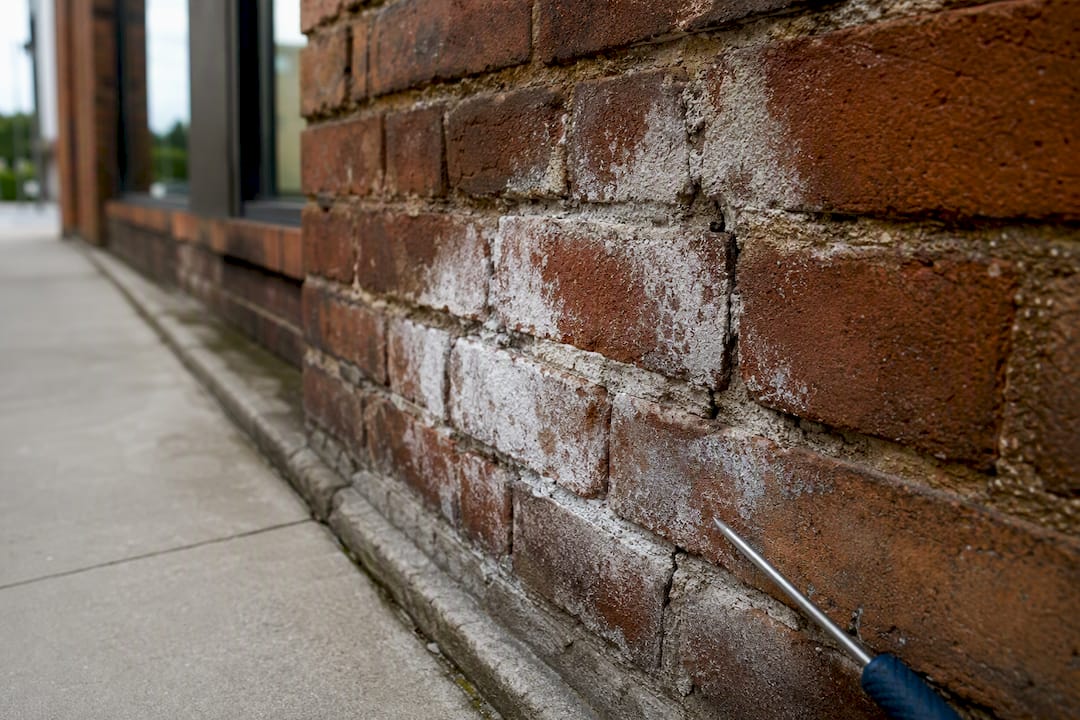
If you spot any of these, don't just reach for the pressure washer again to "fix" it. Repointing damaged mortar and addressing water intrusion are jobs for structural repair work, not another round of the tool that likely caused the problem.
Does Pressure Washing Brick Have Environmental Downsides?
Runoff is the part homeowners rarely think about until it's already a problem. Water mixed with masonry cleaners, dissolved efflorescence salts, and whatever biological growth you just blasted off the wall has to go somewhere, and it usually flows straight into a storm drain, a garden bed, or a neighbor's yard.
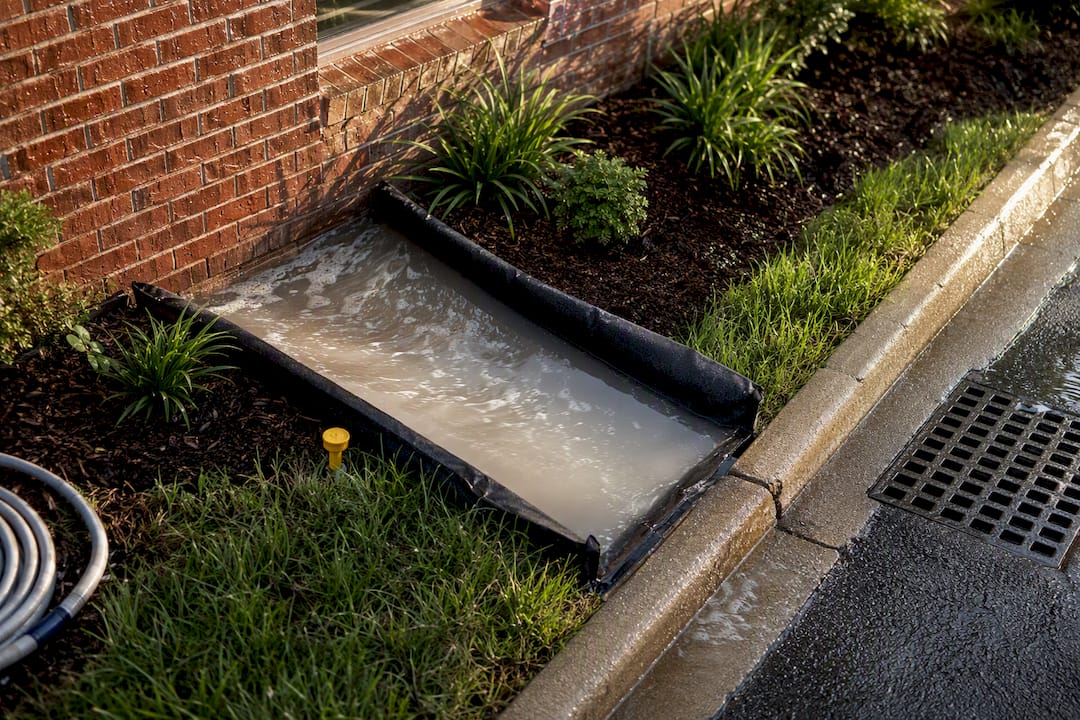
Many municipalities regulate what can legally enter storm drains, and pressure-washing runoff containing detergents or cleaning chemicals can fall under those rules depending on your local ordinances. Before cleaning any exterior surface, check whether your area requires runoff containment or restricts certain cleaning products near storm drains. Non-ionic, biodegradable detergents reduce the environmental load, but they don't eliminate the need to manage where the water actually goes. Diverting runoff away from storm drains and into a vegetated area, or using containment mats, is a simple step that keeps a cleaning project from becoming a compliance issue.
How Does Pressure Washing Compare to Other Brick Cleaning Methods?
Pressure washing isn't the only option, and for a lot of brick, it isn't the best one. Masonry professionals generally treat it as a last resort rather than a default choice, ranking it below gentler alternatives whenever they're viable.
Manual bucket-and-brush cleaning with a mild detergent is the least aggressive option, and it's often the preferred first-line method for removing surface dirt and biological growth on brick that's already showing wear. It takes longer and more physical effort, but it carries almost no risk of mortar loss or spalling.
Soft washing, which uses low pressure combined with a cleaning solution and a longer dwell time, splits the difference. It gets more cleaning power than a hand brush without the mechanical force that damages mortar, which is why it's the standard recommendation for most residential brick.
Chemical-only cleaning, without any pressure, works well for specific stains like paint or efflorescence when paired with a garden-hose rinse. Traditional pressure washing sits at the bottom of that list for anything older, softer, or already compromised, useful mainly on dense, modern brick in solid condition, and only within the PSI limits covered earlier.
Why Contractors Push for Repointing Before Cleaning
Cleaning a wall with failing mortar is like painting over rust. It looks better for a season, then the underlying problem reasserts itself, often worse than before. That's why we usually recommend repointing weak joints first: it protects the wall from the water and pressure the cleaning process introduces, instead of leaving damaged mortar exposed to further stress.
We've seen the alternative play out more than once: a homeowner cleans a wall with crumbling mortar, and within a year, sections that looked fine during the cleaning start failing because the joints were already compromised. Fixing the mortar before cleaning almost always costs less than fixing it after.
— Thomas
Get a Professional Test-Clean Before You Commit
Every brick wall should be treated as a repair-first job, not a rental-equipment weekend project. Where a big-box pressure washer rental gives you one shot with generic settings, we run a controlled test patch calibrated to your wall's specific brick and mortar condition before touching the rest of the surface.

If your mortar is already crumbling, you're seeing efflorescence, or the brick predates 1950, that's a signal to get a professional set of eyes on it before any cleaning happens. We handle brick repointing and tuckpointing to shore up joints before they meet any water pressure, and brick repair for spalled or cracked sections that cleaning alone won't fix. For chimneys, retaining walls, and full masonry restoration, our main service page covers the full scope of what we handle across Richmond, VA. Many masonry contractors provide free estimates and some form of workmanship guarantee. Call 804-324-6304 or request a free estimate today, and we'll tell you honestly whether your wall needs repair, a gentle clean, or both.
Sources
- Cleaning historic masonry: removal of atmospheric soiling, stains, and biological growth (GSA/NPS technical procedure)
- Cleaning brickwork (technical guidance from brick industry)
- Glen-Gery cleaning instructions for brickwork
FAQ
Is It Safe to Pressure Wash Bricks?
It can be, but only within tight limits. Historic brick generally tolerates just 100 to 500 PSI, while standard pressure washers run 1,500 to 4,000 PSI, which is why soft-wash or manual cleaning is usually the safer default.
Is It Safe to Clean Bricks With a Pressure Washer?
Yes, if you use a wide-fan nozzle (25° to 40°), keep at least 12 inches of distance, and stay within the PSI band suited to your brick's age. Narrow, pinpoint nozzles and pressures above 1,000 PSI on sensitive masonry are where most damage happens.
How Long Does It Take for Brick to Dry After Pressure Washing?
Plan on at least 48 hours of good drying weather before evaluating results or applying a sealant. Humid or cold conditions can extend that considerably, and sealing a wall before it's fully dry traps moisture inside.
What Should You Spray on Brick Before Pressure Washing?
Pre-wet the brick with plain water first, then apply a non-ionic detergent or masonry-specific cleaner per the product's instructions. Never let the cleaner dry on the surface, since thorough rinsing afterward is what prevents staining and efflorescence.
How Do I Know if My Brick Wall Needs Repair Before Cleaning?
Look for crumbling or missing mortar, visible cracks, or existing efflorescence, all of which mean the wall should be repaired before any water pressure touches it. If new mortar was recently installed, wait the full 28-day cure period before cleaning.