
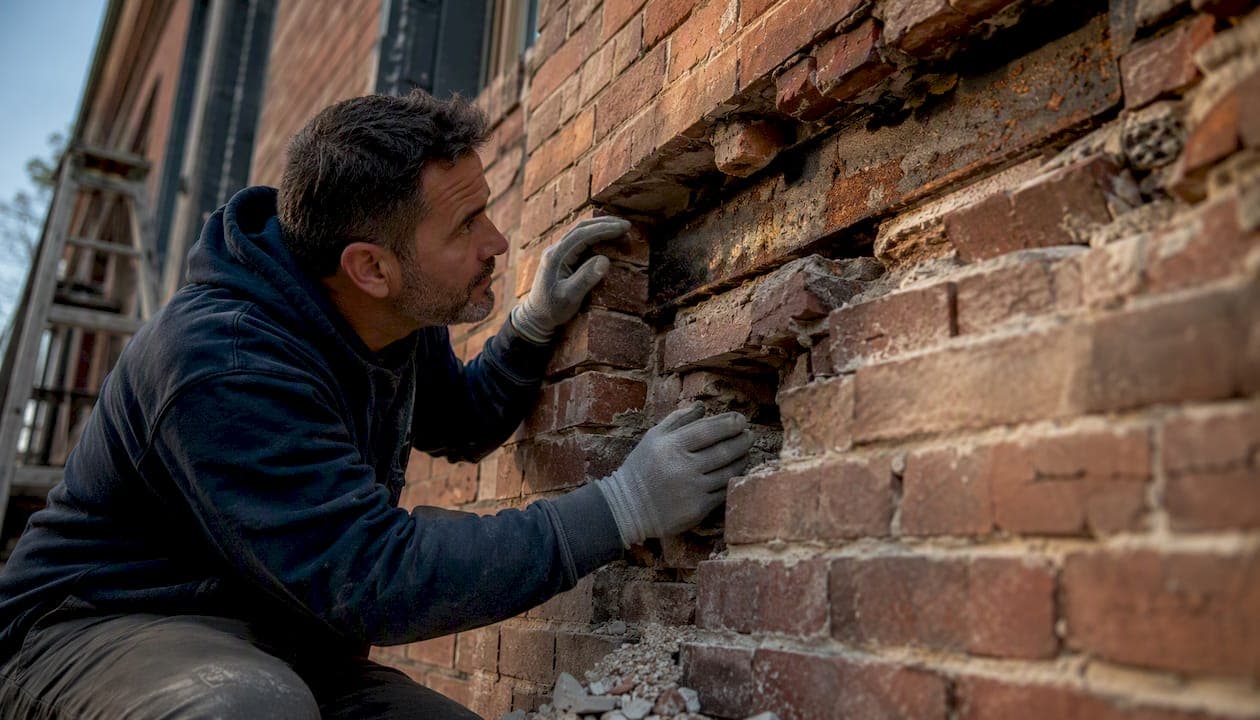
Your lintel needs replacement now if you see stair-step cracks radiating from a window corner, rust stains bleeding through the brick face, a sagging or bowed brick course above an opening, or bricks that have physically shifted out of alignment. Hairline cracks with no rust and no movement can usually be monitored. Everything else on that list means it's time to call someone.
If a door or window won't close, if you can see daylight through a gap at the head of an opening, or if bricks look like they're pulling away from the wall, stop using that opening and keep people clear of the area until it's been inspected.
- Photograph every crack, stain, and gap you notice, with a coin or ruler in frame for scale.
- Mark the location and date on the photo file name or a wall sticker.
- Call a masonry contractor or structural engineer this week, not next month.
A lintel holding back tons of brick doesn't fail all at once. It fails visibly, in stages, and those stages are exactly what this guide teaches you to read.
Key Takeaways
Lintel failure shows up as visible cracks, rust stains, and displaced brick well before the structure becomes an emergency, and reading those signs early is what separates a routine repair from a costly one.
| Point | Details |
|---|---|
| Urgent signs demand action now | Sagging, rust jacking, step cracks over a quarter inch, or falling bricks mean call a professional this week. |
| Material determines failure pattern | Steel rusts and jacks, concrete cracks through, wood rots, brick arches separate at the joints. |
| Cosmetic repair isn't a fix | Tuckpointing around a corroded lintel hides the problem without restoring the load path. |
| Budget by opening and material | Total jobs typically run $280 to $640, with steel running $30 to $60 per linear foot. |
| Heritage Masonry & Brick handles the full job | Free estimates, galvanized steel lintels, matched brickwork, and a 5-year workmanship guarantee in Richmond. |
Table of Contents
- Detailed Lintel Replacement Signs and What They Look Like
- Why Lintels Fail and How That Differs by Material
- What Happens During a Professional Lintel Inspection
- Repair, Reinforce, or Replace: How to Decide
- What a Lintel Replacement Job Actually Involves
- Lintel Replacement Cost: What to Budget For
- Why Lintel Replacement Isn't a DIY Project
- How Heritage Masonry & Brick Handles Lintel Replacement
- Frequently Asked Questions
- Sources
Detailed Lintel Replacement Signs and What They Look Like
Most lintel problems announce themselves in the brick, not in the steel or concrete you can't see. Learning to read those announcements is the fastest way to tell a five-year problem from a five-week emergency.
Stair-step or diagonal cracks running from the corners of a window or door are the most common early warning. They form because the lintel is no longer supporting the brick evenly, so the masonry above finds its own path of least resistance through the mortar joints. Horizontal cracks running the length of the lintel itself are more serious. They often mean the lintel has already deflected under load.
Rust staining below a window or door head is rarely just cosmetic. According to TNT Tuckpointing, rust streaks, stair-step cracks, sagging brick courses, bulging masonry, and sticking doors or windows form the core set of warning signs professionals look for. By the time you see orange stains on brick, the steel has usually been corroding for years already, a process called rust jacking.
- Bulging or displaced bricks: individual bricks pushed slightly proud of the wall plane, often near the ends of the lintel.
- Sagging or bowed brick course: the row of brick directly above the opening dips visibly compared to the courses beside it.
- Gaps at window heads: a widening seam between the frame and the brick, sometimes stuffed with old caulk that's failed.
- Sticking or misaligned doors and windows: the frame has racked slightly as the opening above it shifts.
You can catch a lot of this from the ground. Stand back from the building and sight along a brick course at eye level. A course that dips even a quarter inch in the middle of a run is worth measuring and tracking.
Pro Tip: Take a photo of any crack today, then take the same photo from the same spot every three months. A crack that's widened or grown new branches between photos is active. One that looks identical a year later is probably stable, but still worth mentioning to a contractor at your next inspection.
Why Lintels Fail and How That Differs by Material
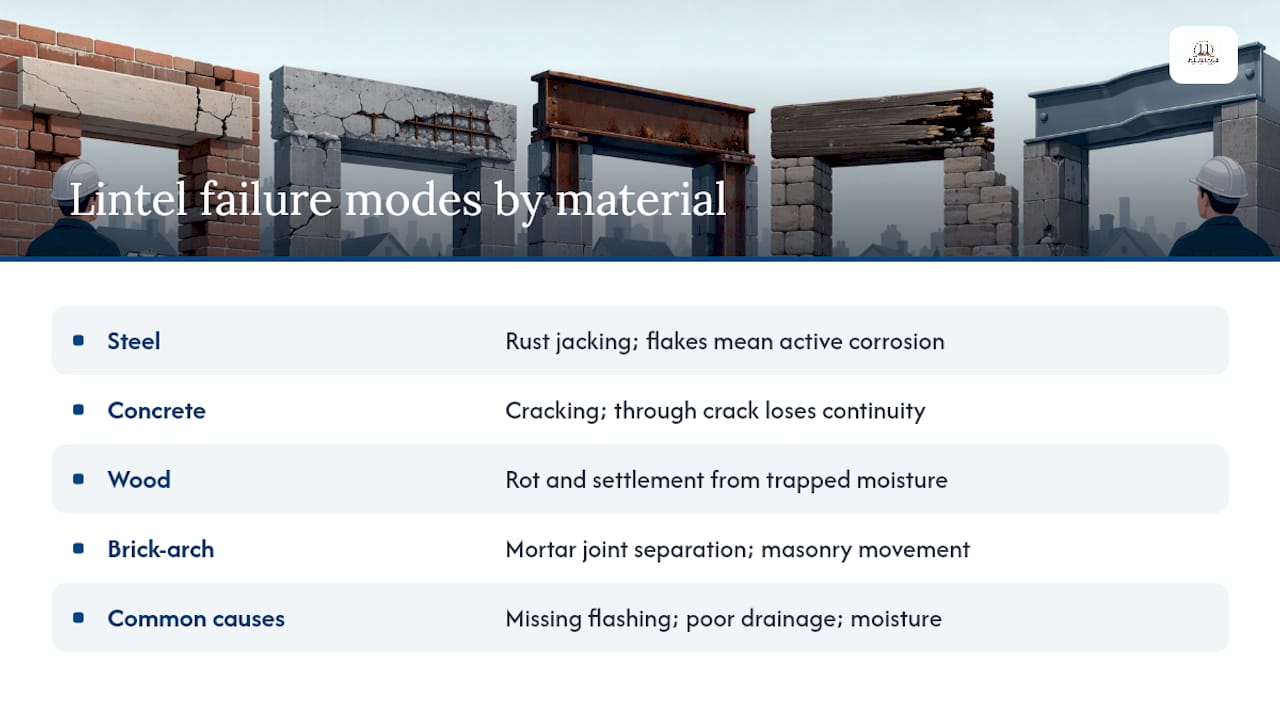
Lintels fail differently depending on what they're made of, and knowing which one you have narrows down what to look for.
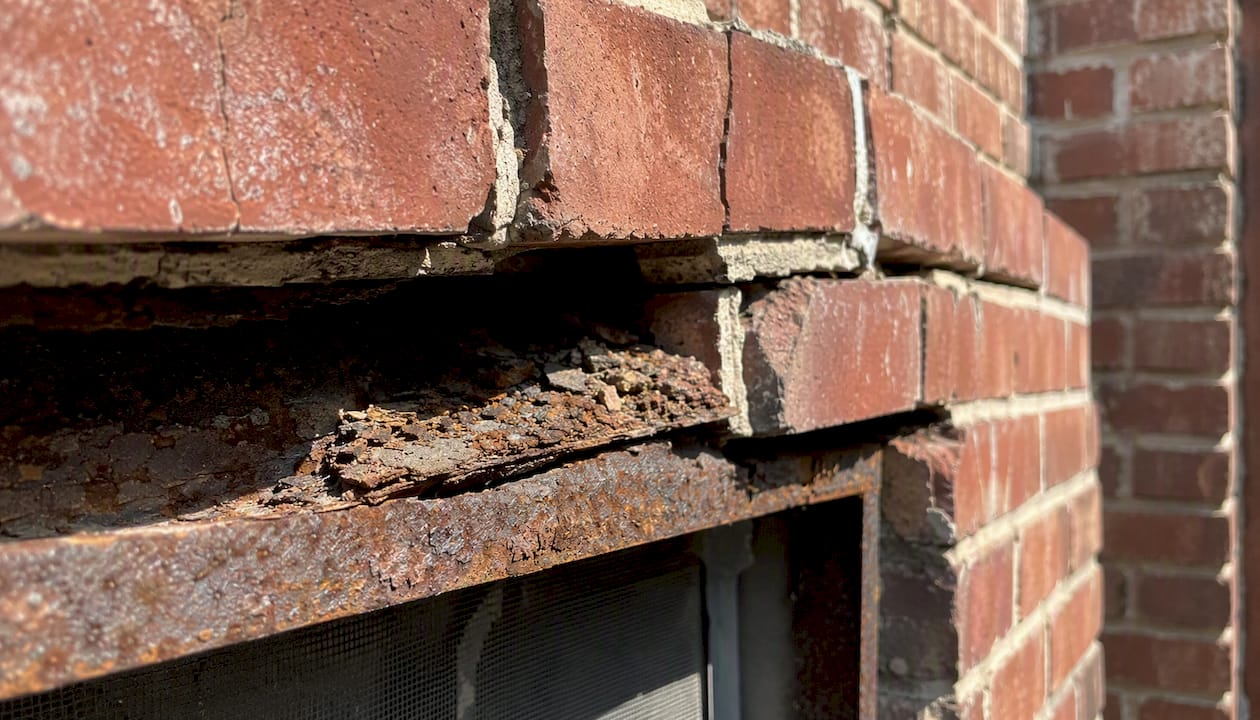
Steel lintels fail through rust jacking. Corrosion products take up more volume than the original steel, and that expansion physically pushes the surrounding brick outward, producing the step cracks and bulging described above. Rust flakes visible at the lintel's exposed edge mean active, ongoing corrosion, not old staining from a past leak.
Concrete lintels crack rather than rust. A hairline surface crack is often just shrinkage and rarely urgent. A through-crack you can see light or feel a draft through means the concrete has lost structural continuity.
Wood lintels, found mostly in older construction, fail through rot and gradual settlement rather than sudden cracking, usually where moisture has been trapped against the wood for years.
Brick-arch lintels fail through mortar joint separation and general masonry movement rather than a single failed member.
Missing flashing, poor drainage, and moisture trapped against the lintel accelerate every one of these failure modes, and installation shortcuts like skipped flashing or incompatible fasteners are a common root cause of premature failure regardless of material.
What Happens During a Professional Lintel Inspection
A qualified inspection follows a fairly consistent sequence, and knowing it helps you evaluate whether a contractor is doing a thorough job or a quick drive-by estimate.
- Visual crack mapping across every affected opening, noting direction, length, and width.
- Measuring for deflection or sag using a straightedge or level along the brick course.
- Probing or selectively removing a small section of masonry to inspect the lintel directly, checking for rust flakes or section loss.
- Examining flashing and weep holes for blockage or absence.
- Assessing access, such as whether scaffolding is needed for upper-floor openings.
An engineer, not just a contractor, is the right call when multiple openings on the same wall show damage, when you can see visible sag with your own eyes, or when a contractor suspects the load is redistributing onto neighboring structure. ASCE's structural engineering resources exist for exactly this kind of load-bearing uncertainty.
Bring your dated photos, any history of when cracks appeared or changed, and copies of prior repair permits or drawings if you have them.
Repair, Reinforce, or Replace: How to Decide
Not every damaged lintel needs full replacement, but the decision rules are narrower than most owners expect.
- Monitor: hairline cracks with no rust staining and no measurable sag. Recheck every few months.
- Repair or protect: light surface rust with no bulging, paired with localized mortar repairs and a rust-inhibiting treatment on exposed steel.
- Replace: visible sag or deflection, rust jacking with displaced bricks, or a concrete lintel with a through-crack.
Reinforcement options like steel plates, angle brackets, or targeted tuckpointing can extend the life of a lintel that's still structurally sound but showing cosmetic wear. They don't work once the lintel itself has lost load capacity.
This is where a lot of owners get burned. Tuckpointing the cracks around a corroding lintel makes the wall look better for a season or two, but it does nothing about the steel underneath. The load path is still compromised, and the cracks come back, usually worse, within a year or two.
What a Lintel Replacement Job Actually Involves
A properly run replacement follows a sequence designed to protect the structure above the opening at every step, and a responsible process includes real shoring and proper flashing, not just a swapped beam.
- Site protection and setup, including scaffolding or ladders as needed for access.
- Temporary shoring installed to carry the load above the opening.
- Selective brick removal around the lintel.
- Removal of the old, failed lintel.
- Installation of a new, correctly sized lintel with flashing and weep holes.
- Brick rebuild and mortar pointing to match the existing wall.
- Final inspection confirming shoring removal and weep function.
A single opening typically takes a day or two of active work, though scheduling, material lead time, and the extent of brick rebuild can stretch that timeline. Watch for correct shoring, a galvanized steel lintel spec where steel is used, properly installed flashing, and mortar that matches the existing joint profile in color and tooling.
Lintel Replacement Cost: What to Budget For
Total job costs for lintel replacement typically fall between $280 and $640, averaging around $460 per opening, though scope and access swing that range considerably.
A single-story window opening needing a straightforward steel lintel swap, minimal brick rebuild, and no scaffolding sits near the lower end of the total range. Add a second-story opening requiring scaffolding, an engineer's sign-off, or an extensive brick rebuild to match historic coursing, and the price climbs quickly.
- Access and scaffolding: upper-floor or hard-to-reach openings add labor hours.
- Extent of brick rebuild: more displaced brick means more demolition and rebuilding.
- Labor rates: general repair labor commonly runs $45 to $60 per hour, with specialized masons charging more depending on region.
- Engineering review and permitting: required for structural uncertainty or multiple affected openings.
- Historic material matching: sourcing the right brick and mortar color adds time and cost on older buildings.
Homeowners' insurance generally treats lintel deterioration as gradual wear, not a covered event, so budgeting for this work as routine maintenance is the safer assumption.
Why Lintel Replacement Isn't a DIY Project
Calculating how much weight the wall above an opening actually carries, installing shoring that safely holds that weight, and rebuilding brick to match the surrounding wall are specialist skills. Getting any one of them wrong risks a wall failure, not just a bad-looking repair.
Certain signs mean you need a licensed contractor or engineer immediately rather than getting a few quotes over the next month:
- Active, visible sagging you can watch change week to week.
- Bricks that have fallen or are loose enough to fall.
- Large step cracks wider than a quarter inch.
- Visible rust flakes at an exposed lintel edge.
When you're vetting contractors, ask about their shoring plan, whether they specify galvanized steel, how they handle flashing and weep details, what warranty backs the work, proof of insurance, and references from similar masonry projects. If a bid skips shoring or flashing entirely, get a second opinion.
Pro Tip: Ask every contractor the same five questions, in the same order, and write down the answers. Vague answers on shoring or material spec are the clearest tell you're talking to someone who hasn't done many of these.
What Experienced Masonry Contractors Emphasize About Lintel Work
Lintel damage is structural, not cosmetic. Patching mortar around a corroding steel beam doesn't restore the load path, it just hides the symptom until the cracks come back. A proper fix removes the compromised lintel and rebuilds the opening with materials that match the original wall, backed by a workmanship guarantee that reflects confidence in the repair.
A Publisher's Note on How We Approach This Work
We've spent more than 25 years matching historic brick and mortar on buildings across Richmond, and lintel work is where that experience matters most. Getting the structural fix right and getting the brickwork to look like it was never touched are two different skills, and we insist on both. Every estimate we provide is free, and every job carries our workmanship guarantee.
How Heritage Masonry & Brick Handles Lintel Replacement
Heritage Masonry & Brick is the option for Richmond property owners who want the structural fix and the finish work handled by the same crew, instead of coordinating a shoring contractor, a mason, and a painter separately. We install galvanized steel lintels with proper flashing and weep details, rebuild the surrounding brick to match your building's existing coursing and mortar color, and back every job with a 5-year workmanship guarantee.

If you're seeing rust stains, step cracks, or a sagging brick course above a window or door, request a free inspection through our Richmond service page and get a straight answer on whether you're looking at monitoring, repair, or full replacement. Property managers juggling multiple buildings can also review our brick repair services to see how we scope larger portfolios, and our partners at AJC & Son Builders have useful guidance on prioritizing exterior repairs across a property portfolio. Call now or fill out our online form to get your free estimate started.
Frequently Asked Questions
How do I know if my lintel needs replacing versus just repointing? Hairline cracks with no rust and no sag can often be handled with monitoring or minor mortar repair. Rust staining, step cracks, sagging brick, or displaced masonry point toward replacement since cosmetic repair over a corroding lintel doesn't address the underlying structural loss.
Can I replace a lintel myself? It's not a practical DIY project. Calculating the load above an opening, installing safe temporary shoring, and rebuilding brick to match the wall are specialist tasks where a mistake risks the wall itself.
How long does lintel replacement take? A single opening with straightforward access typically takes a day or two of active work. Multiple openings, scaffolding needs, or extensive brick matching on historic buildings extend the timeline.
Will homeowners' insurance cover lintel replacement? Usually not. Insurers generally treat lintel deterioration as gradual wear and tear rather than a sudden covered event, so plan for it as a maintenance expense.
What's the difference between rust staining and rust jacking? Rust staining is the visible discoloration on brick. Rust jacking is the underlying mechanism, where corrosion expansion physically pushes brick out of alignment, producing the cracks and bulging that staining alone doesn't cause.
Sources
- ASCE — Structural engineering resources
- HomeAdvisor — Lintel replacement
- Angi — Ballpark repair cost for sagging lintel
- Jaspector — Steel lintel (evaluation and repair)
- Installix — Replacing rusty lintel beams above windows
Treat published cost ranges as a starting point for budgeting, not a quote, and prioritize an engineering assessment whenever sag or multiple affected openings are involved.